Automate status reports with Google Apps Scripts
Create and deploy an automated project reporting solution with Google Apps Scripts
Introduction
By integrating Asana's API with reporting tools or custom scripts, you can gather up-to-date information on tasks, deadlines, progress, and collaborating team members from Asana's project management platform. This data can be then used to create dynamic and up-to-date project status reports, making it easy to share with project stakeholders on a scheduled basis.
In this guide, you will build an application that efficiently tracks these project status updates and automatically adds them to a spreadsheet, streamlining your project management workflow.
To accomplish this task, you'll leverage Google Apps Scripts, allowing you to easily create and deploy custom scripts without the need for complex hosting infrastructure. Google Apps Scripts also provides a seamless integration between Asana's API and Google Sheets, allowing you to create a powerful automation tool with minimal effort. This automation streamlines the reporting process, eliminates the need for user intervention, and allows stakeholders outside of Asana to stay up to date with the latest project updates.
What you'll build
To learn more about status updates, check out our guide.
Try it!
Before you build it yourself, we recommend trying a demo the complete application (as an end-user) by following these brief steps:
-
Get a personal access token (PAT). This token is used by the application to make requests against Asana's API.
-
Get the GID of a project. This is the project for which you'd like to automate its existing status reports. For example, if the link to your project is
https://app.asana.com/0/12345678/list, the project ID is12345678. -
Create a new, blank Google Sheet (here), then take note of its ID. For example, if the link to your newly-created spreadsheet is
https://docs.google.com/spreadsheets/d/abc1234567/edit#gid=0, the spreadsheet ID isabc1234567. -
Visit the public app here in Google Apps Scripts. Then, while in the ℹ tab in the sidebar, select the option to Make a copy of the application for yourself:
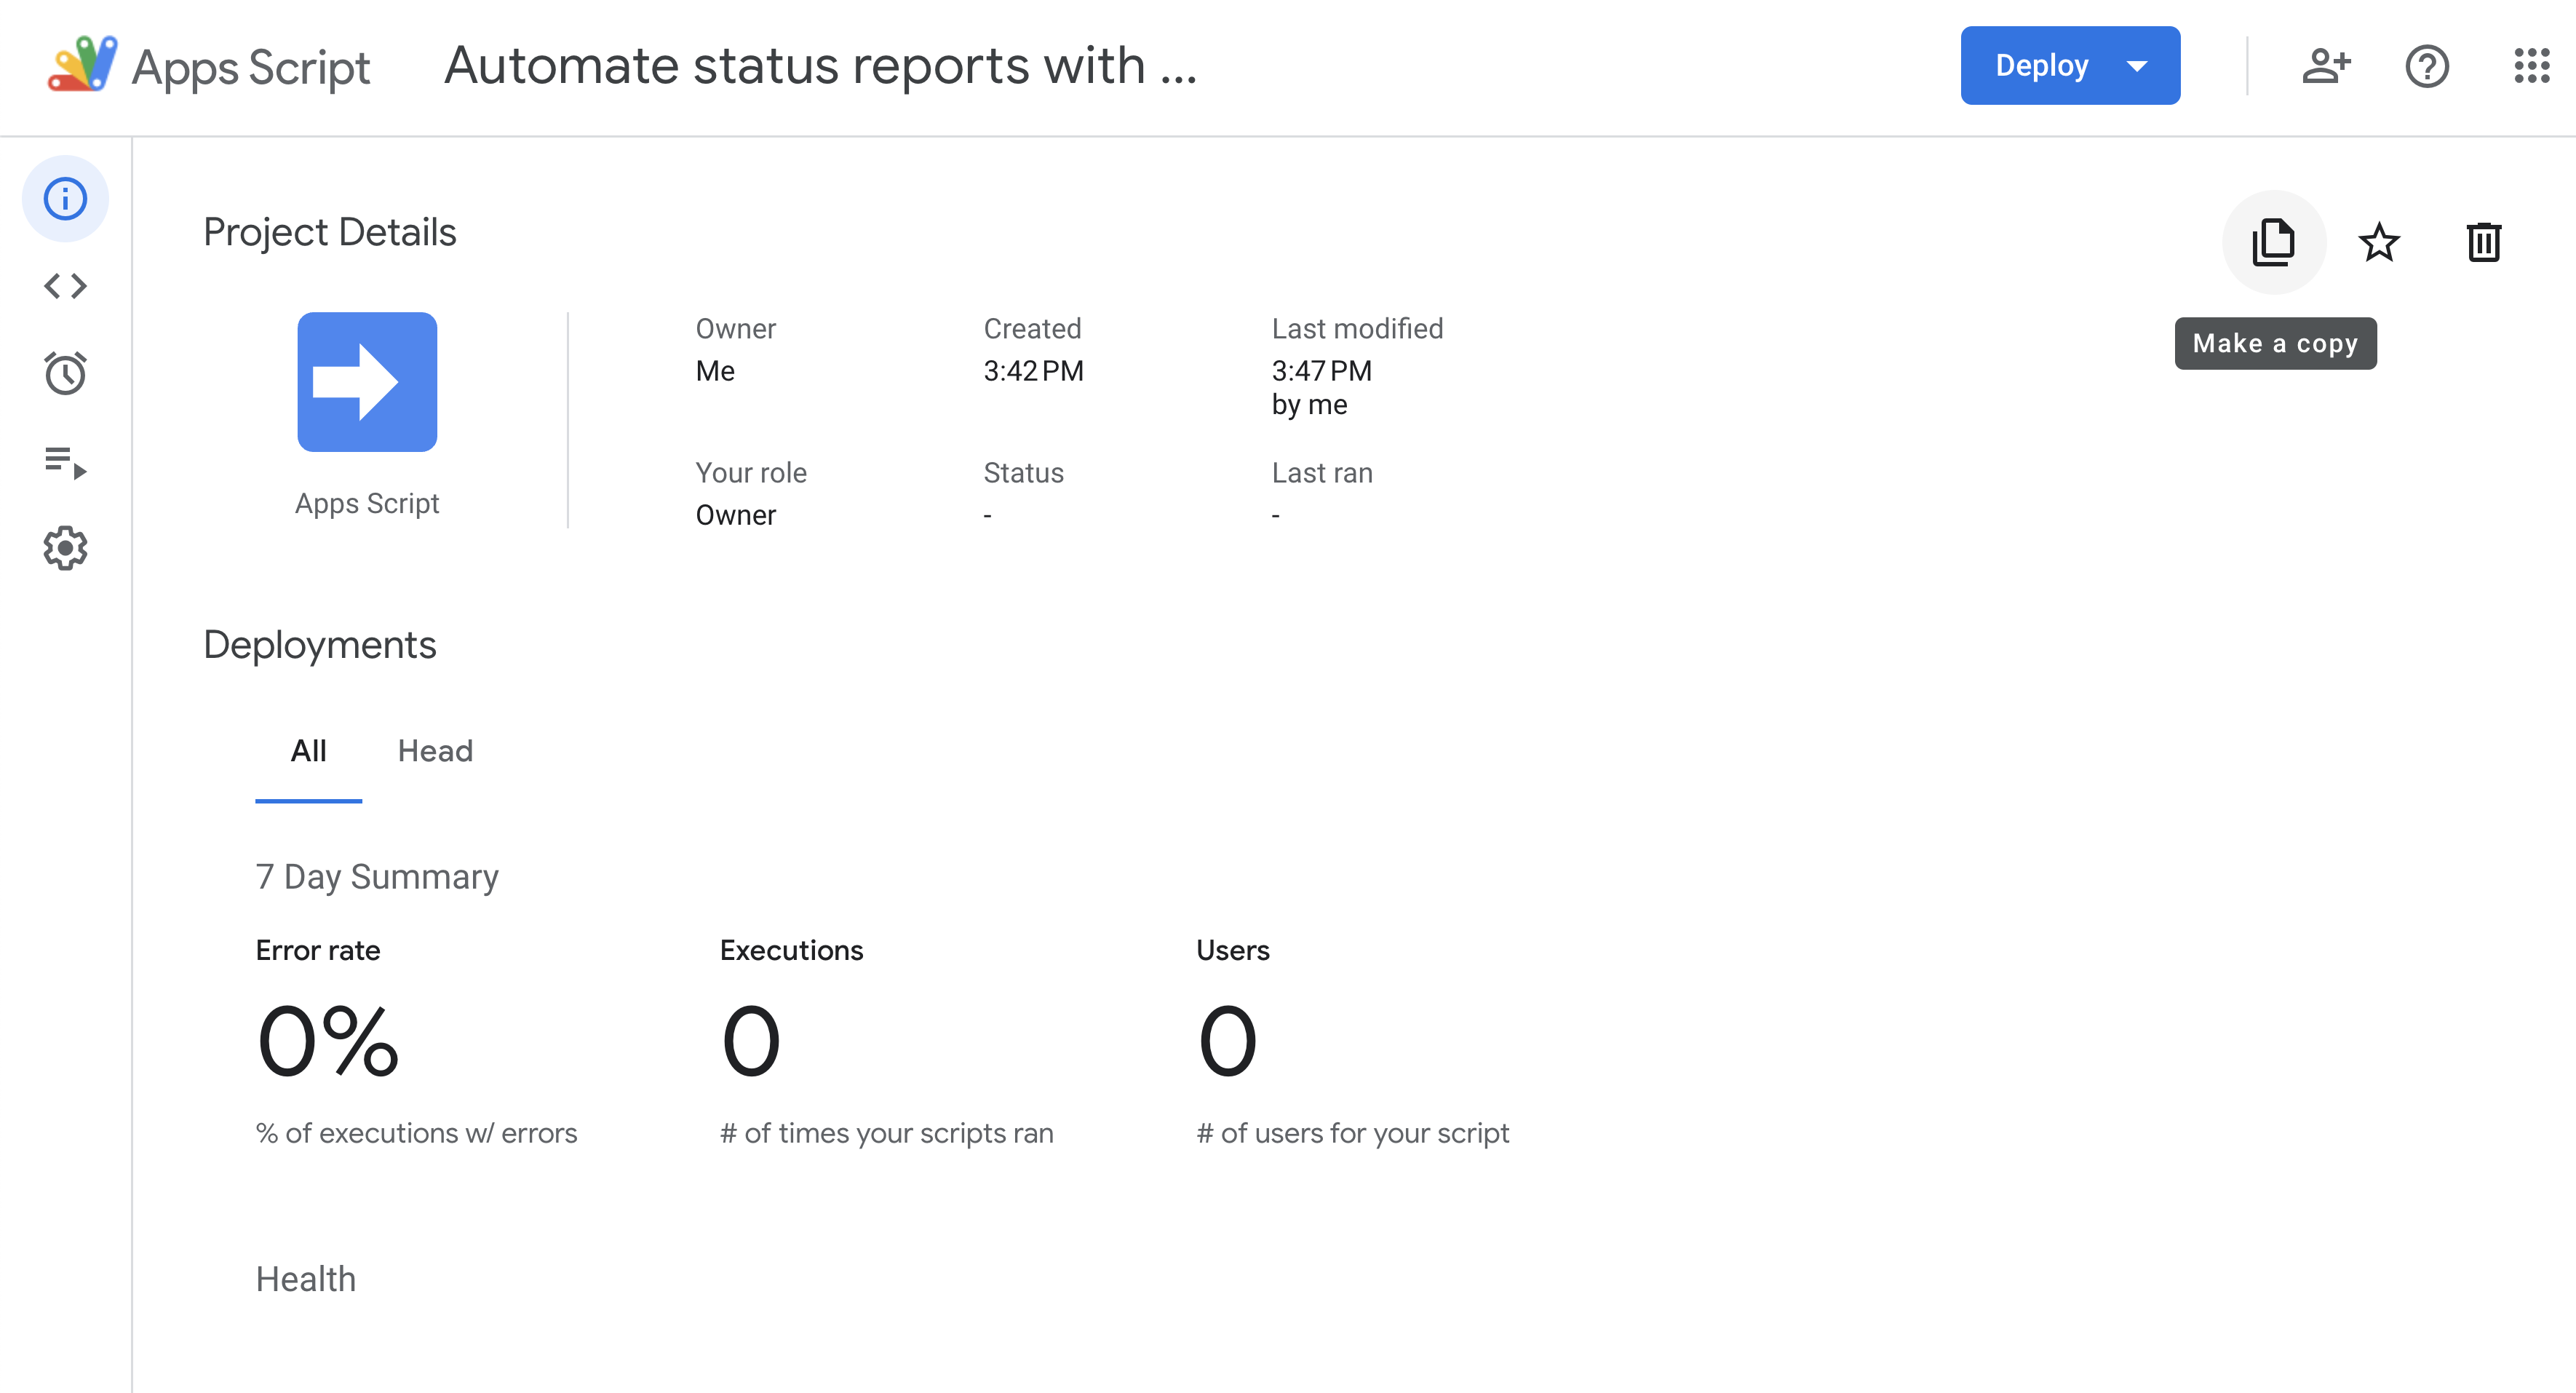
You will perform the rest of the following steps in your newly-duplicated instance of the app.
-
Set your PAT in
setToken.gs. This script only needs to be run once (i.e., manually during initial setup of the application), and is not part of any automation. -
Set your spreadsheet ID and project ID in
runAutomation.gs. -
Run the application by clicking the ▶ Run button on
runAutomation.gs. -
View the results in your spreadsheet. You can review the Execution Log for helpful comments as well.
Tutorial
After following this tutorial, you'll have created an automated reporting application that periodically reads status updates from a project, then appends them to a Google Sheet. You will be able to:
-
✅ Work with objects in the object hierarchy in Asana
-
✅ Create and use a personal access token for making API requests
-
✅ Set up input/output options to customize the responses received from your API requests
-
✅ Use Google Apps Scripts to build an automated script to:
GETa user to verify the user's personal access tokenGETa project (including its most current status update)GETall statuses from a project
App structure
Under the hood, the application is comprised of just two Google Apps Scripts files (i.e., .gs). No third party libraries or frameworks are used in this application. The two files included are:
| File | Description |
|---|---|
setToken.gs | Sets the personal access token securely into user properties (i.e., to prevent exposure in script code). This script must be run first and only during the initial setup of the application. |
runAutomation.gs | Entry point and primary script in the application. This script is set to automatically run to regularly read the sheet, make API requests to Asana, and append new project statuses to the sheet. |
You are also welcome to skip immediately to the application source code on GitHub. The end of this tutorial also includes the complete application code for review.
Starter code
This tutorial will guide you through building the complete application step-by-step. To help you get started more quickly (and to help focus on building the main business logic for the application), we've provided starter code below for setting your personal access token:
// If this is your first time using the application, you must run this script (setToken.gs) once before running anything else
// Instructions:
// 1. Set your the `pat` to your personal access token (documentation: https://developers.asana.com/docs/personal-access-token).
// 2. Run the script once via the "Run" button above.
// 3. Remove your token and save the file. Do not run the script again.

function setToken() {
  const pat = "";

  if (pat === "") {
    Logger.log("Error: Please set your personal access token (pat) before running the script.");
    return;
  }

  let url = "https://app.asana.com/api/1.0/users/me";
  let options = {
    'method': 'get',
    'headers': { 'Authorization': `Bearer ${pat}` },
    'muteHttpExceptions': true
  };

  try {
    let response = UrlFetchApp.fetch(url, options);
    let body = JSON.parse(response.getContentText());
    Logger.log(body);
  } catch (error) {
    Logger.log("Error: Unable to fetch data. Please verify your API key and try again.");
    return;
  }

  let userProperties = PropertiesService.getUserProperties();
  userProperties.setProperty('pat', pat);

  Logger.log("API key has been successfully set.");
}
You won't need to know all the inner workings of this script, so feel free to copy and paste this file later on in this tutorial. The two key takeaways to note in the provided setToken.gs file are:
- The user sets their personal access token (i.e.,
pat) securely into user properties. As such, only the current user can access the token, and only within this script - We test the token via UrlFetchApp, which we use to make an API request to retrieve the user's information. If this request succeeds, then the initial setup of setting the token is complete
We won't need to modify or edit setToken.gs in any way during the rest of this tutorial. Moving forward, we'll build runAutomation.gs, which carries out several tasks in sequence:
- Create the Google Apps Scripts project
- Parse and validate user input
- Initialize the spreadsheet
- Write the latest project status (existing spreadsheets)
- Write all project statuses (new spreadsheets)
- Automate script execution
1. Create the Google Apps Scripts project
You'll build the application entirely in your browser via Google Apps Scripts (note that the service enforces its own terms and quotas for usage).
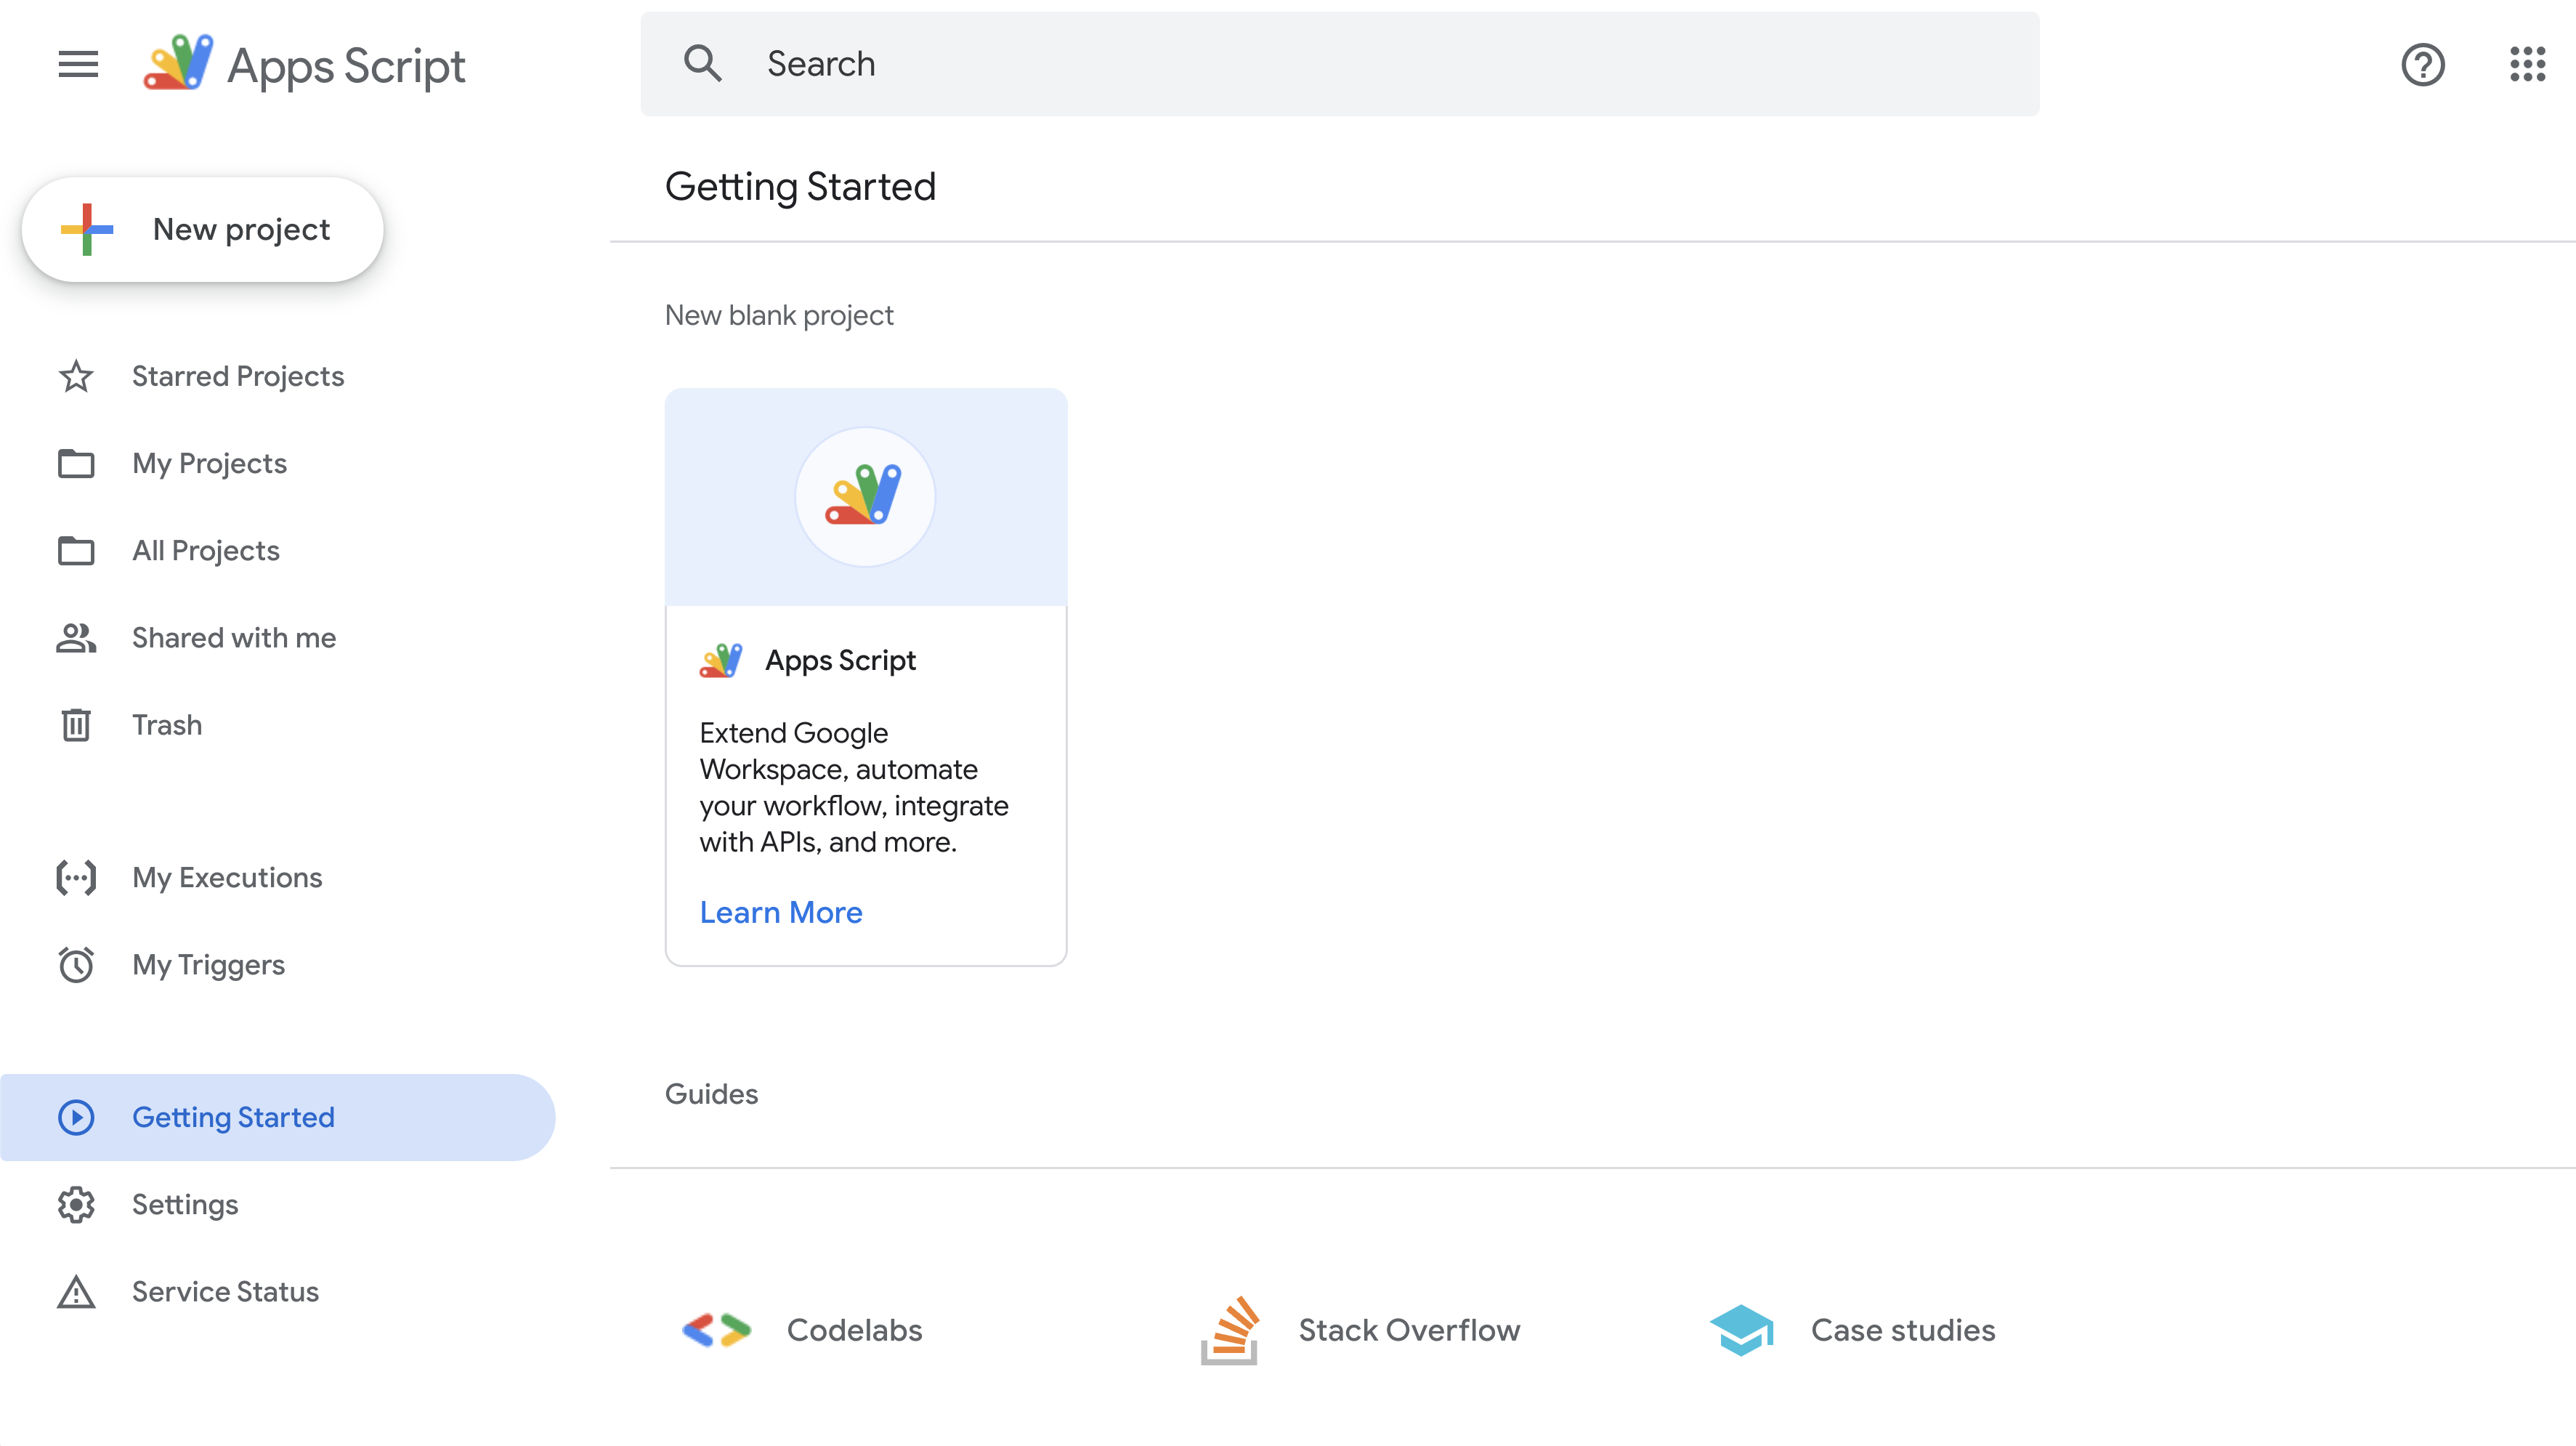
To begin, make sure you are logged in to your Google account. Then, visit the Google Apps Scripts home page and select + New Project on the top left:
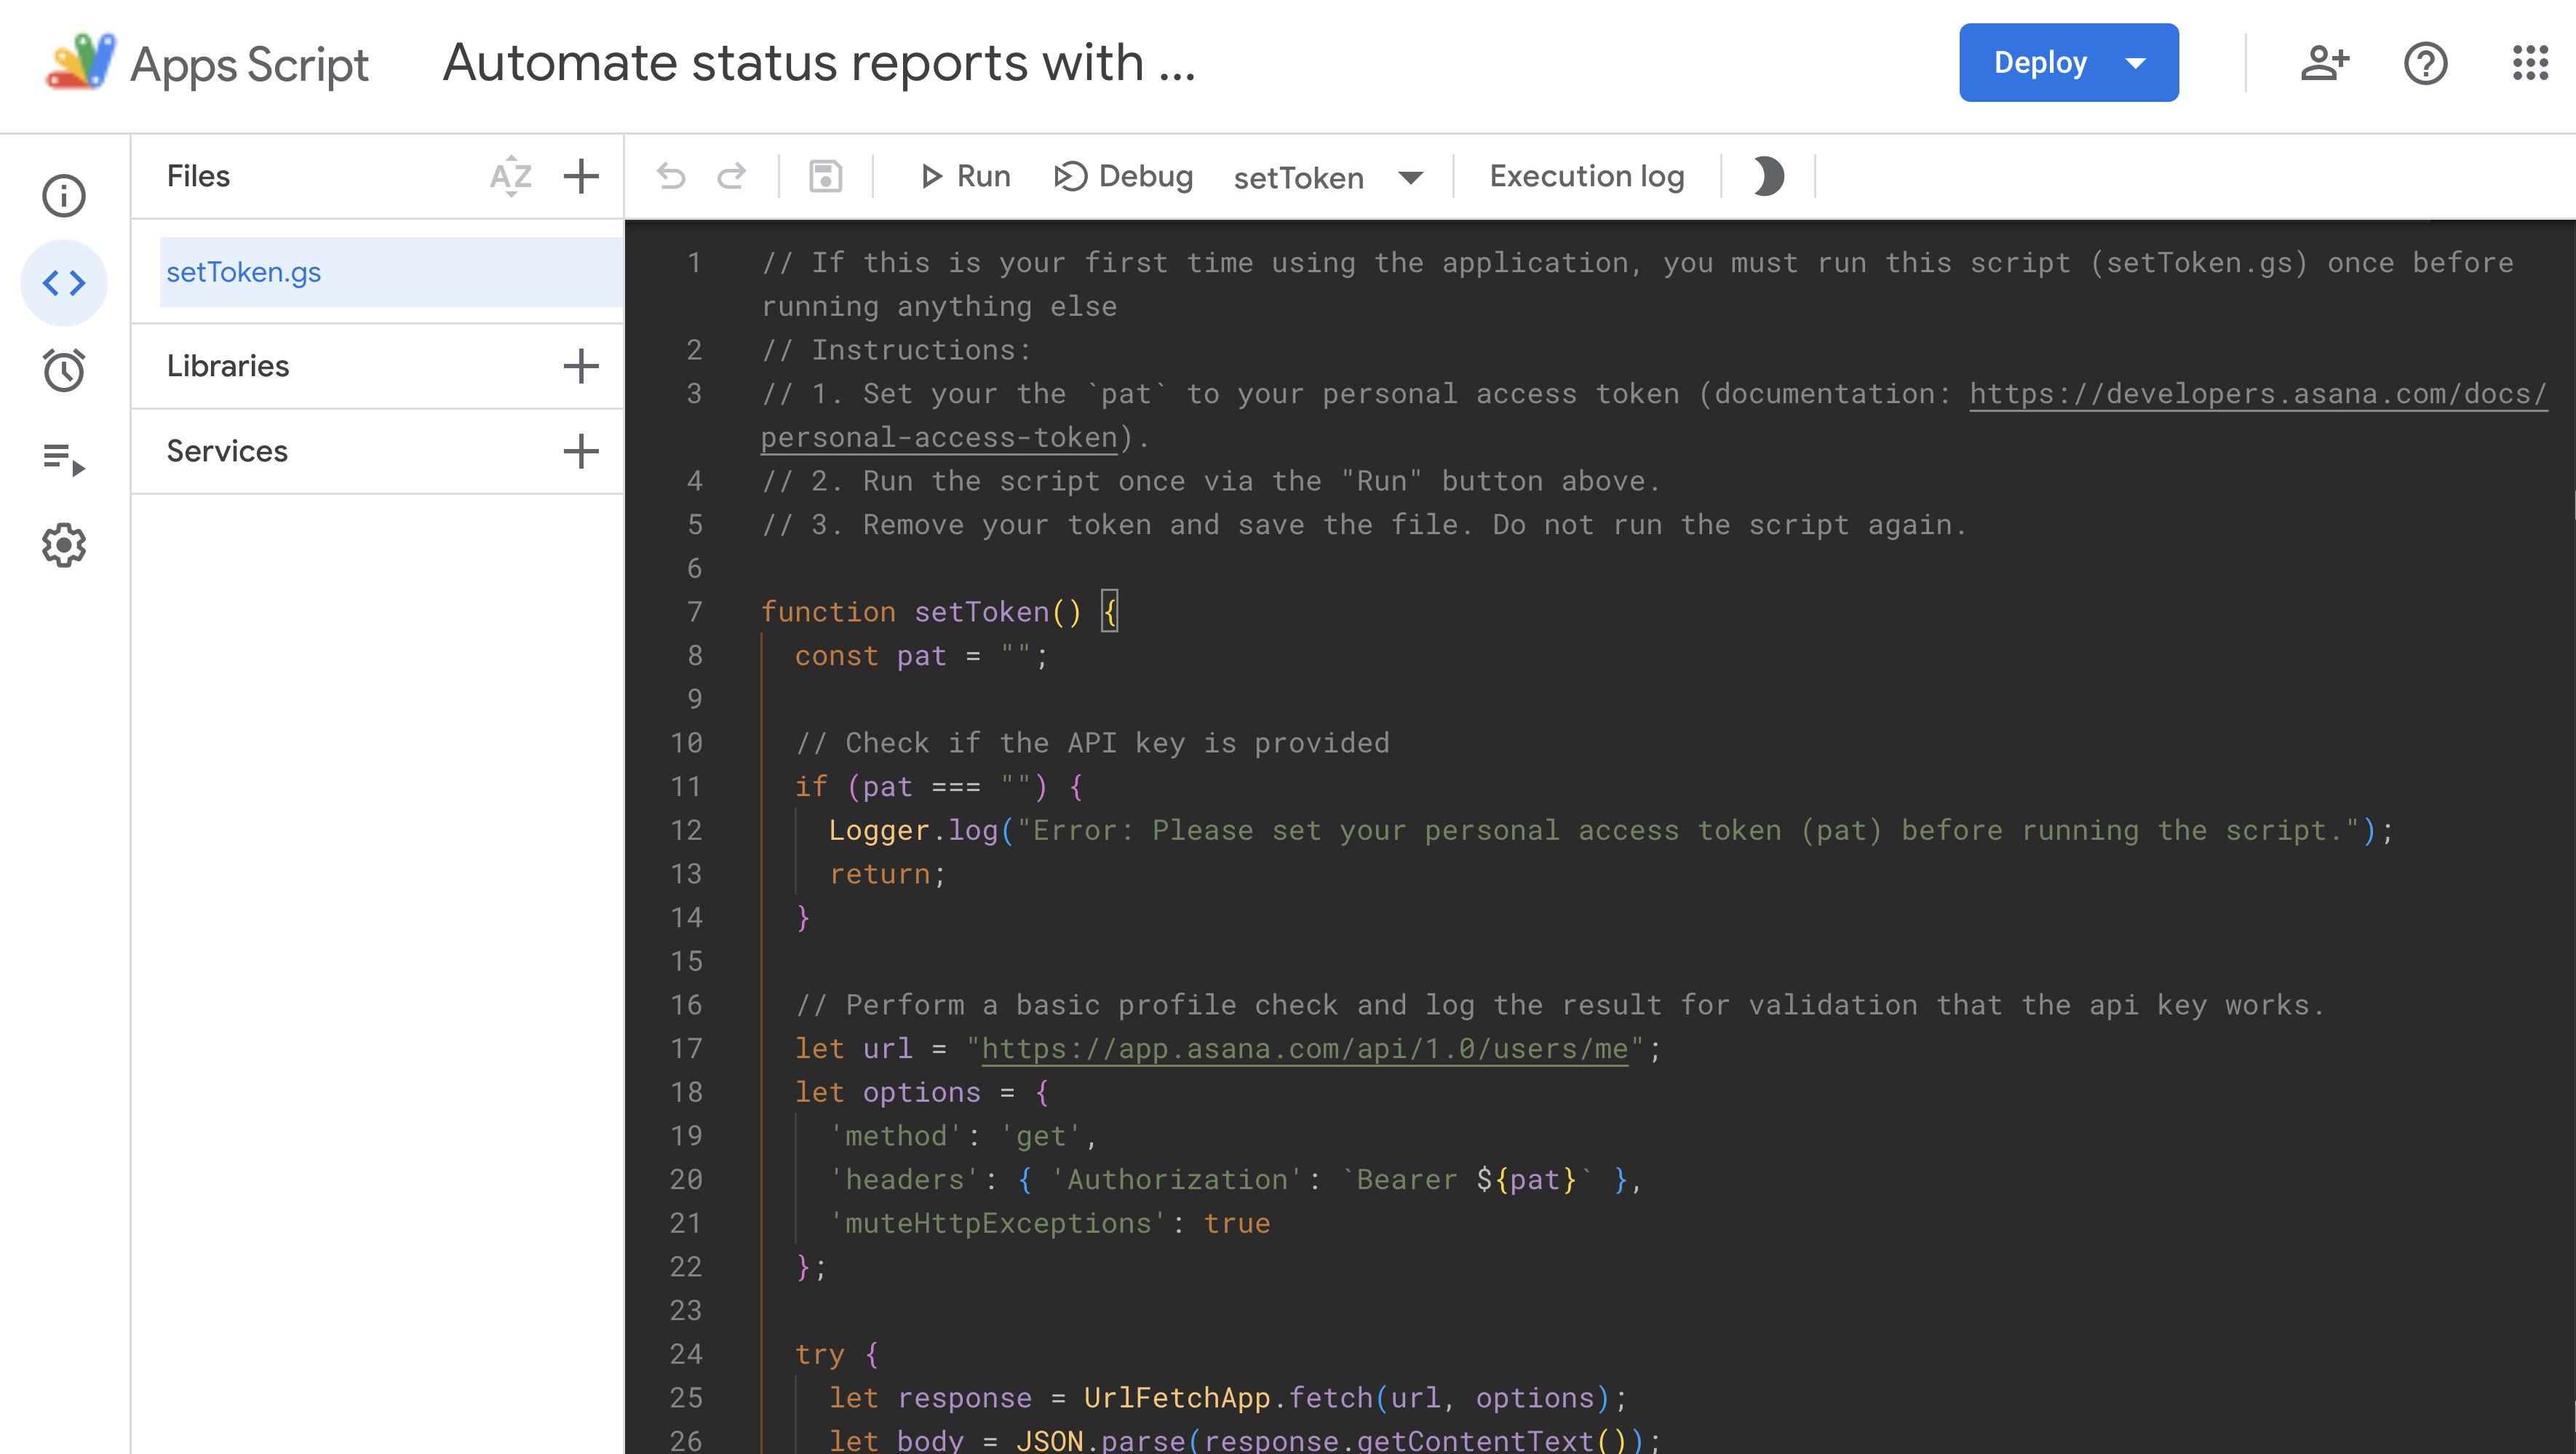
Next, replace any code provided by Google Apps Scripts with the starter code given above. You may also wish to title this project with a name:
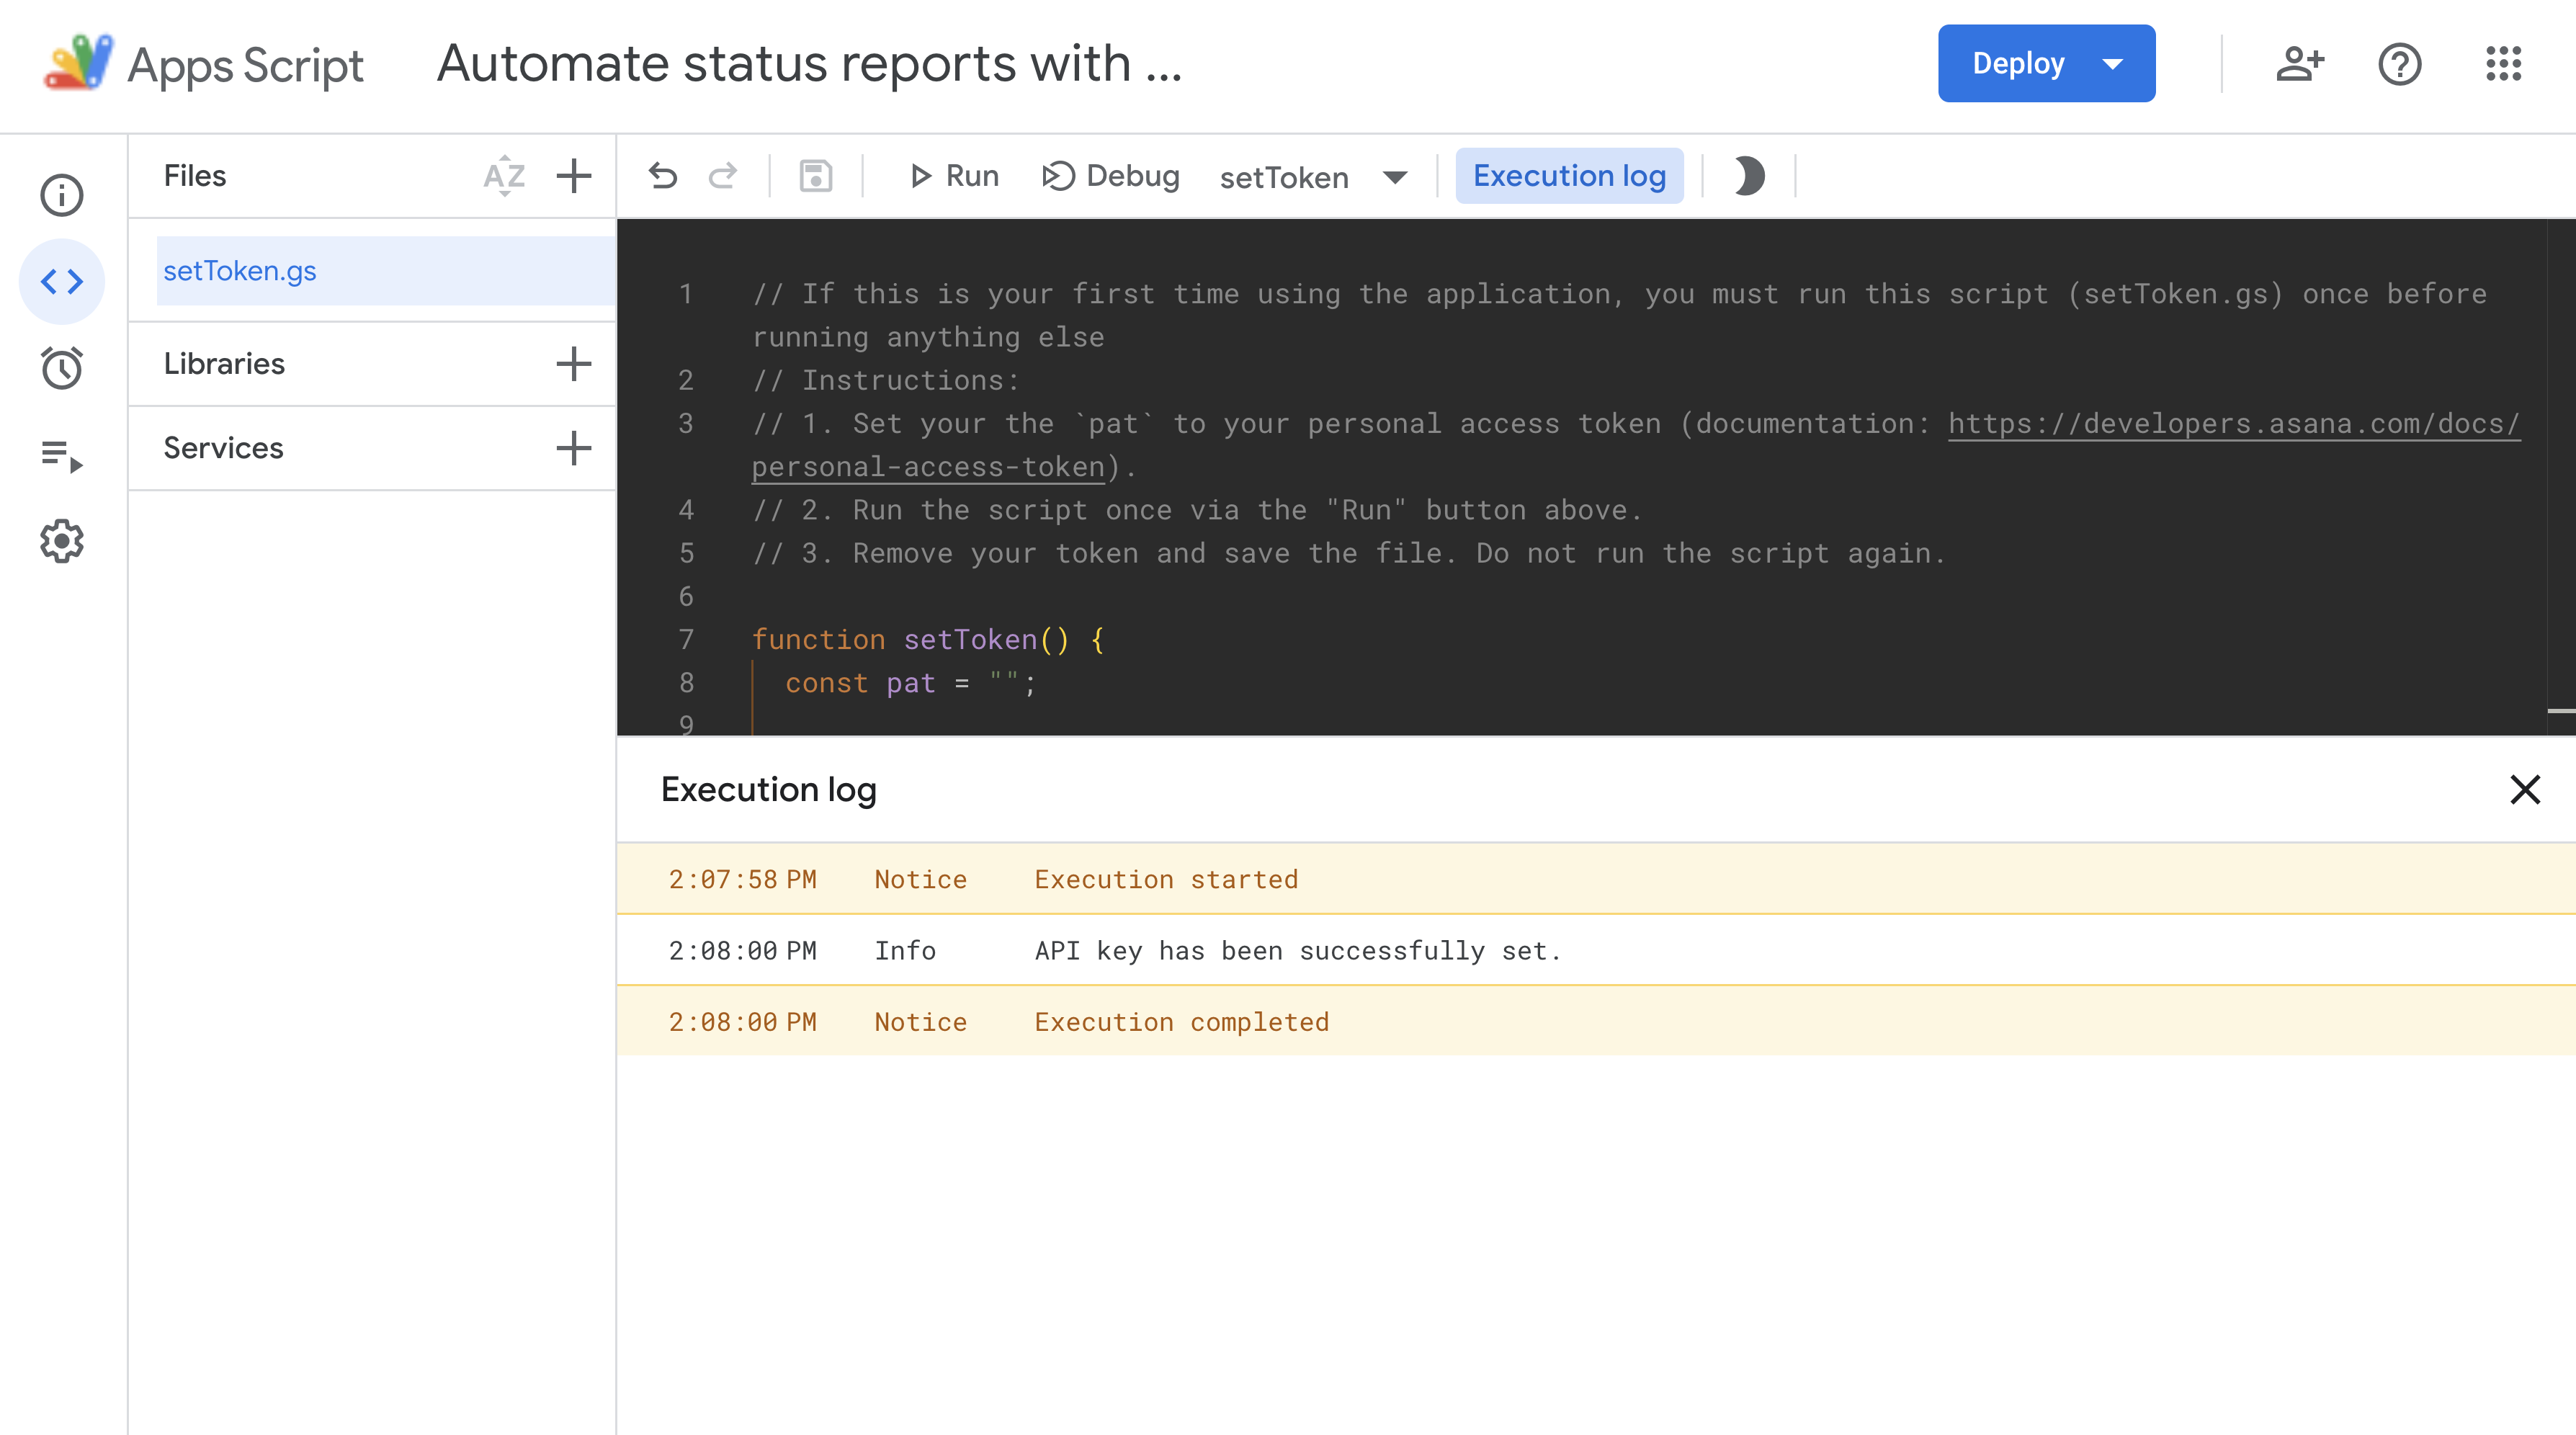
After pasting the code above, run the application by clicking the ▶ Run button. Upon success, you should see a message in the Execution Log:
For the final part of this setup, create a file named runAutomation.gs, then add an empty asynchronous function runAutomation() into it:
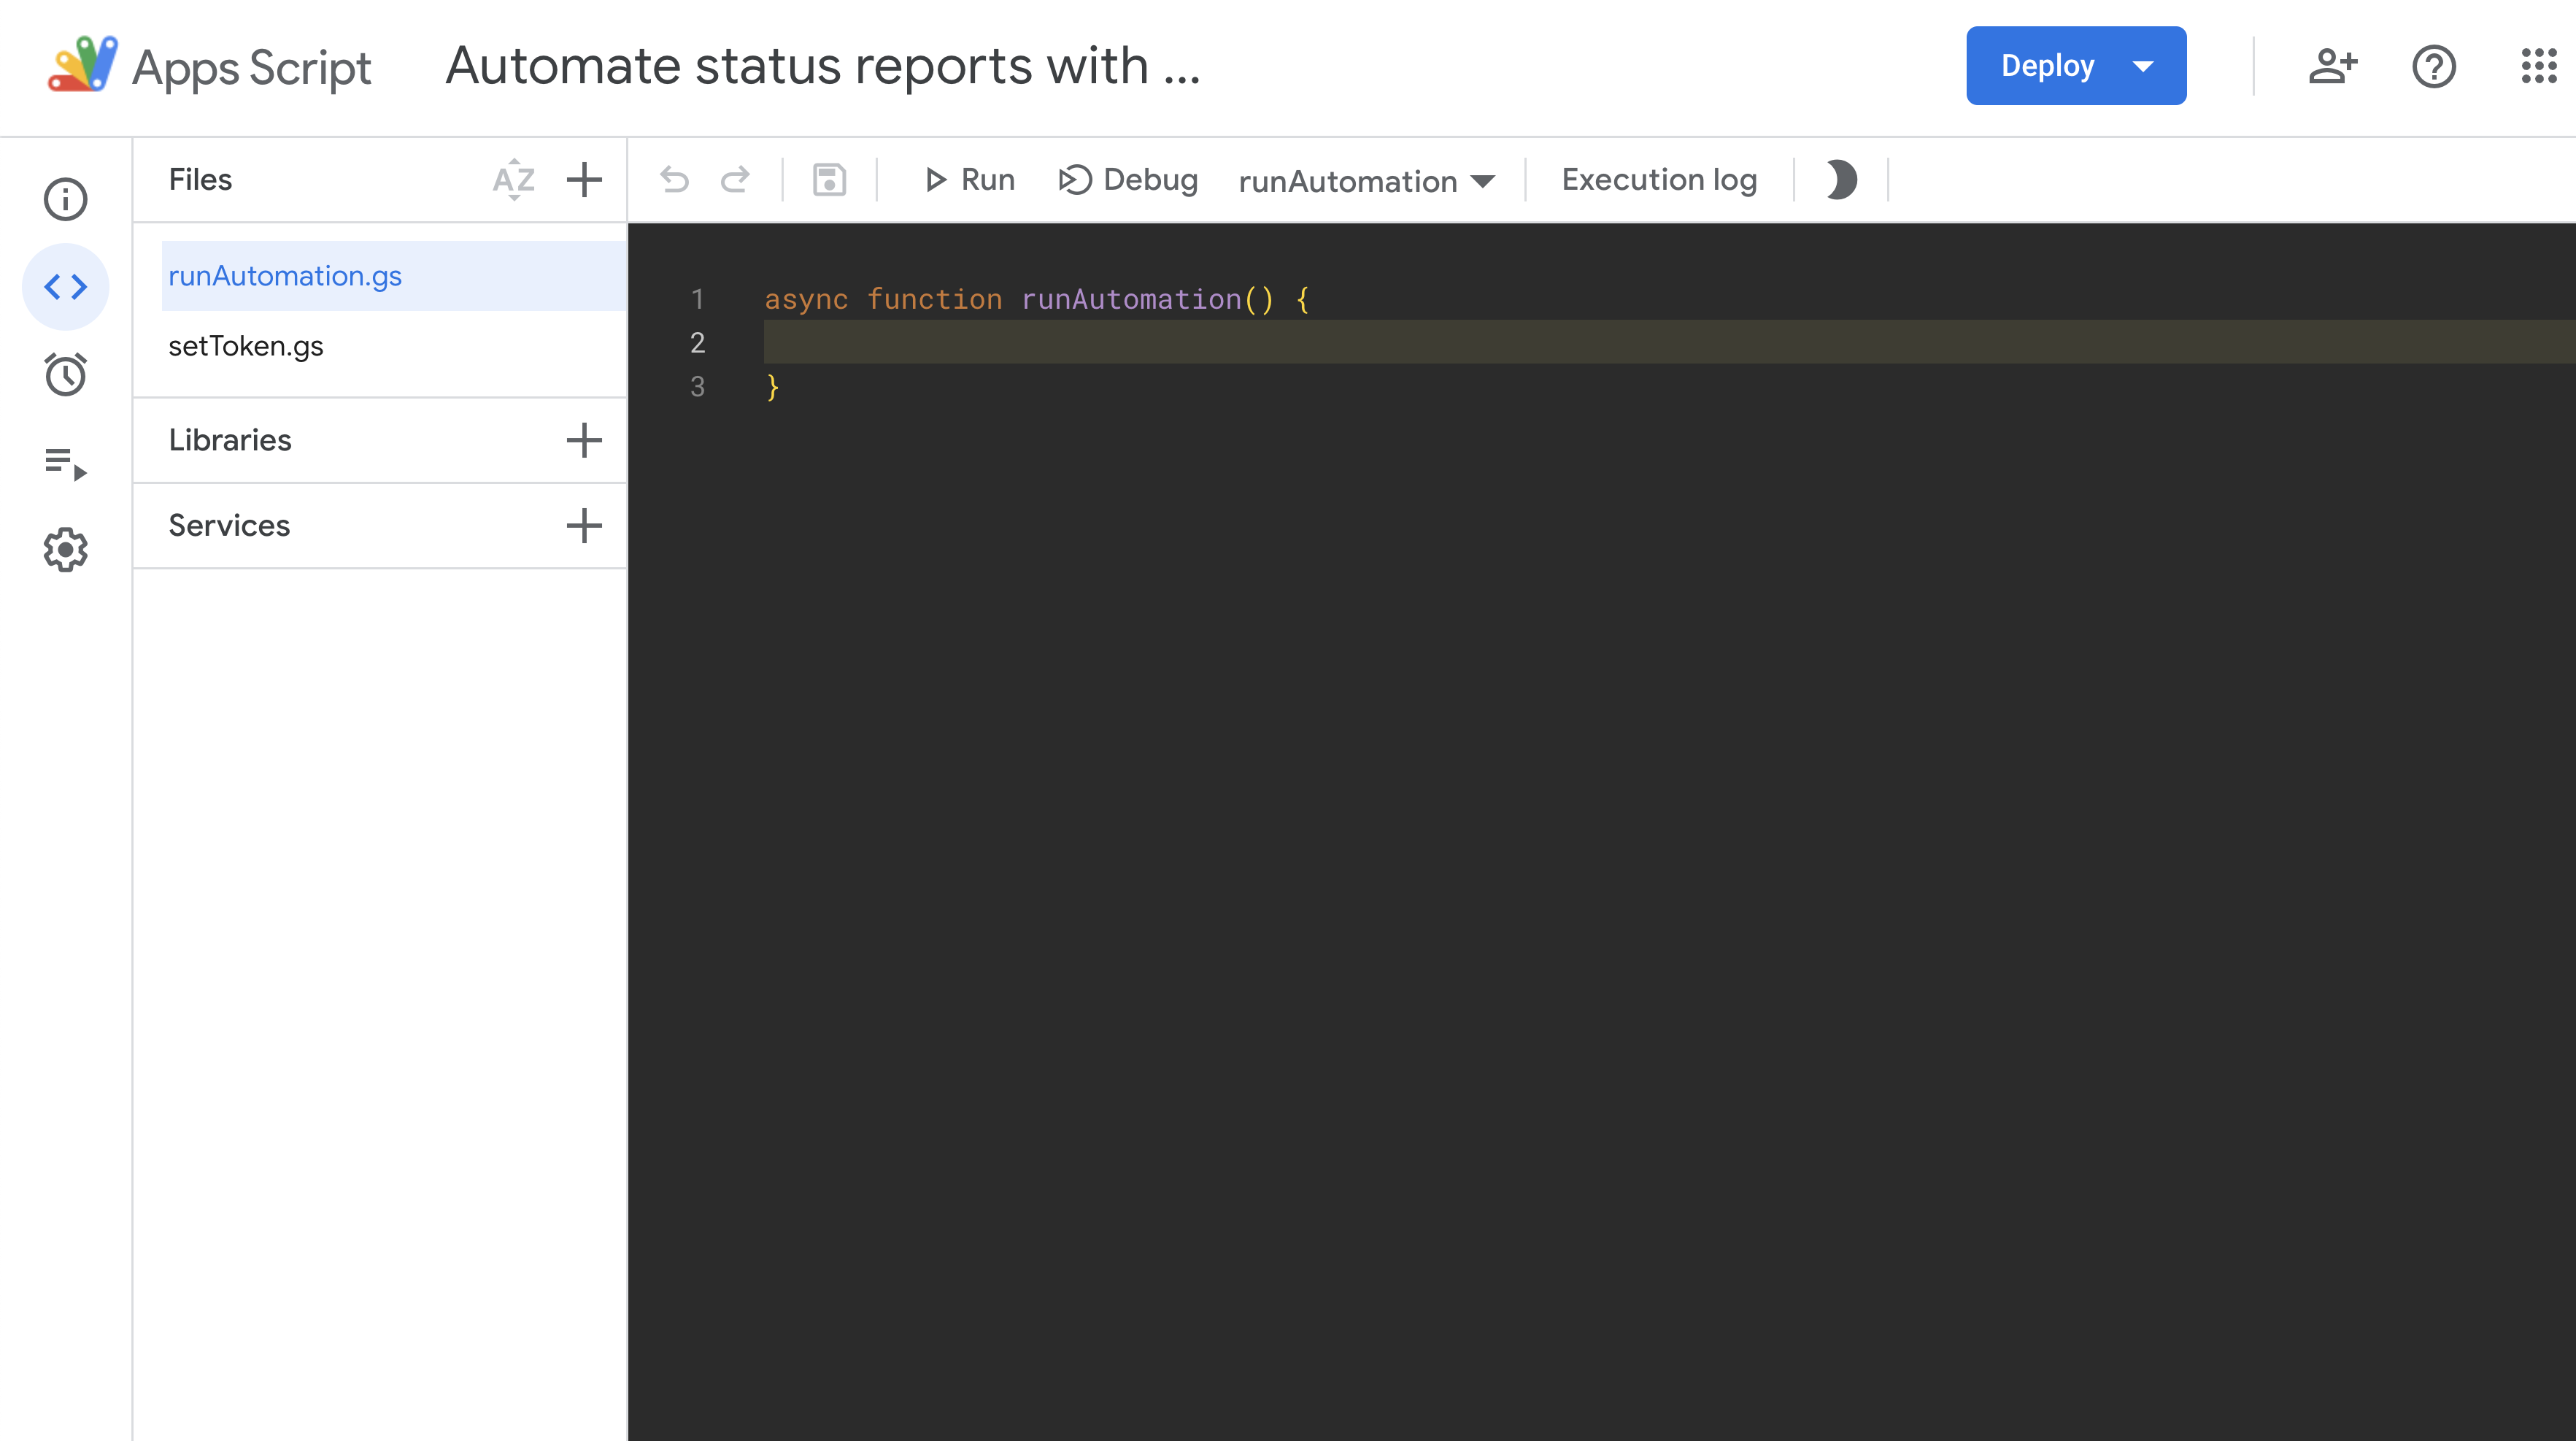
For the remainder of this tutorial, we'll focus mainly on building this runAutomation.gs script.
2. Parse and validate data
In order for the application to retrieve statuses from the correct project and write them into a spreadsheet, the application needs both the ID of that spreadsheet as well as of the project. This information is captured in spreadsheetID and projectID, respectively (which we can define outside of runAutomation():
const spreadsheetID = "";
const projectID = "";
In order to make requests against Asana's API, we'll also need to make sure that the user's personal access token is available from user properties (recall that this token was set in setToken.gs before the main application script is ever run). Similar to spreadsheetID and projectID, we'll define pat in the global scope (i.e., outside of runAutomation()):
const userProperties = PropertiesService.getUserProperties();
const pat = userProperties.getProperty('pat');
Next, within our currently-empty runAutomation() function, we'll perform basic validation on the values above to ensure proper input:
if (!pat) {
  Logger.log("Please set your PAT in setToken.gs before continuing.");
  return;
}

if (spreadsheetID === "" || projectID === "") {
  Logger.log("Please provide both a spreadsheet ID and project ID to continue.");
  return;
}

if (!projectID || isNaN(projectID) || projectID.length < 3) {
  Logger.log("Your project GID is invalid. Please check it and try again");
  return;
}
Now that we have all the information required from the user, we'll move forward with initializing the spreadsheet.
3. Initialize the spreadsheet
Using the user-specified spreadsheetID, we'll first retrieve the spreadsheet (and display a convenient message in the console). And since spreadsheets can be made up of individual sheets, we'll also make sure the application operates on just the first sheet of the spreadsheet:
const spreadsheet = SpreadsheetApp.openById(spreadsheetID);
Logger.log(`Accessing spreadsheet "${spreadsheet.getName()}"...`);

const sheet = spreadsheet.getSheets()[0];
Next, we'll write the headers (i.e., column names) if the application detects that the sheet is empty. The application can determine this by first searching for the last row of the sheet that has content.
const lastRow = sheet.getLastRow();If the last row that has content is 0.0, this indicates that the sheet is empty (meaning that there are no rows that have content). As such, we can move forward with writing the headers:
if (lastRow === 0.0) {
  Logger.log("Empty sheet detected...");
  Logger.log("Writing sheet headers...");

  const headers = [
    "Status GID",
    "Link",
    "Title",
    "Status type",
    "Text",
    "Author",
    "Created at",
  ];
  sheet.appendRow(headers);
}
In our sheet, the result of this may look like the following:
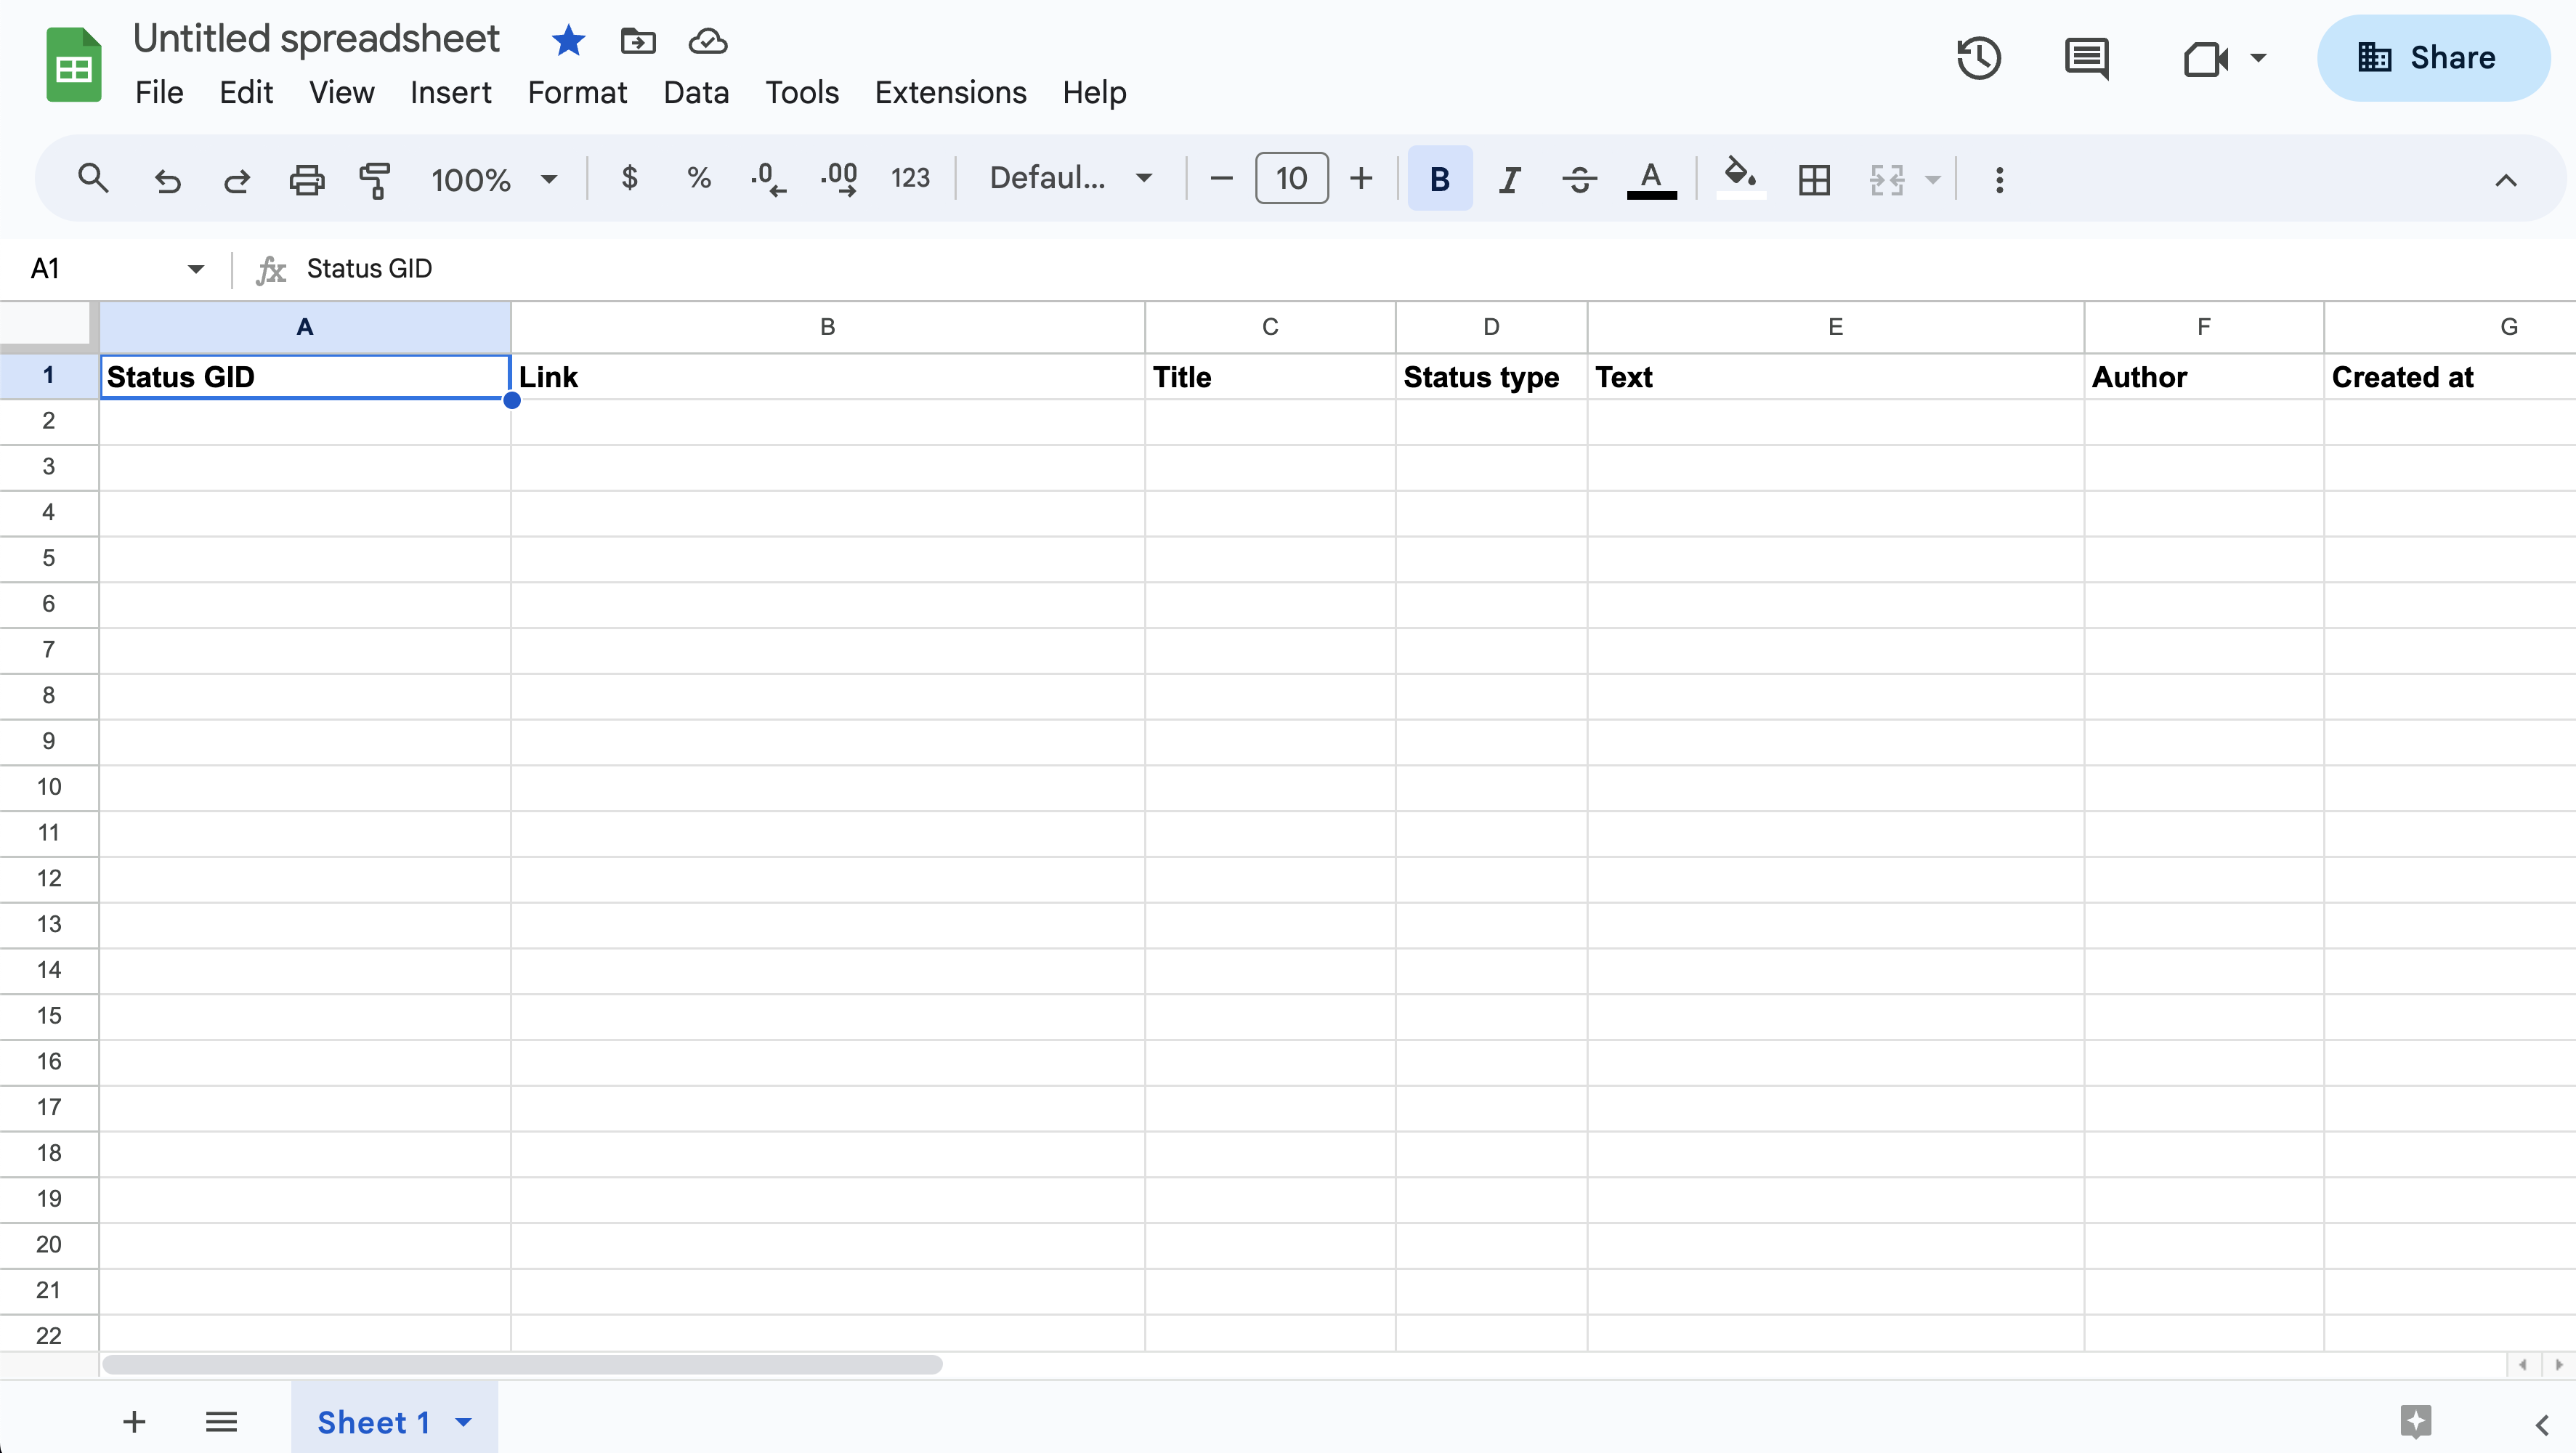
You may feel free to modify column widths, font faces, and other styling to your preference in the sheet itself.
The next steps for the application involve requesting information from Asana, then writing a project status (or project statuses) as appropriate. We'll need to accommodate two distinct scenarios:
- Does the sheet have existing project data?
- ➡️ Append the latest status update to the sheet
- Is the sheet empty (i.e., no existing project data)?
- ➡️ Add all status updates (past and current) to the sheet
We'll build the former scenario first: writing the latest project status for a sheet that has existing data.
4. Write the latest project status
If the sheet has project data, there will be at least two non-empty rows (i.e., the first row contains sheet headers). We'll first verify this:
const hasProjectData = lastRow > 1;If project data exists in the sheet, we should append the project's latest (i.e., current) status update to the sheet. However, we also need to make sure we do not duplicate that status update if it's already written in the sheet. To address this, we'll need to perform a series of steps in order:
- Get the GID of the latest status update included in the sheet (this should be the value in the first column of the last row)
- Make an API request to get the project and the GID given in the project's
current_status - Compare these values. A non-match indicates a new status update, which should be appended as a new row on the sheet
Here is the code for the steps above:
if (hasProjectData) {
  const latestStatusGID = sheet.getRange(lastRow, 1).getValue();
  const projectData = await getAsanaProject(projectID, options);
  if (!projectData) return;

  const { current_status } = projectData.data;

  if (latestStatusGID != current_status.gid) {
    const newRow = [
      current_status.gid,
      `https://app.asana.com/0/0/${current_status.gid}`,
      current_status.title,
      current_status.status_type,
      current_status.text,
      current_status.author.name,
      current_status.created_at,
    ];

    sheet.appendRow(newRow);

    Logger.log(`Latest project status successfully written for project ID: ${projectID}.`);
  } else {
    Logger.log("There are no new project statuses to write.");
  }
} else {
  // (we'll handle this "else" case in step 5 in this tutorial)
}
Note that the above code also references a getAsanaProject() helper function. Below is getAsanProject() defined, which simply makes a GET request to /projects/{project_gid} to retrieve project information.
const getAsanaProject = (projectID, options) => {
  const url = `https://app.asana.com/api/1.0/projects/${projectID}?opt_fields=name,current_status.status_type,current_status.title,current_status.text,current_status.author.name,current_status.created_at,created_at,modified_at`;
  return getAsanaData(url, options);
};

const getAsanaData = async (url, options) => {
  try {
    const response = UrlFetchApp.fetch(url, options);
    const body = JSON.parse(response.getContentText());
    return body;
  } catch (error) {
    Logger.log("Error: Unable to fetch data. Please verify your API key and try again.");
    return null;
  }
};

const options = {
  'method': 'get',
  'headers': { 'Authorization': `Bearer ${pat}` },
  'muteHttpExceptions': true
};
The request URL has also been appended opt_fields, which customizes the response with specified fields (see Input/output options for additional details). These opt_fields are mapped to the headers we have chosen for the sheet itself:
- Project ID (
current_status_update.gid) - Link (i.e., to the project, created from using the GID above)
- Status type (
current_status_update.status_type) - Text (
current_status_update.text) - Author (
current_status_update.created_by.name) - Created at (
current_status_update.created_at)
Note that text refers to the body of the status update in plain text. Alternatively, you may also wish to request for html_text, which provides a formatted rich text version of the status update (this value would need to be parsed).
In the next step, we'll handle the end-most else case from the above code: writing all status updates (past and current) for an empty sheet.
5. Write all project statuses
If there is no existing project data in the sheet, the application will populate the empty sheet with all existing status updates from the project.
To accomplish this, we can add the following code to the end-most else case in the code from the previous step:
spreadsheet.rename(`Statuses for project ${projectID}`);

const response = await getAsanaStatuses(projectID, options);
if (!response) return;

const statusList = response.data;
for (let i = statusList.length - 1; i >= 0; i--) {
  const newRow = [
    statusList[i].gid,
    `https://app.asana.com/0/0/${statusList[i].gid}`,
    statusList[i].title,
    statusList[i].status_type,
    statusList[i].text,
    statusList[i].created_by.name,
    statusList[i].created_at
  ];
  sheet.appendRow(newRow);
}

Logger.log(`Project statuses successfully written for project ID: ${projectID}.`);
In the above code, we first rename the spreadsheet for the user. Then, we call the helper function getAsanaStatuses(), which returns status updates for the object provided (i.e., the project). Finally, we iterate through the array of statuses in the response, then append each status to the sheet, row by row.
Here is the getAsanaStatuses() helper function defined:
const getAsanaStatuses = (projectID, options) => {
  const url = `https://app.asana.com/api/1.0/status_updates?parent=${projectID}&opt_fields=title,status_type,text,created_by.name,created_at`;
  return getAsanaData(url, options);
};
Similar to getAsanaProject() from the previous step, this function simply makes a request to a GET endpoint, this time to /status_updates.
At this point, the application code is complete! To indicate this in our Execution Log, we'll simply log a final message to the user at the very end of the runAutomation() function:
Logger.log(`View the current spreadsheet here: https://docs.google.com/spreadsheets/d/${spreadsheetID}/edit#gid=0`);The application can always be run manually through the ▶ Run button at the top of the page:
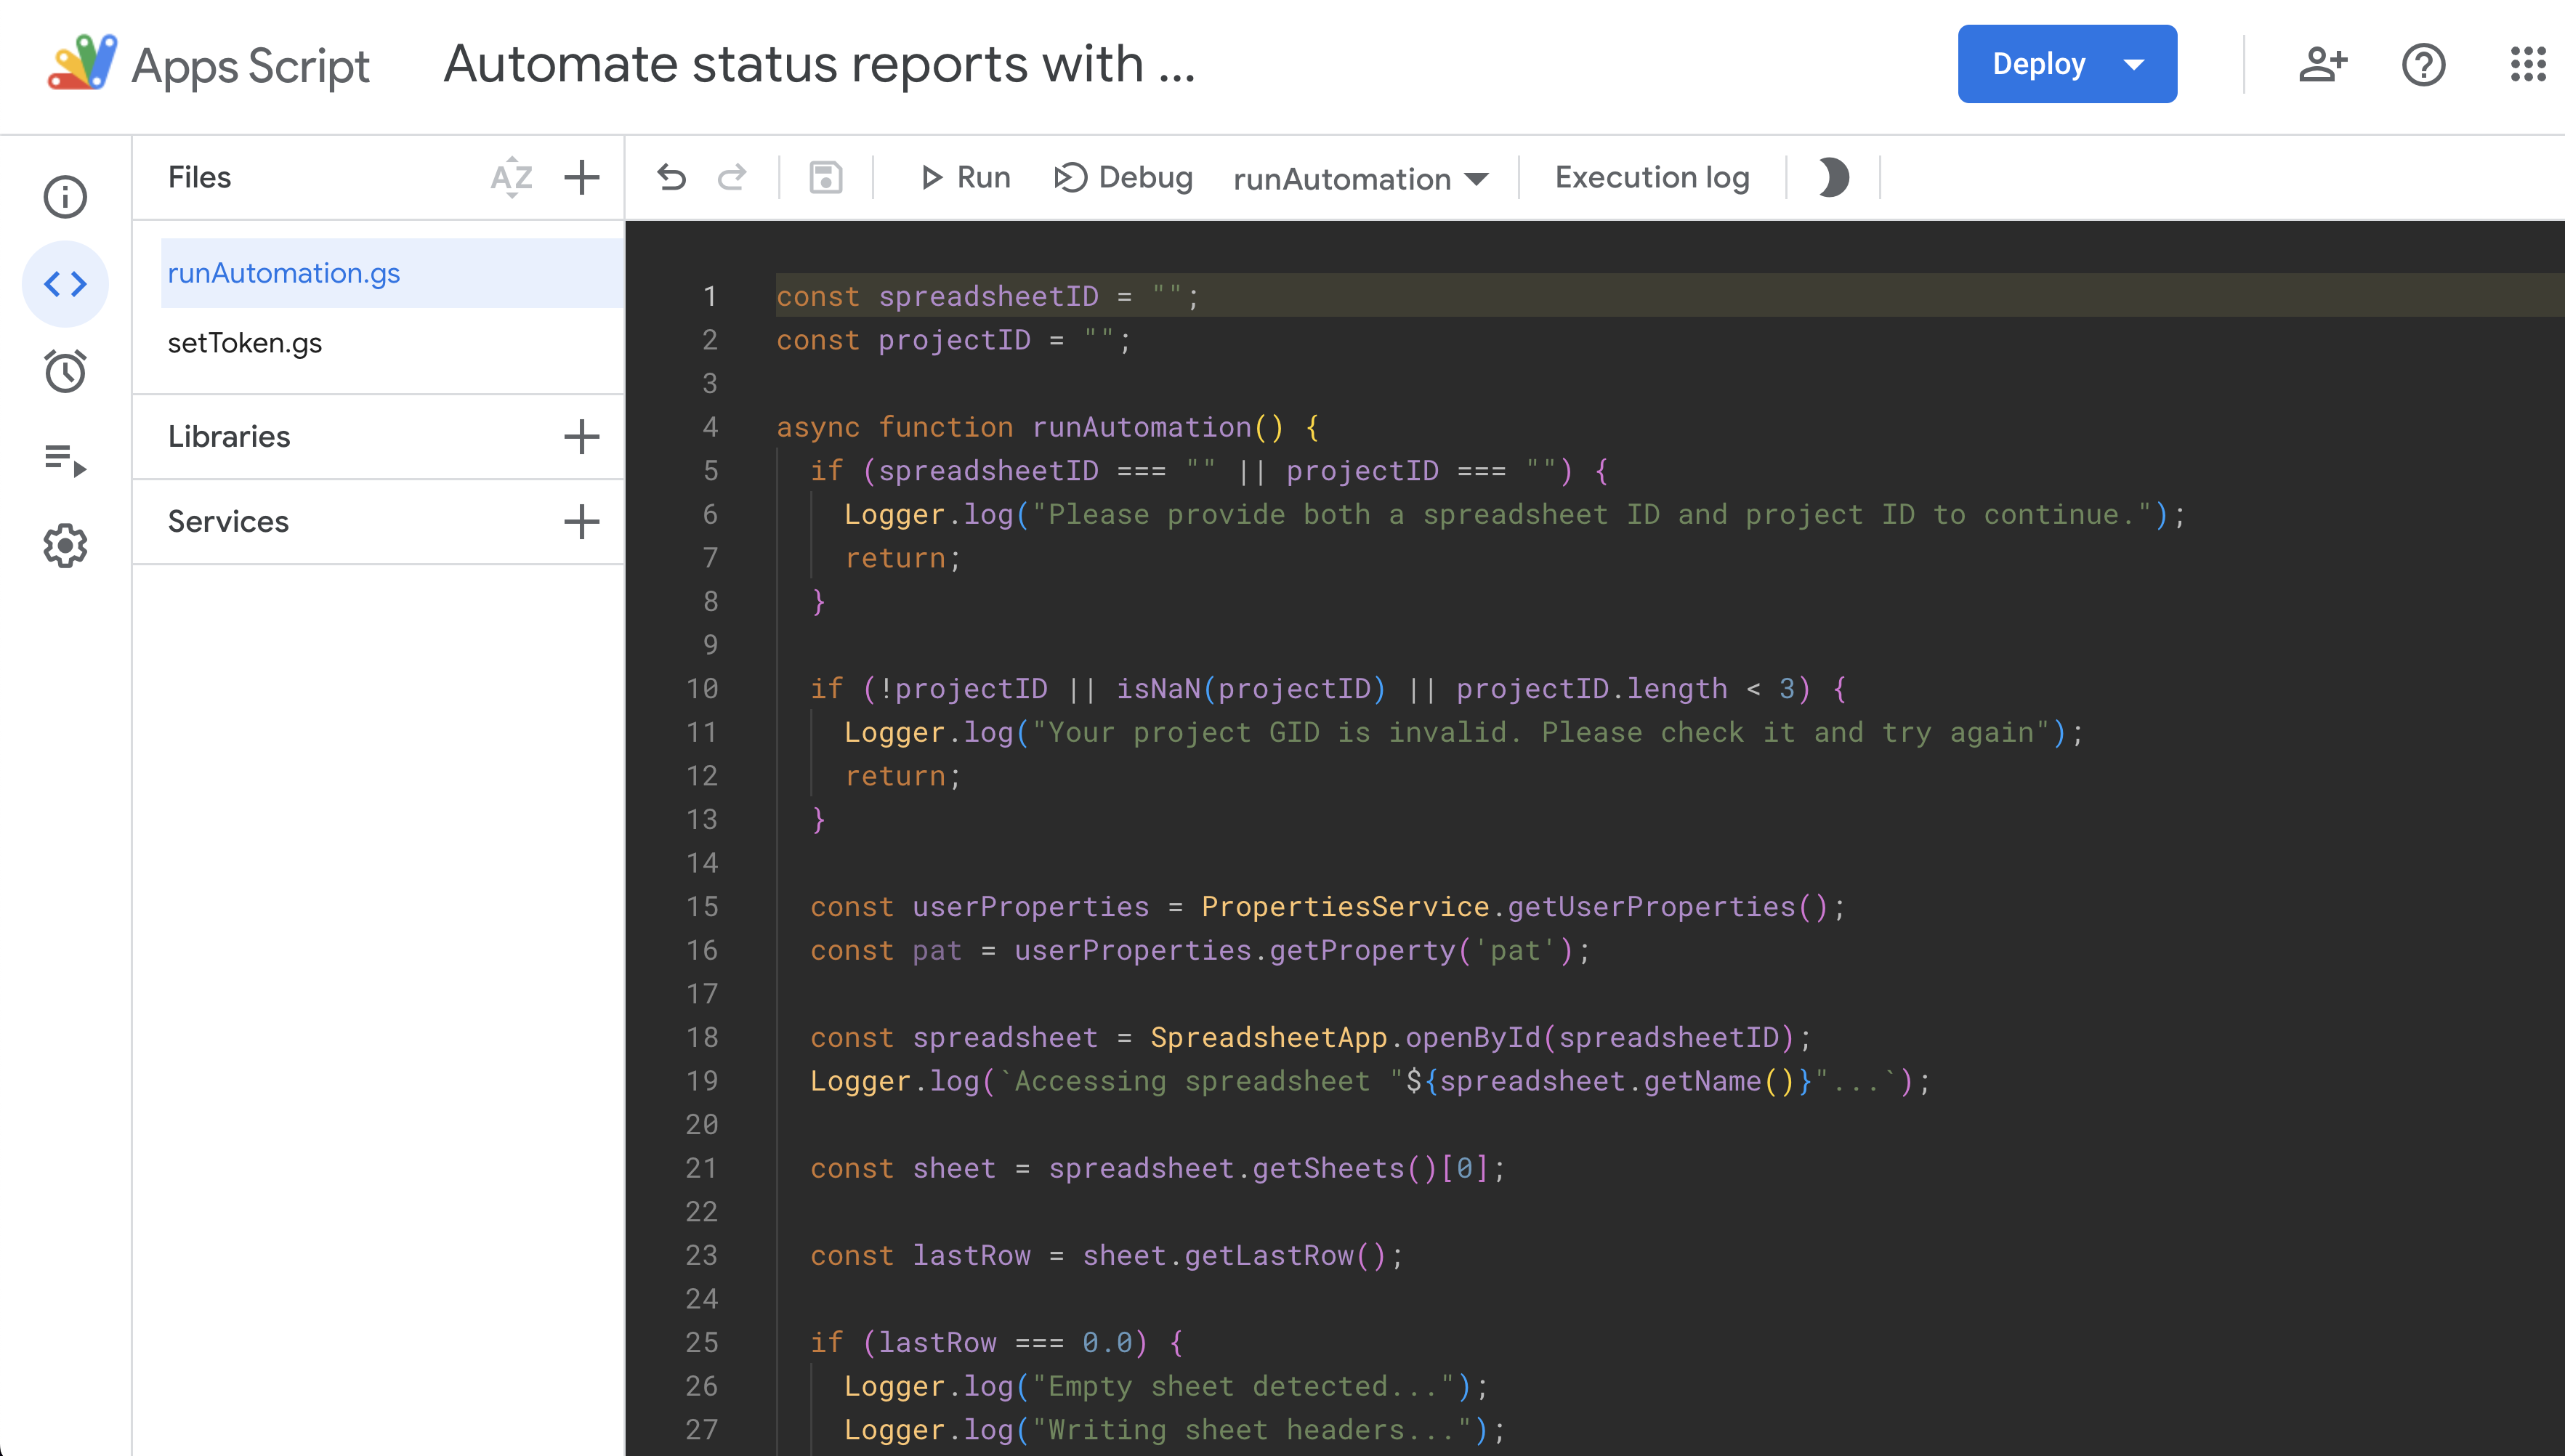
And as a result of this operation, the application successfully updates the sheet:
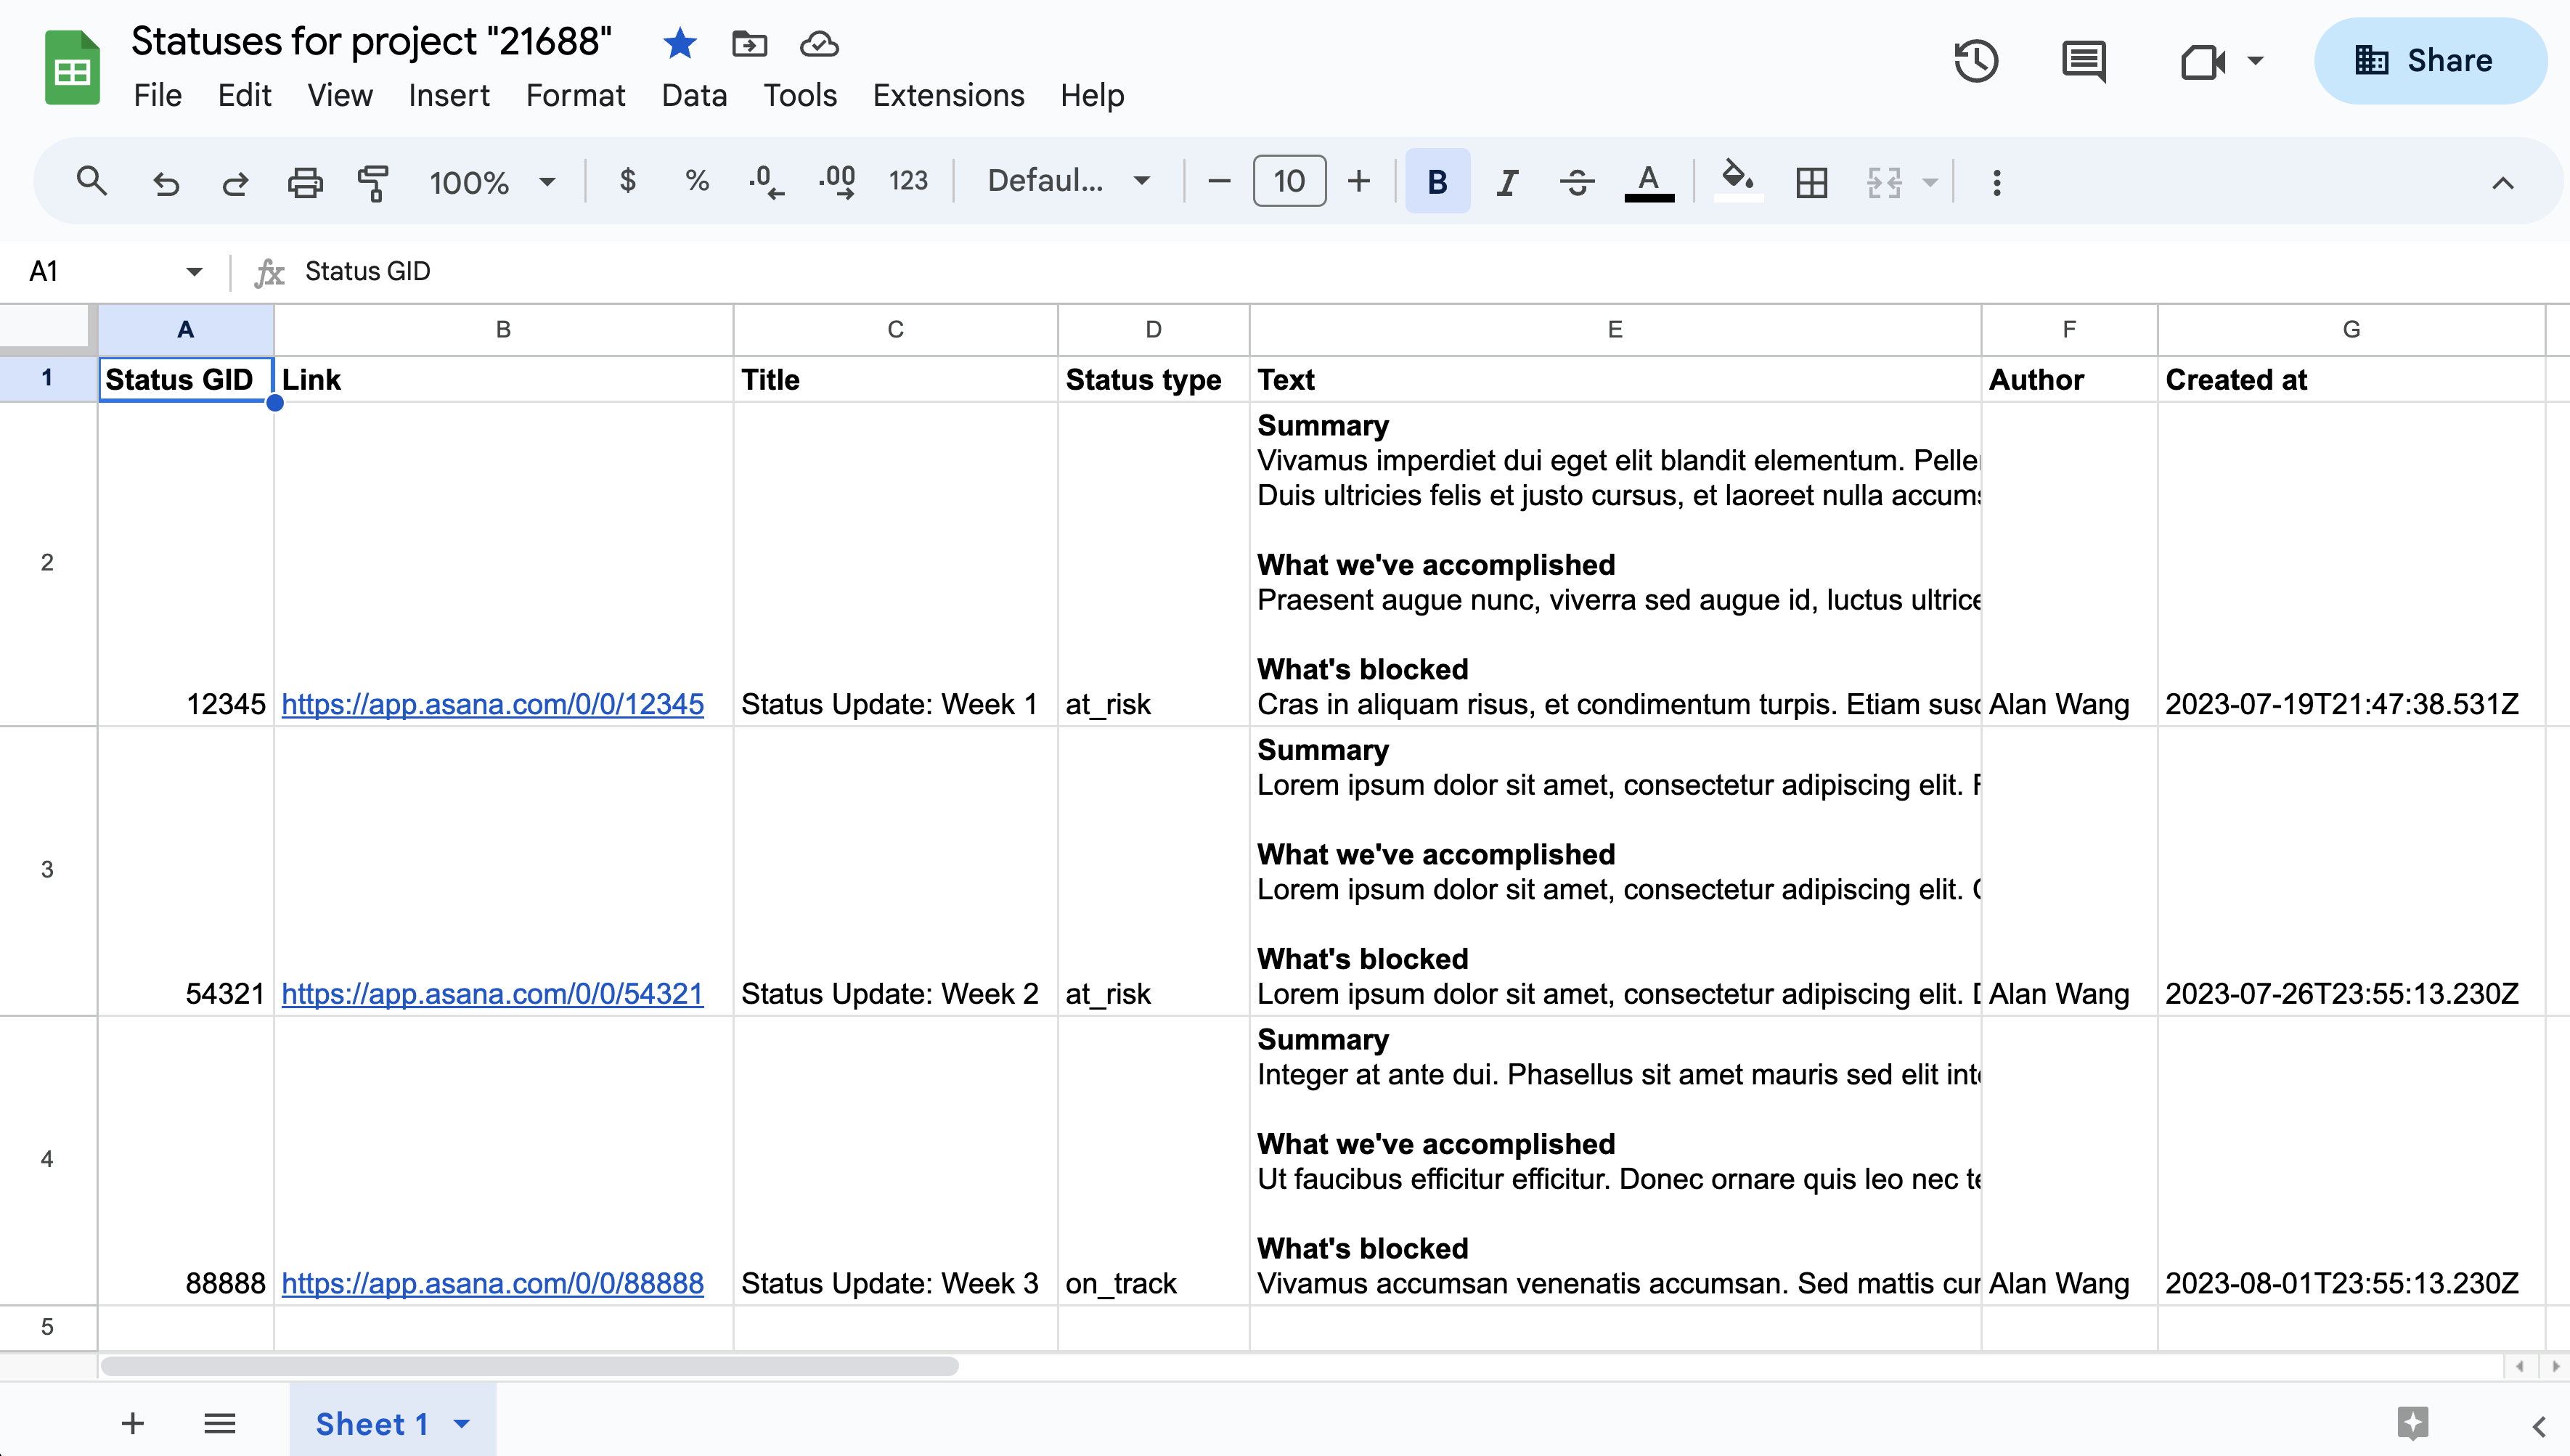
To optimize and automate this application, however, we'll configure the script to run on its own via time-based triggers (e.g., once a week).
6. Automate script execution
As the final step, we'll set the runAutomation.gs script to run automatically at a pre-determined interval. To do so, select Triggers in the sidebar, then + Add Trigger.
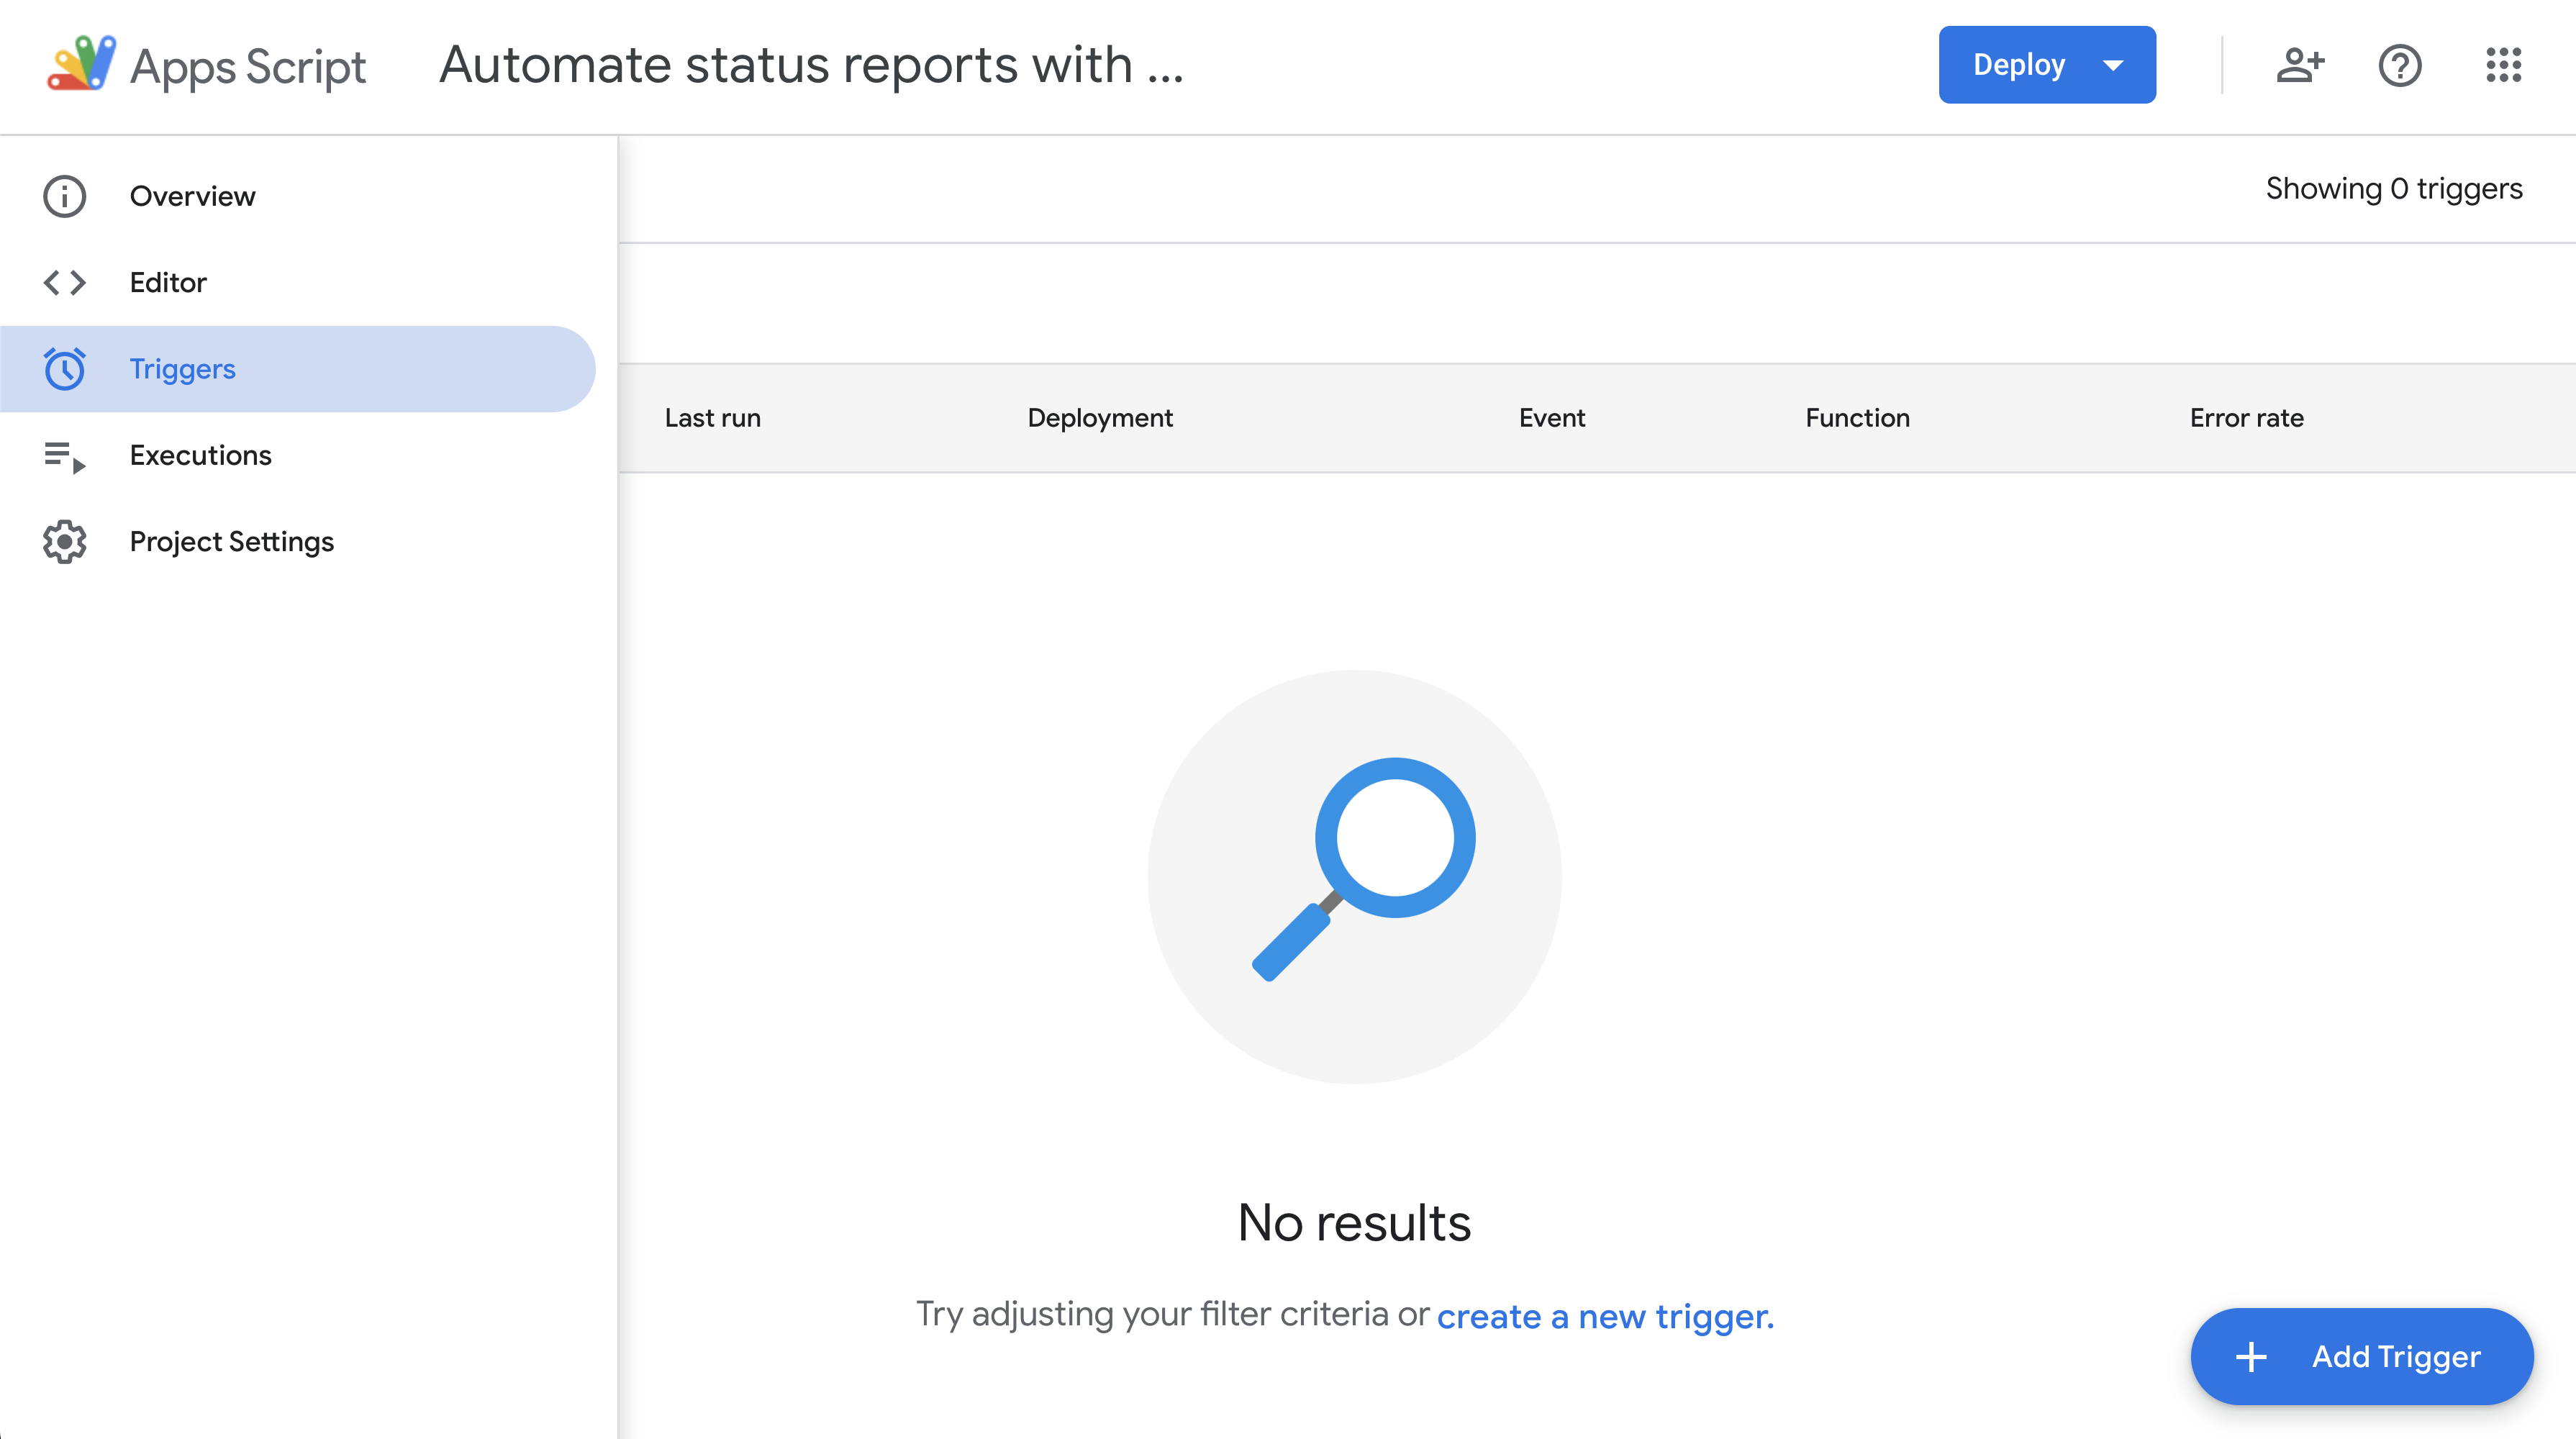
Next, we can modify the trigger to run on a time-driven basis. For example, if status updates are posted every Monday afternoon, we can set our application code to execute every Monday evening:
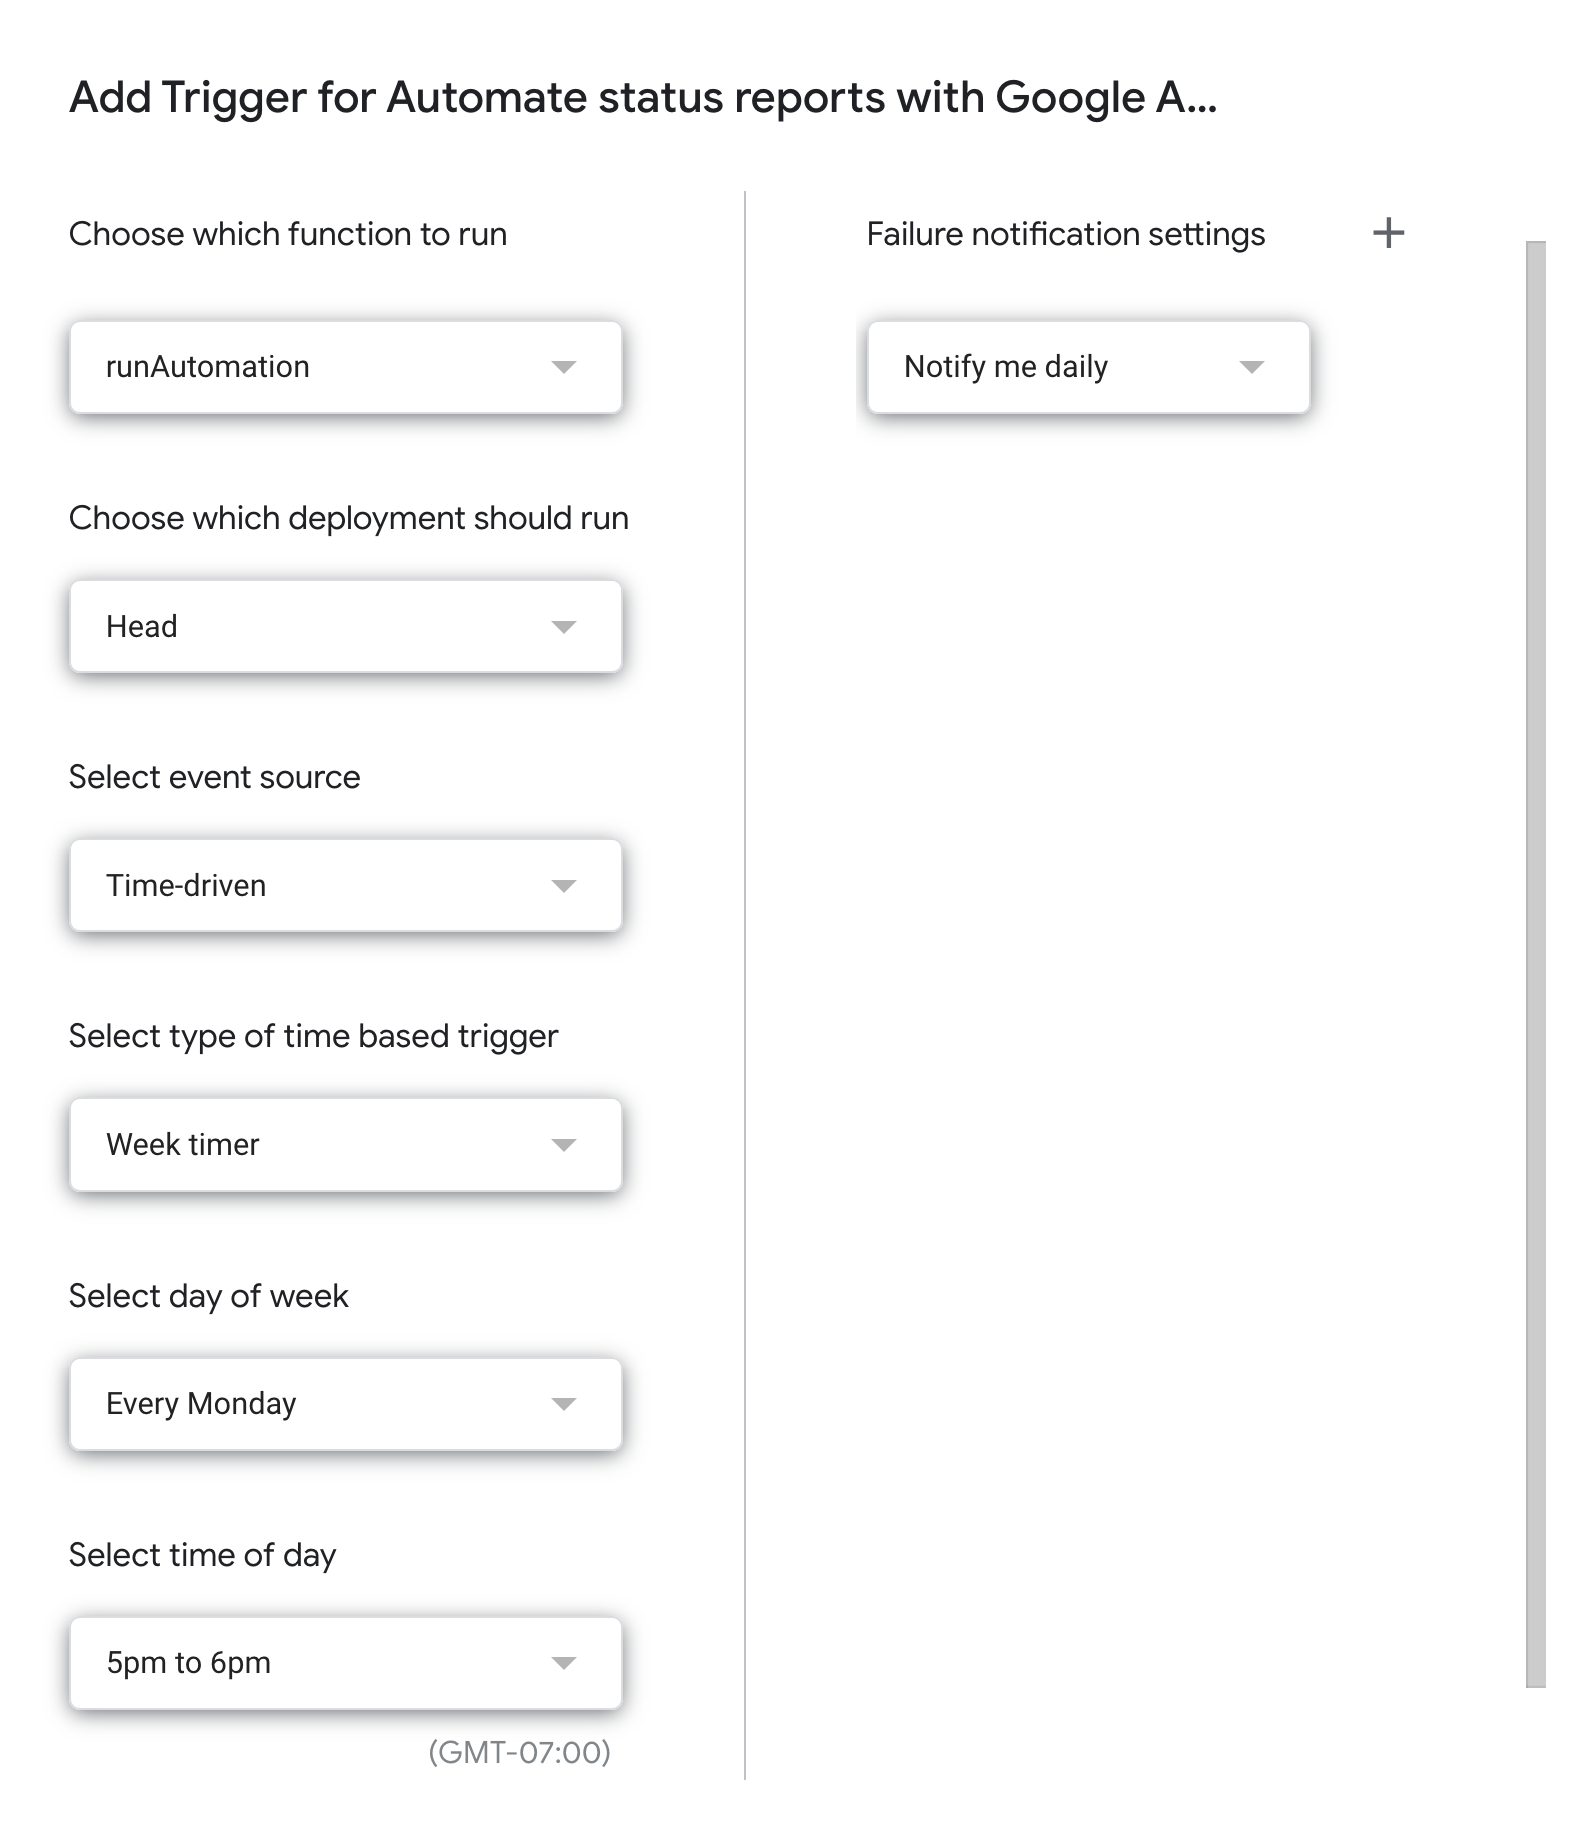
Provided that the token was previously set up in setToken.gs, runAutomation() will now be automatically invoked every week around 5pm! As such, with this automation, any project statuses posted to the project will be added to the sheet — all without the need for user intervention.
Data accessIt is important to note that the accuracy of this application is limited by the project that the authenticated user (i.e., through the personal access token) has access to.
For a complete representation of the data, use a Service Account to perform such audits.
Complete code
To ensure completeness, feel free to review the finished application code (for runAutomation.gs) in its entirety through this Recipe:
Conclusion
Once finished, you should have a basic application that tracks project status updates and automatically adds them to a sheet. Feel free to customize the code to fit your specific requirements. You can modify error messages, adjust API requests, or otherwise handle project data differently.
Extending this application
You may use this application as a starting point for creating more complex automations, such as:
- Building with webhooks to be notified of project changes (i.e., rather than periodically polling for changes)
- Writing status updates to a spreadsheet from all projects in a portfolio (i.e., rather than from a single project)
- Automatically performing certain operations based on the status updates (e.g., creating follow-up tasks for
at_riskprojects, sending an email, etc.)
If you choose to integrate a more complex hosting solution, you can also enhance and extend your existing application by optimizing the authentication method, using an official client library to make requests against the API, or even building your app directly into Asana's user interface by displaying customized widgets and forms.
What's next
We recommend visiting Asana's app directory to see the tools that other organizations (as well as the general community) have built. Beyond that, visit the API reference for a comprehensive reference for objects, schemas, and endpoints available in the API.
Updated 5 months ago