
Export project statuses to CSV
Build a custom reporting solution using Asana's API
Introduction
Asana is the source of truth for many organizations’ work management. It is the essential tool for understanding who is doing what by when. With so much rich data in Asana, teams often want to learn about how well work is getting done.
Asana provides a suite of both native reporting tools and powerful integrations with common reporting solutions like Power BI and Tableau to help you translate and review this data in an organized, easily digestible format.
Alongside these universal tools, Asana also provides a platform for building custom reporting solutions -- made possible by a flexible API. Asana’s API provides a means for software and scripts to read information from inside Asana, input information from outside Asana, and automatically react when things change.
In this tutorial, you will learn how to export project statuses to a CSV so that project statuses can be used to build reports in other tools.
What you'll build
By following this tutorial, you'll build a basic reporting application that reads projects from a portfolio, then exports status updates from those projects into a CSV. Portfolios are available to all Business and Enterprise customers. To learn more about status updates, check out our guide.
Try it!
Before you build it yourself (or if you'd simply like to run the application as an end-user), you can demo the complete application by following these brief steps:
- Get a personal access token (PAT). This token is used by the application to make requests against Asana's API
- Get the GID of a portfolio. This is the existing portfolio for which you'd like to generate a CSV report. For example, if the link to your portfolio is
https://app.asana.com/0/portfolio/12345/list, the GID of your portfolio is12345
Test dataIf you do not have a portfolio with nested projects and status updates that you’d like to test with, you can follow these brief steps to create that data. We recommend doing this in a developer sandbox or other test workspace:
- Click on each of these links to automatically import four projects with included test data: Project 1, Project 2, Project 3, Project 4
- Create a portfolio (learn how to create a portfolio)
- Add the newly-created projects into the newly-created portfolio (learn how to add work to a portfolio)
- Download the project here on your local machine
- Open
index.htmlin your browser - Select Generate CSV after providing your PAT and portfolio GID
Tutorial
After following this tutorial, you'll have created a basic reporting application that reads project from a portfolio then exports status updates from those projects into a CSV. You will be able to:
- ✅ Work with objects in the object hierarchy in Asana
- ✅ Create and use a personal access token for making API requests
- ✅ Set up input/output options to customize the responses received from your API requests
- ✅ Build and a run a local script to:
GETa user to verify the personal access tokenGETportfolio items, which may include both projects and portfolios- Parse status updates from projects and export them to a CSV
App structure
Under the hood, the application uses vanilla JavaScript, HTML, and CSS. No third party libraries or frameworks are used in this application. The applications consists of just three files:
| File | Description |
|---|---|
index.js | Entry point of the application. The single runExport() function is run when the user clicks the Generate CSV button on the main index.html page. This script also contains numerous helper (i.e., utility) functions and variables, defined outside runExport(). |
index.html | The user interface of the application. Users submit their personal access token and the identifier (i.e., GID) of a portfolio to generate a CSV of project status updates in that portfolio |
style.css | Basic stylesheet for the application |
You are also welcome to skip immediately to the complete application code on GitHub. The end of this tutorial also includes the complete application code for review.
Starter code
This tutorial will guide you through building the complete application step-by-step. To help you get started more quickly (and to help focus on simply building the business logic for the application), we've provided the basic structure and styles for the user interface, which presents a web page for users to enter their personal access token and portfolio GID.
<!DOCTYPE html>
<html>
  <head>
    <link rel="stylesheet" href="./style.css" />
    <link
      rel="stylesheet"
      href="https://cdn.jsdelivr.net/npm/[email protected]/dist/css/bootstrap.min.css"
      integrity="sha384-ggOyR0iXCbMQv3Xipma34MD+dH/1fQ784/j6cY/iJTQUOhcWr7x9JvoRxT2MZw1T"
      crossorigin="anonymous"
    />
  </head>
  <body>
    <form onsubmit="return false" id="mainform">
      <h2>Report: Status updates from all projects in a portfolio</h2>
      <details style="display: block">
        <summary><b>Instructions</b></summary>
        <p>
          This tool is used to generate a CSV of project records, from a nested
          portfolio structure in Asana. To use this tool, you'll need a
          <b>personal access token</b> and a
          <b>link to the top-level portfolio</b> you'd like to export. Enter
          these details in the form below, and a CSV file will be generated to
          download. You may be prompted to approve or allow downloads from this
          page. Note that you'll only be able to export projects and portfolios
          that you have access to and can view in Asana.
        </p>
        <p><b>Personal access token</b></p>
        <p>
          For information on how generate your own personal access token,
          navigate to
          <a
            target="_blank"
            href="https://developers.asana.com/docs/personal-access-token"
            >https://developers.asana.com/docs/personal-access-token</a
          >
        </p>
        <p>
          <em>You should treat this token like a password!</em> It allows
          programmatic access to Asana as you, so it is best saved in a password
          manager or private vault. If you have any reason to think a token may
          have been compromised, you can reset it or delete it in the developer
          console. See documentation at:
          <a
            target="_blank"
            href="https://developers.asana.com/docs/developer-console"
            >https://developers.asana.com/docs/developer-console</a
          >
        </p>
        <p><b>Portfolio GID</b></p>
        <p>
          To obtain your portfolio GID, simply navigate to your portfolio in the
          Asana app, and copy the GID from the URL itself. For example, if the
          link is "https://app.asana.com/0/portfolio/12345/list", you should
          copy <em>12345</em>. See documentation at:
          <a
            target="_blank"
            href="https://developers.asana.com/reference/portfolios"
            >https://developers.asana.com/reference/portfolios</a
          >
        </p>
        <br />
      </details>

      <div class="input-block">
        <label for="pat">Personal access token</label>
        <input
          id="pat"
          class="form-control form-rounded"
          autocomplete="current-password"
          name="Personal Access Token"
          type="password"
          required
        />
      </div>

      <div class="input-block">
        <label for="pat">Portfolio GID</label>
        <input
          id="portfolio"
          type="text"
          class="form-control form-rounded"
          required
        />
      </div>

      <div class="input-block">
        <input
          id="submit"
          type="button"
          class="btn btn-primary"
          value="Generate CSV"
          onclick="runExport()"
        />
      </div>

      <div id="errorbox"></div>
    </form>
  </body>
  <script src="./index.js"></script>
  <script src="./utils.js"></script>
</html>
#errorbox {
  background-color: red;
  color: white;
  align-self: center;
  width: auto;
}

body {
  height: 100vh;
  width: 100vw;
  display: flex;
  justify-content: center;
  font-family: -apple-system, BlinkMacSystemFont, "Segoe UI", Roboto,
    Oxygen-Sans, Ubuntu, Cantarell, "Helvetica Neue", sans-serif;
}

#mainform {
  width: 60%;
  margin: auto;
  align-self: center;
  display: flex;
  flex-direction: column;
  justify-content: space-around;

  align-items: flex-start;
}

.input-block {
  display: block;
  min-width: 25%;

  margin-top: 1rem;
  margin-bottom: 1rem;
}

input {
  width: 100%;
  display: block;
}

.form-rounded {
  border-radius: 10px;
}

.button {
  display: block;
  font-size: 14px;
  width: 100%;
  color: #ffffff;
  background-color: #4573d1;
  padding: 10px 18px 10px 18px;
  margin-bottom: 30px;
  border-radius: 10px;
}
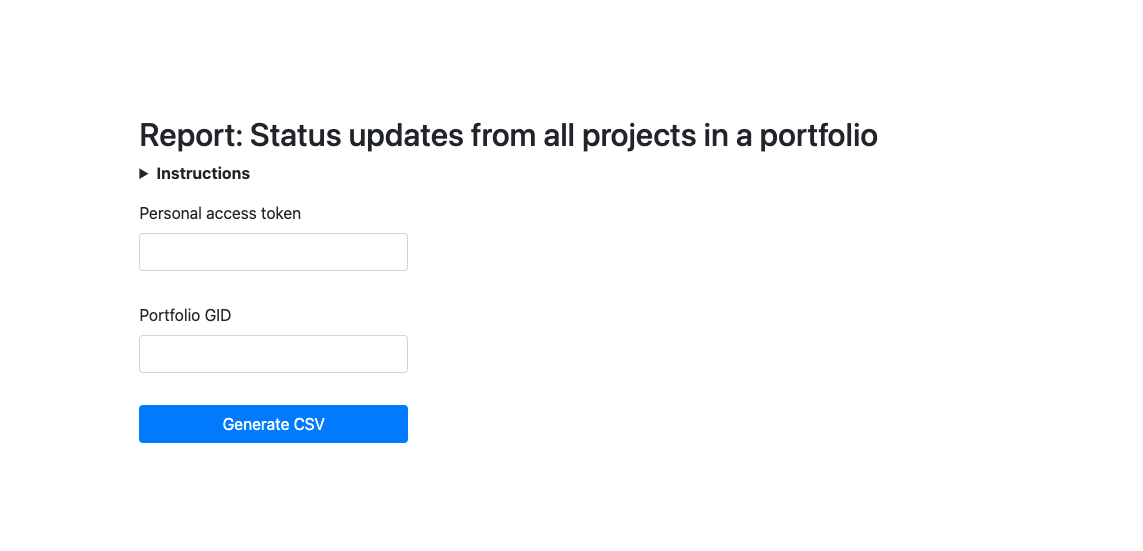
You won't need to know all the inner workings of these files, so feel free to copy and paste these files directly. The two key takeaways to note in the provided index.html file are:
- Two input fields with the IDs
pat(personal access token) andportfolio(portfolio GID). This information is captured and used by the JavaScript code inindex.jsto make requests against Asana's API - A submit button with the ID
submit. When clicked, this button simply invokes therunExport()function
When put together, we have the main user interface for the application:
Through the rest of the tutorial, we'll build the aforementioned runExport() function. runExport() carries out several tasks in sequence:
- Create the boilerplate
- Parse and validate user input
- Extract projects from the portfolio
- Consolidate data
- Generate the CSV and download
- Clean up
1. Create the boilerplate
To begin, we'll first create a new index.js file, then define a single asynchronous runExport() function inside it. Note that unless explicitly noted as a "helper function" (or "helper map"), the code snippets in this tutorial will all be written sequentially into the body of runExport().
const runExport = async () => {

};
As the first line in runExport(), we'll start a timer. This is purely for performance logging as part of the user experience. As additional boilerplate, we'll also temporarily disable the submit button (i.e., Generate CSV) while the function is running, provide the user with a loading indicator, then reset any errors that were previously displayed on the page.
const start = new Date();

const submitBtn = document.getElementById("submit");
submitBtn.disabled = true;
submitBtn.value = "Please wait...";

document.getElementById("errorbox").innerText = "";
2. Parse and validate user input
Recall that the user interface prompts the user to enter both their personal access token and portfolio GID. This information is captured in the elements with ID pat and portfolio, respectively.
We'll first parse the values for this information from the page, then perform some basic validation to check user inputs when the user submits the form.
const pat = document.getElementById("pat").value;
const portfolio_gid = document.getElementById("portfolio").value;

if (pat === "" || portfolio_gid === "") {
  const message = "Please provide input to both fields to continue";
  postError(message);

  return;
}

if (!portfolio_gid || isNaN(portfolio_gid) || portfolio_gid.length < 3) {
  const message =
        "Your portfolio GID is invalid. Please check it and try again";
  postError(message);

  return;
}
In the case of invalid inputs, we'll invoke a postError() helper function that prints a useful error message for the user, then allow the user to resubmit the form with modified inputs. Here is postError(), defined outside the runExport() function.
// Helper function (i.e., defined outside of the main runExport() function)
function postError(message) {
  document.getElementById("errorbox").innerText += message;
  document.getElementById("submit").disabled = false;
  document.getElementById("submit").value = "Generate CSV";

  return;
}
Finally, we'll verify the validity of the personal access token provided by the user. To "test" the token, we'll make an API request to GET /users/{user_gid}, using the special me identifier in place of a user GID, which refers to the authenticated user.
const httpHeaders = { Authorization: `Bearer ${pat}` };

const resp = await fetch(`https://app.asana.com/api/1.0/users/me`, {
  headers: httpHeaders,
});

if (!resp.ok) {
  const message =
        "Your personal access token is invalid. For documentation, see: https://developers.asana.com/docs/personal-access-token";
  postError(message);

  return;
}
After making our GET request to the https://app.asana.com/api/1.0/users/me, we'll display an error on the page and stop execution if we do not receive a 200 OK response back.
3. Extract projects from the portfolio
Now that we know that we can make validated API requests, we'll begin to extract project data from the user-provided portfolio.
Still within runExport(), we'll invoke an asynchronous helper function called extractProjectsFromPortfolio(). This function will return a list of all projects under a specified portfolio (including all projects nested in child portfolios within the top-level parent portfolio):
const projects = await extractProjectsFromPortfolio(
  portfolio_gid,
  httpHeaders
);
Here is the helper function extractProjectsFromPortfolio() defined, which we'll examine step-by-step:
// Helper function (i.e., defined outside of the main runExport() function)
async function extractProjectsFromPortfolio(portfolio_gid, httpHeaders) {
  try {
    let items = await getAsanaPortfolioItems(portfolio_gid, {
      headers: httpHeaders,
    });
    let projects = [];
    let portfolioPromises = [];

    for (let item of items) {
      if (item["resource_type"] === "project") {
        let newItem = { ...flattenProjectFields(item) };
        projects.push(newItem);
      } else if (item["resource_type"] === "portfolio") {
        portfolioPromises.push(
          extractProjectsFromPortfolio(item["gid"], httpHeaders)
        );
      }
    }

    let portfolioResults = await Promise.all(portfolioPromises);
    projects.push(...portfolioResults.flat(3));

    return projects.flat(3);
  } catch (error) {
    console.log(error);
    postError(
      "Something went wrong... inpect the page to view the dev console or wait and try again"
    );
  }
}
Within extractProjectsFromPortfolio(), we first get all items from a portfolio with the help of yet another asynchronous helper function: getAsanaPortfolioItems(). The main purpose of this function is to make an API request to GET /portfolios/{portfolio_gid}/items and return its response: a list of items from the user-provided portfolio. Here is getAsanaPortfolioItems() defined:
// Helper function (i.e., defined outside of the main runExport() function)
async function getAsanaPortfolioItems(portfolio_gid, headers) {
  const maxRetries = 10;
  let retryCounter = 0;

  while (retryCounter < maxRetries) {
    const resp = await fetch(
      `https://app.asana.com/api/1.0/portfolios/${portfolio_gid}/items?opt_fields=name,resource_type,archived,color,created_at,current_status_update.(created_by.name|status_type|created_at|text),notes,modified_at,public,owner.name,start_on,due_on`,
      headers
    );

    if (resp.ok) {
      const results = await resp.json();
      return results.data;
    }

    if (resp.status >= 400 && resp.status != 429 && resp.status != 500) {
      const errorMessage = errorCodeMap[resp.status] || "";
      document.getElementById("errorbox").innerHTML += errorMessage;
      break;
    }

    retryCounter++;
    const wait_time = retryCounter * retryCounter * 120;
    await new Promise((resolve) => setTimeout(resolve, wait_time));
  }

  return [];
}

// Helper map (i.e., defined outside of the main runExport() function)
const errorCodeMap = {
  400: "Something went wrong with the request. Check your portfolio GID. For more information on portfolios, see: https://developers.asana.com/reference/portfolios",
  401: "You are not authorized to get this portfolio. Check that you pasted your personal access token correctly and that your portfolio GID is correct",
  403: "You are not authorized to get this portfolio. Check that you pasted your personal access token correctly and that your portfolio GID is correct",
  404: "We couldn't find that portfolio. Check your portfolio GID. For more information on portfolios, see: https://developers.asana.com/reference/portfolios",
};
In making the API request, getAsanaPortfolioItems() is set up to work within the rate limits of Asana's API. Additionally, note that in our GET request to https://app.asana.com/api/1.0/portfolios/${portfolio_gid}/items, we also appended opt_fields to customize the exact properties we want returned in the response (see input/output options for more details on usage).
Continuing with the execution of extractProjectsFromPortfolio() -- we'll next take either one out of two different courses of action depending on what the item in the portfolio is. If the item is a project, we format the standard project fields using flattenProjectFields(), then add it to our list of projects
Below are additional helper functions and maps to help us accomplish this formatting:
// Helper function (i.e., defined outside of the main runExport() function)
function flattenProjectFields(project) {
  const {
    gid = "",
    name = "",
    current_status_update,
    start_on,
    due_on,
  } = project;

  const newProject = {
    "Project ID": escapeText(gid),
    Name: escapeText(name),
    Link: escapeText(`https://app.asana.com/0/${gid}/list`),
    "Status update": escapeText(current_status_update?.text || ""),
    "Status color": getStatusColor(current_status_update),
    "Status created by": escapeText(
      current_status_update?.created_by?.name || ""
    ),
    "Status created at": current_status_update?.created_at || "",
    "Start on": start_on || "",
    "Due on": due_on || "",
  };

  return newProject;
}

// Helper function (i.e., defined outside of the main runExport() function)
function escapeText(text) {
  const newText = text.replace(/"/g, '""');
  return `"${newText}"`;
}

// Helper function (i.e., defined outside of the main runExport() function)
function getStatusColor(current_status_update) {
  const { status_type } = current_status_update || {};
  return status_type in statusTextMap ? statusTextMap[status_type] : "";
}

// Helper map (i.e., defined outside of the main runExport() function)
const statusTextMap = {
  on_track: "green",
  at_risk: "yellow",
  off_track: "red",
  on_hold: "blue",
  complete: "complete",
};
On the other hand, if the item is a portfolio, we continue to run the extractProjectsFromPortfolio() recursively (i.e., until the most deeply-nested project is reached). Then, after any and all nested portfolio responses return, we add those projects to the list (i.e., projects) and flatten any nested arrays within.
After invoking extractProjectsFromPortfolio() within the body of runExport(), the function returns an array of objects, each representing a project. However, this list may contain duplicate projects; that is, projects that may belong to multiple portfolios. In the next step, we'll implement some consolidation to account for any duplicate data.
4. Consolidate data
To consolidating our data, we'll first create:
- A consolidated set of all headers (i.e., titles for each column):
headerSet - A consolidated map of all projects:
finalProjects
As we iterate through projects, we'll only include the project if we haven't already mapped it (i.e., if the project ID does not exist as a key in finalProjects). During this iteration, we'll also add the necessary properties to our set of headers (e.g., "Project ID", "Project name", etc.).
const headerSet = new Set();
const finalProjects = {};


for (const project of projects) {
  const projectId = project["Project ID"];

  if (!(projectId in finalProjects)) {
    finalProjects[projectId] = { ...project };
  }

  for (const property in project) {
    headerSet.add(property);
  }
}
Finally, we'll make some quick conversions to created consolidated lists (i.e., arrays) from our original map and set.
const finalProjectList = Object.values(finalProjects);

const csvHeaders = [...headerSet];
In the above snippet, finalProjectList is an array of objects, each representing a project, while csvHeaders is an array of strings, each representing a header.
With these final data structures, we'll now be able to pass these data as lists into our exporting helper function.
5. Generate the CSV and download
Next in our runExport() function, we'll export the data above to CSV, then allow the user to download it. Arguments will include our list of CSV headers and the consolidated list of projects:
exportToCsv(csvHeaders, finalProjectList);Here is our custom exportToCsv() helper function defined:
// Helper function (i.e., defined outside of the main runExport() function)
function exportToCsv(headers, projects) {
  let csvContent = "";

  // Write the header row
  csvContent += headers.map((h) => `"${h}"`).join(",") + "\n";

  // Map each project as a new row
  let projectsCsvData = projects
    .map((project) => headers.map((key) => project[key] || "").join(","))
    .join("\n");

  // Join the content to the headers
  csvContent += projectsCsvData;

  // Create the file with the data
  const blob = new Blob([csvContent], { type: "text/csv" });
  const href = window.URL.createObjectURL(blob);

  // Force download
  const link = document.createElement("a");
  link.setAttribute("href", href);
  link.setAttribute("download", "project_statuses.csv");
  document.body.appendChild(link);
  link.click();
  window.URL.revokeObjectURL(href);
}
6. Clean up
Once the CSV has been downloaded for the user, we'll simply perform some "clean-up" as part of the user experience. We'll log and display the finish time to the user, then reset the submit button to allow for another form submission.
const duration = new Date() - start;
alert(`Finished in ${duration} ms`);

submitBtn.disabled = false;
submitBtn.value = "Generate CSV";

return false;
At this point, the app is complete!
Data accessIt is important to note that the accuracy of this application is limited by the portfolios and projects that the authenticated user (i.e., through the personal access token) has access to.
For a complete representation of the data in a portfolio, use a Service Account to perform such audits.
Complete code
To ensure completeness, feel free to review the finished application code in its entirety through this Recipe:
Conclusion
Once finished, you should have a basic application that reads a portfolio, extracts all projects within it, and exports their status updates to a portable and easily readable CSV file. Feel free to customize the code to fit your specific requirements. You can modify error messages, adjust API requests, or handle exported data differently.
Extending this application
As we mentioned earlier in this guide, you may use this application as a starting point for creating more complex data reports, such as:
- Task-level reporting for projects in the portfolio
- An export of additional project metadata (e.g., custom fields)
- An automated, aggregate status update on the parent portfolio
- A direct integration into your reporting tool of choice
You can also enhance and extend your existing application by optimizing the authentication method, using an official client library to make requests against the API, or even building your app directly into Asana's user interface by displaying customized widgets and forms.
What's next
In addition to reporting on portfolio items, you can use the Asana API to report on other data in your Asana instance (e.g., analysis of analysis of custom fields). We also recommend visiting Asana's app directory to see the tools that other organizations (as well as the general community) have built. Beyond that, visit the API reference for a comprehensive reference for objects, schemas, and endpoints available in the API.
Updated 11 months ago