
Incoming web requests
Beta featureThis feature is currently in beta and is expected to change. This API is to be used for testing only as an advance preview into the final product. During this period, we recommend against using the API in production apps.
Business and Enterprise featureIncoming web requests are available to users of Asana Business and Asana Enterprise.
Note that admins in Enterprise domains can turn off this feature for their domain in the admin console.
Overview
Asana Rules allow you to easily streamline routine tasks and establish workflows. With rules, you can create a trigger that activates the rule, followed by an action that is performed automatically. For example, a rule can be created to automatically assign a task (action) when a due date is set (trigger).
To support cross-application workflows, we offer incoming web requests: a generic trigger that helps quickly connect a third-party application to Asana through rules. By making a simple web request to Asana, you can use incoming web requests to trigger automations in the Asana product. This way, you can easily set up workflows outside of Asana to perform operations on data within Asana.
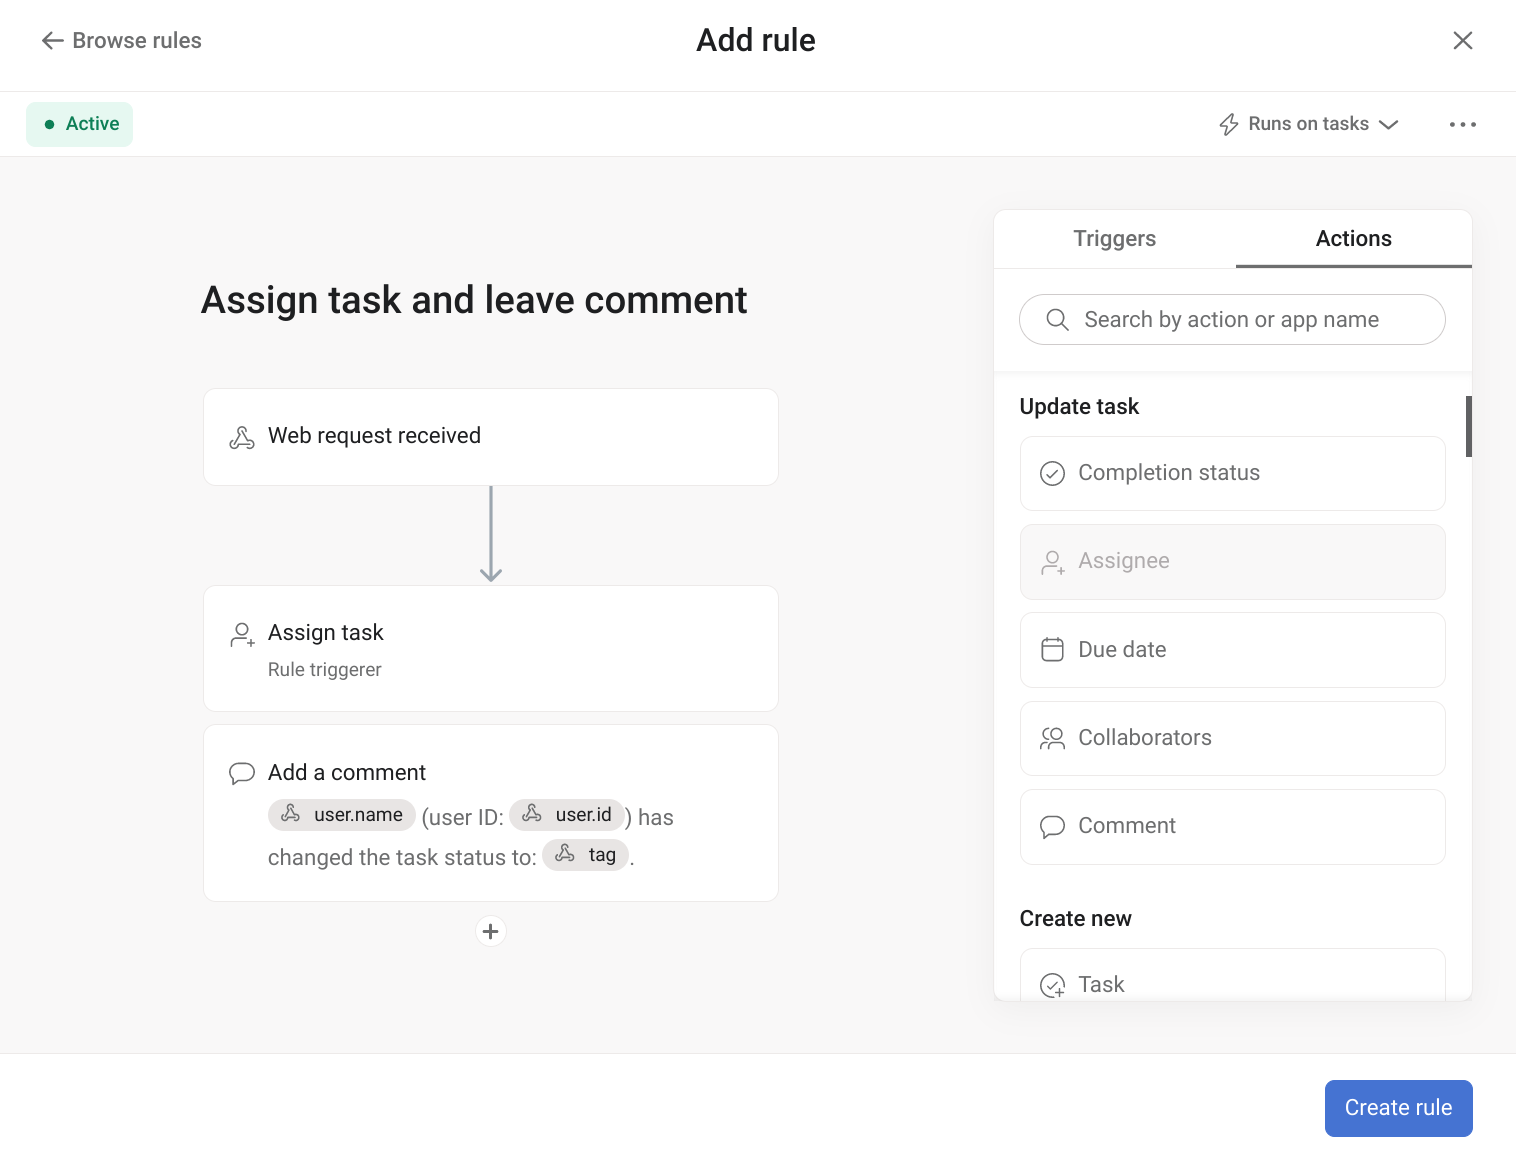
In the above example, you can set up a third-party application to make a web request to Asana. Then, when the request is received, any number of user-defined automations can be run. Here: (1) A task will be automatically assigned to the user who triggered the web request, and (2) A comment, containing data from the request body, will also be automatically created on that task.
Example use cases
Incoming web requests allow you to build a low-code integration using Asana rules. For example:
- When a Salesforce record reaches a particular stage (e.g., "Demo for client"), use incoming web requests to automatically create a task in Asana. This rule can be coupled with other rules (e.g., when a task is created, convert it to a project).
- When a Zendesk ticket is closed, use incoming web requests to automatically mark a corresponding task in Asana as "Complete."
After following this tutorial, you will be able to using incoming web request triggers to build similar automations.
Prerequisites
This guide leverages features that are only available in Asana Business and Asana Enterprise workspaces. Note that if your workspace is of a different tier, you may still be able to test these features by requesting a developer sandbox.
Additionally, this guide requires operations to be performed by an authorized user. Before making any API requests through this guide, we recommend creating a personal access token (if you do not already have one).
API reference
Web request URL
Setting up a Web request received trigger in an Asana rule will automatically generate a web request URL (i.e., API endpoint).
| HTTP method | API endpoint | Asana behavior |
|---|---|---|
POST | /rule_triggers/:trigger_identifier/run | Requests made to this API endpoint will trigger an automation via a rule. |
Similar to other Asana API endpoints, this web request URL is relative to the same base URL. Additionally, note that requests to this API endpoint must include valid request headers:
Authorization: Bearer <your_access_token_here>Content-Type: application/json
Path parameters
| Property | Type | Description |
|---|---|---|
trigger_identifier | string | The ID of the incoming web request trigger. This value is a path parameter that is automatically generated for the API endpoint. |
Body parameters
The JSON request body (i.e., payload) is a single data object with the following properties:
| Property | Type | Description |
|---|---|---|
action_data | object | The dynamic keys and values of the request. These fields are intended to be used in the action for the rule associated with this trigger. |
resource (required) | string | The ID of the resource. For the duration of the beta, this resource is always a task, and this task must exist in the project in which the rule is created. |
Note that while the action_data object has no strict schema (i.e., key names are user-defined), the following limits are enforced:
- A maximum of 10 nesting layers
- A maximum of 100 key-value pairs
- A maximum payload size of 256 kb
Example request body
The following is an example JSON request body when making a POST request to the API endpoint above.
{
  "data": {
    "resource": "TASK_ID",
    "action_data": {
      "user": {
        "id": "12345",
        "name": "Ross"
      },
      "description": {
        "body": "{{issue.description}}"
      },
      "status": "In progress"
    }
  }
}
Responses
Requests to the API endpoint can return the following HTTP response status codes:
| Status | Description |
|---|---|
200 | The payload is saved, and the rule may or may not have run. |
400 | Invalid payload format. |
401 | A valid access token was not provided. |
404 | The trigger or task was not found. |
429 | This indicates the user has sent too many requests in a given amount of time (see limits). |
500 | Internal server error. |
See also errors below for additional details and troubleshooting tips.
Tutorial
In the following tutorial, you'll build a rule that, when triggered by an incoming web request, automatically executes a defined set of actions. The build process covers:
- Setting up the trigger: creating a rule, adding a Web request received trigger, and saving any action data as a payload
- Setting up the action: adding automated actions to perform when the rule is activated
- Testing the automation: activating the rule to perform the automated actions
1. Set up the trigger
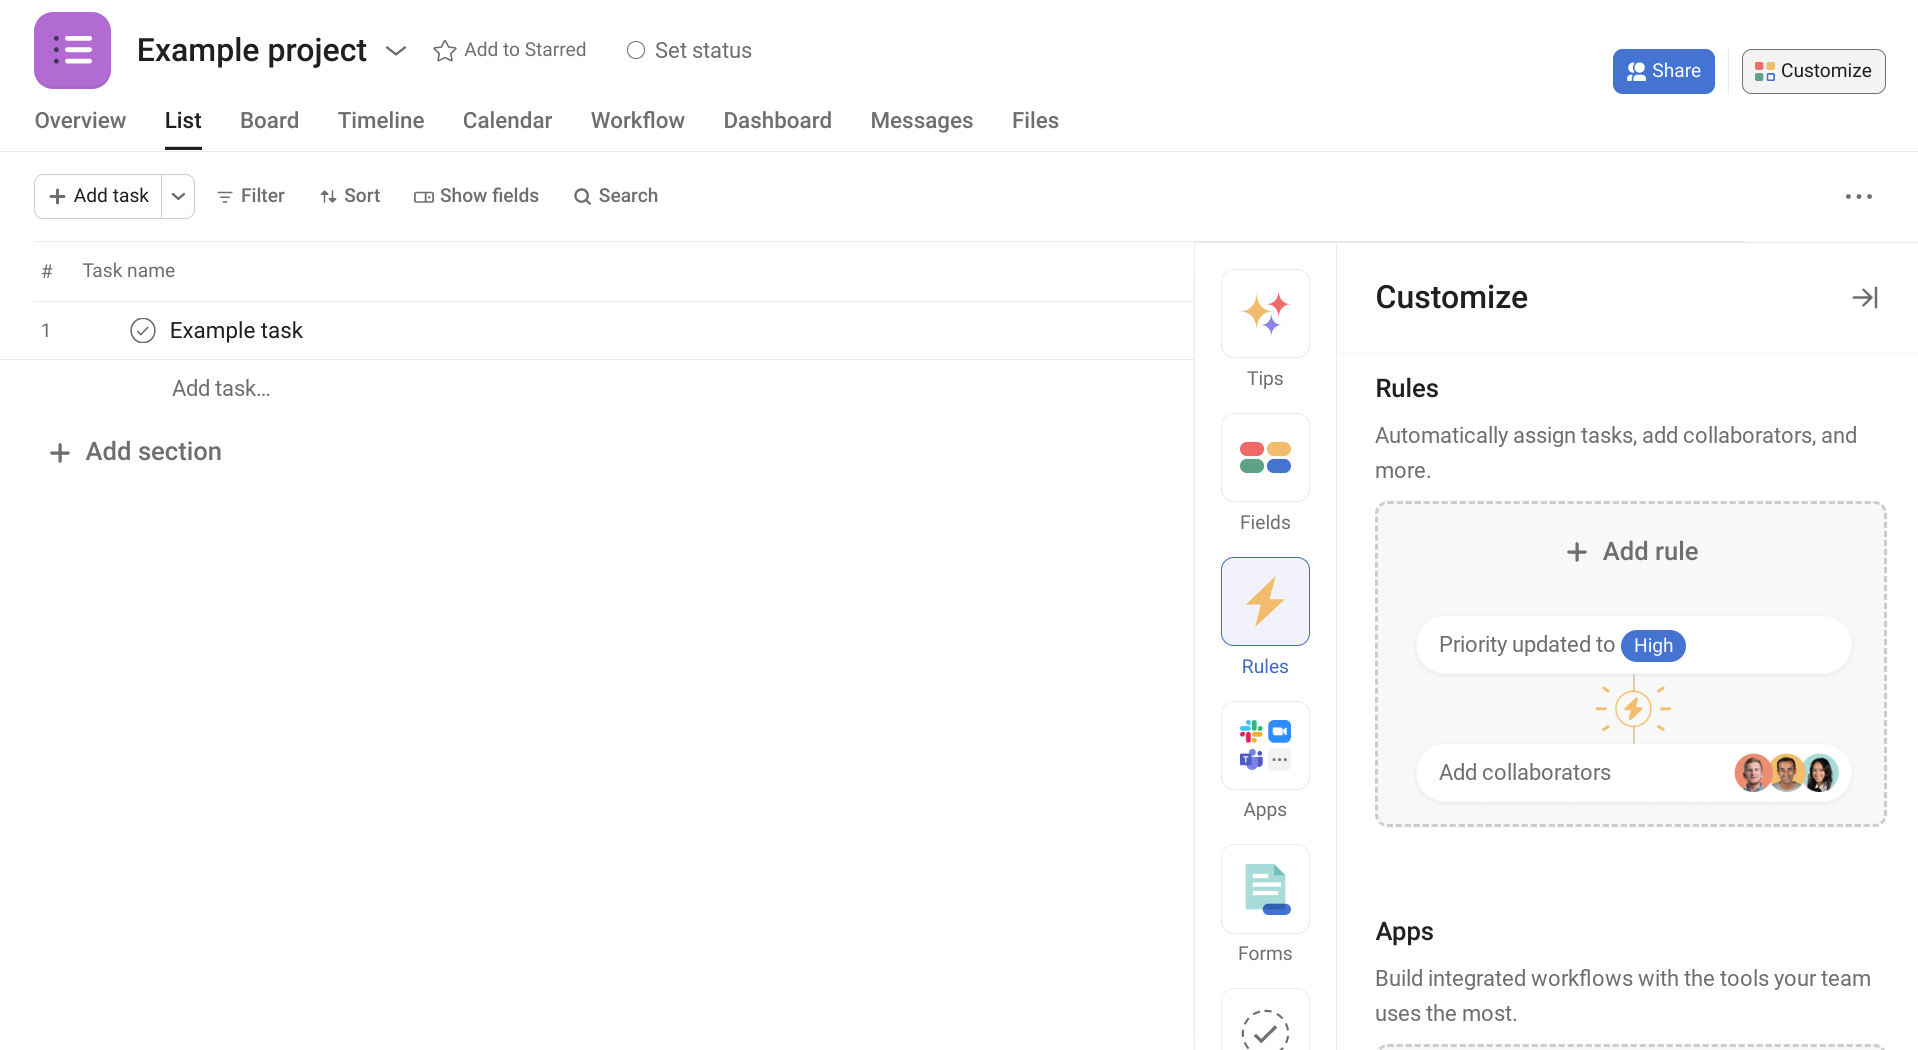
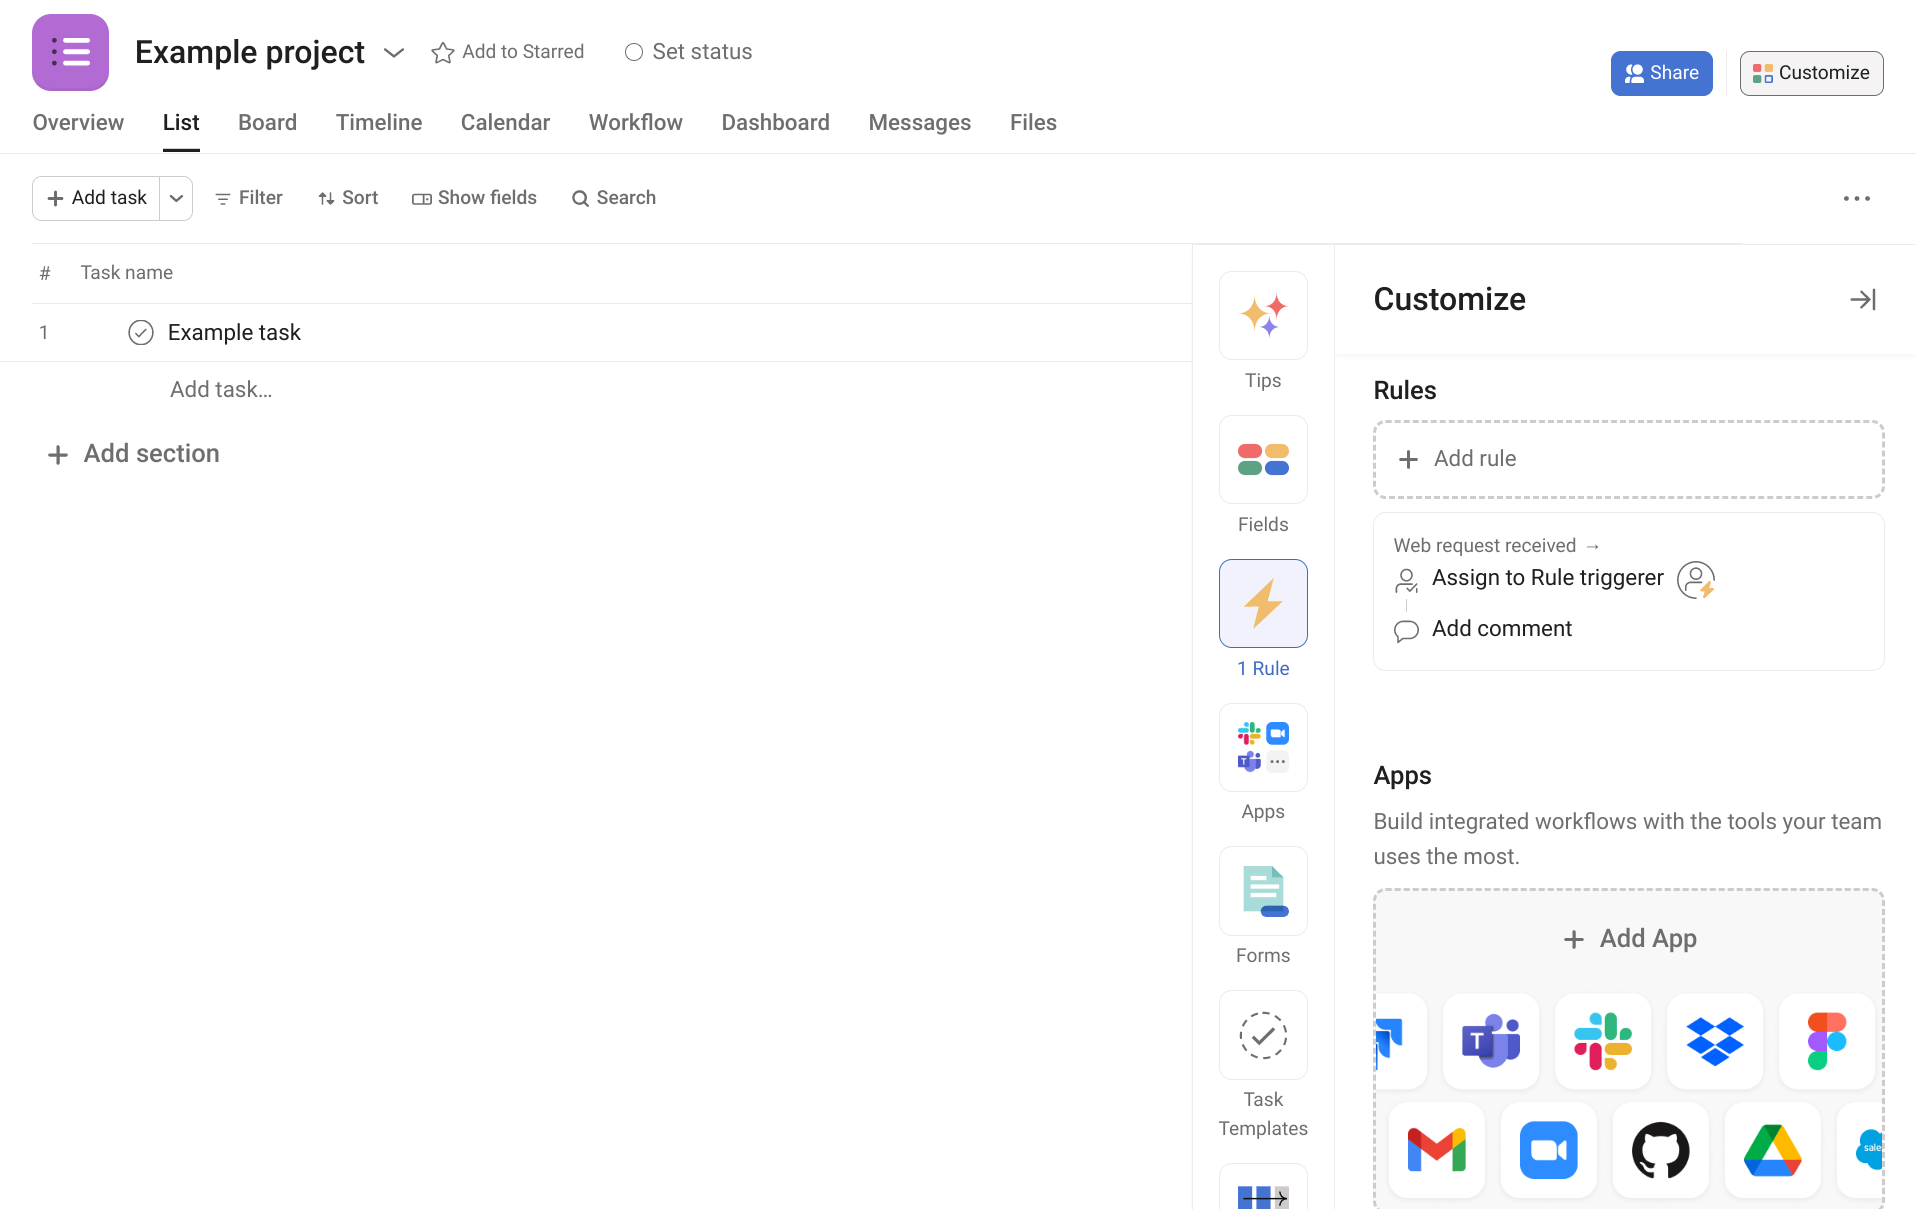
In a project with at at least one existing task, select Customize on the top right corner, then navigate to Rules and select + Add rule.
On the next screen, select Create custom rule.

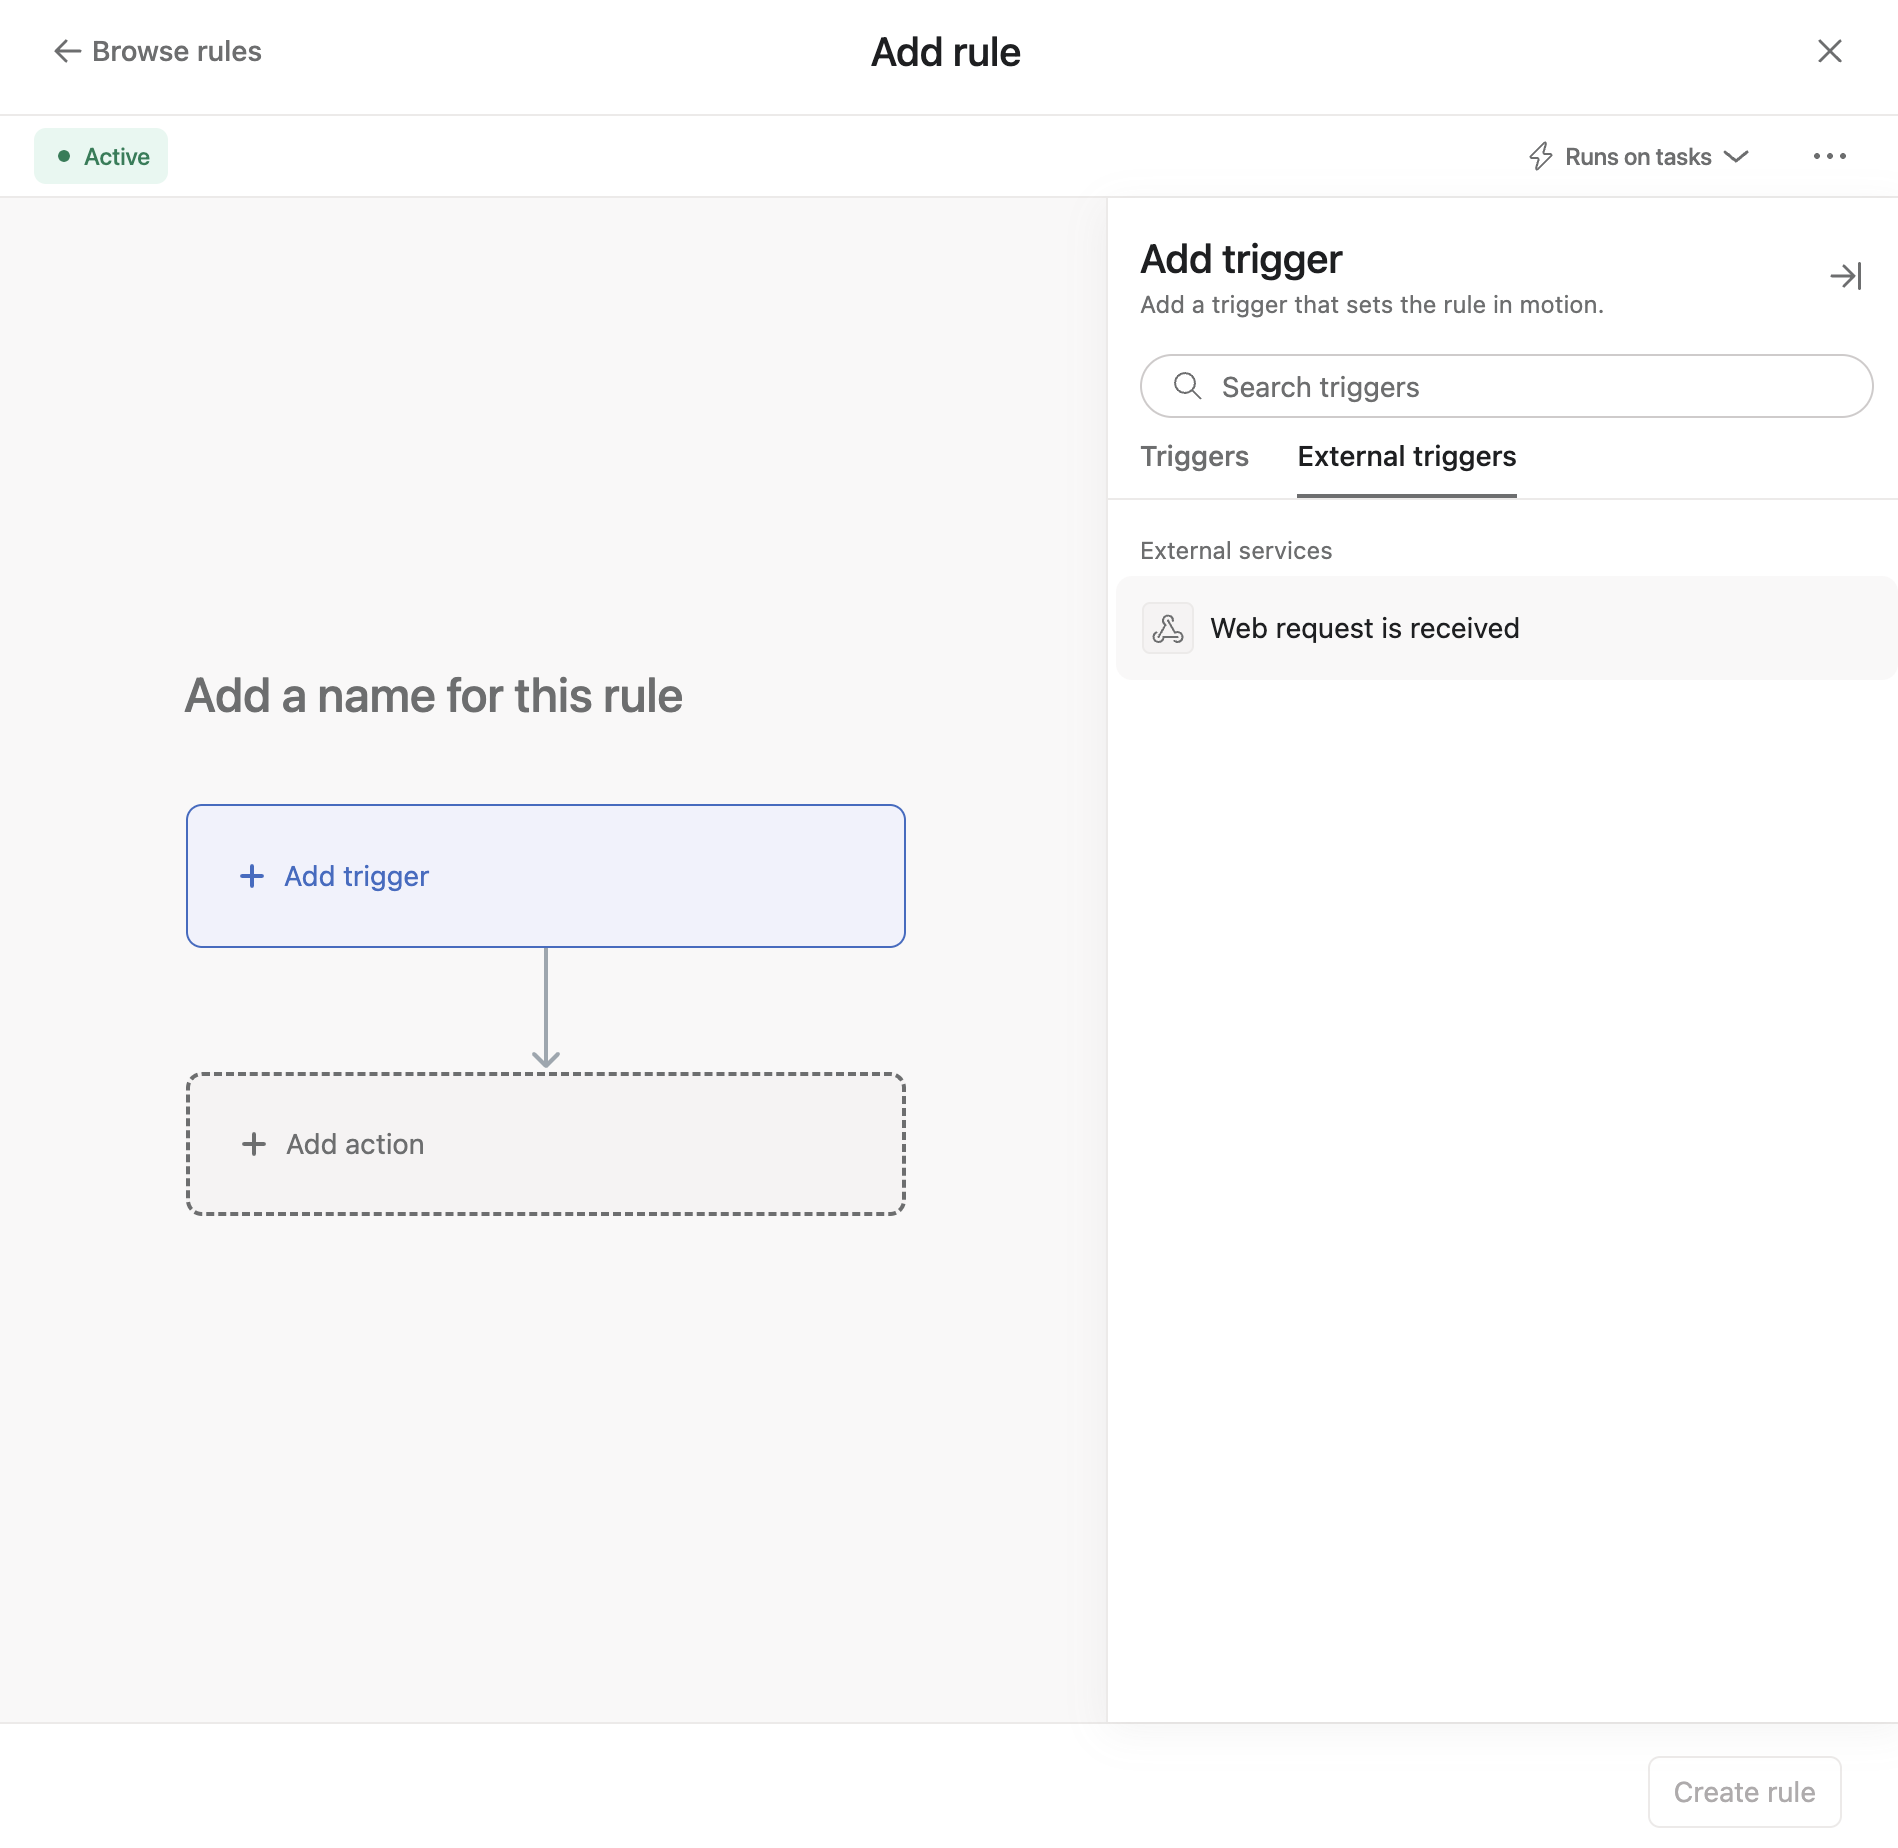
Next, choose designated trigger. Because we want our automation to run following a web request, navigate to the External triggers tab and select Web request is received.
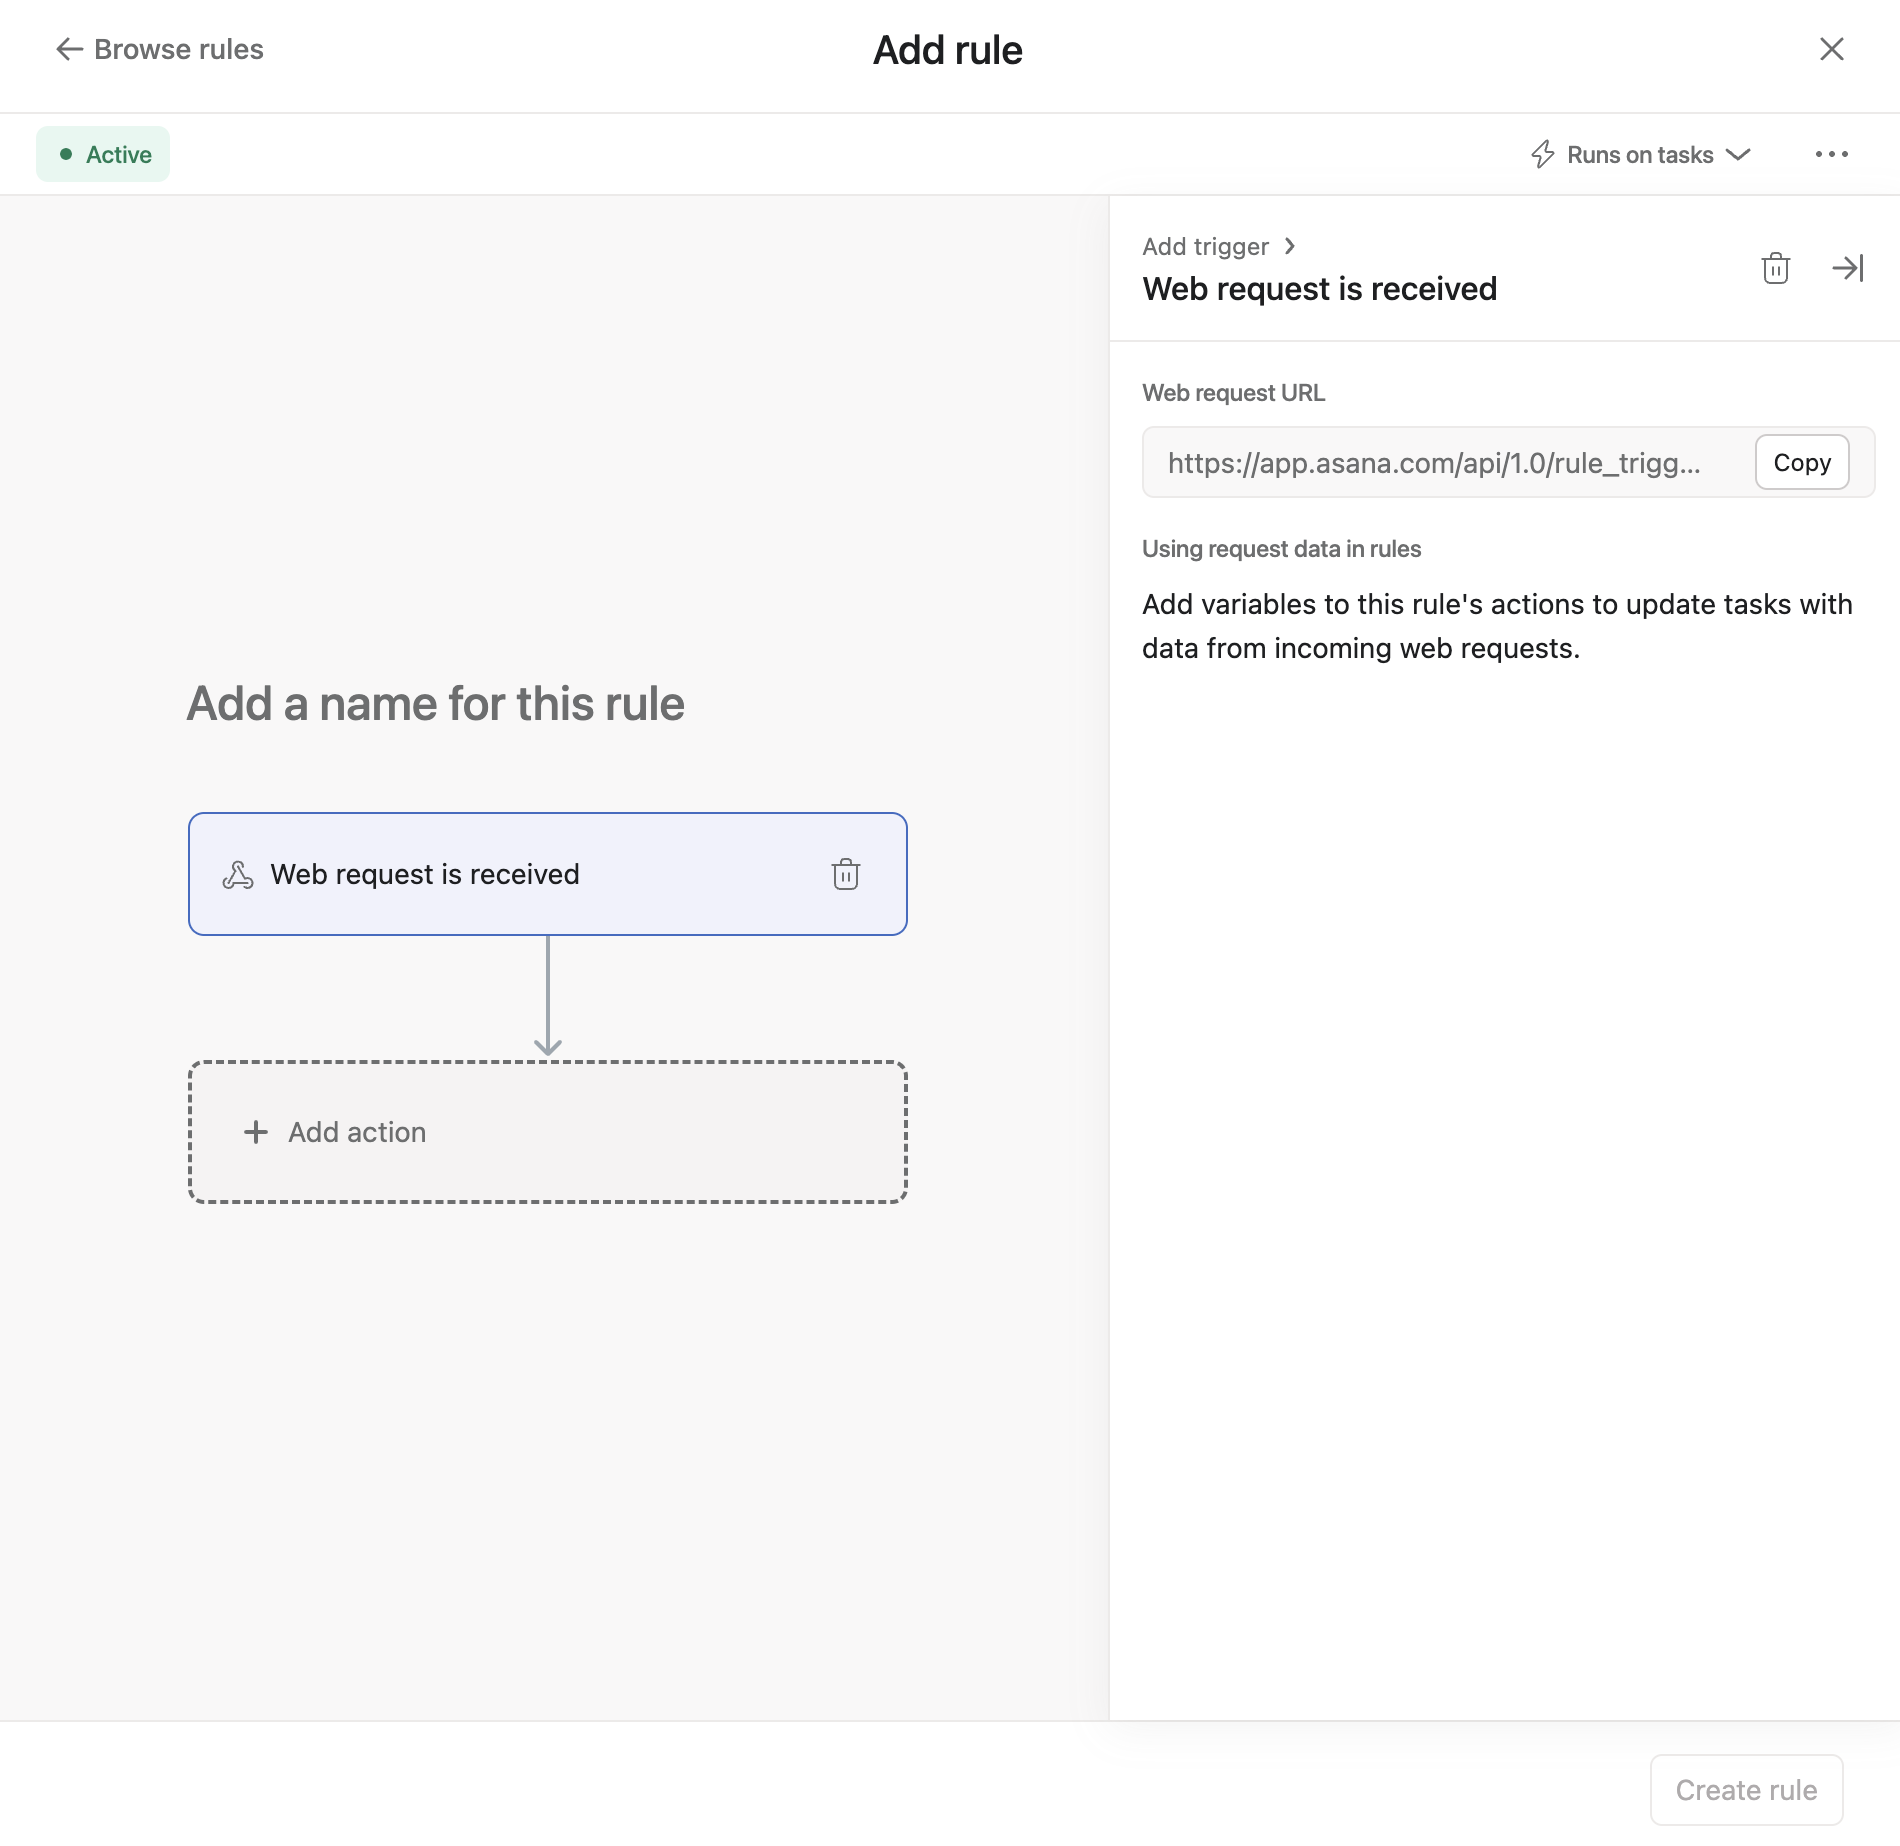
Upon choosing this trigger, a web request URL (i.e., API endpoint) will be automatically generated for you. You can send a request to this URL at any time. Once a request is made, any request data sent with the request can be used as variables in this rule’s actions.
Let's say that we first want to create an automation that, when triggered, performs two actions:
- Assigns the task to the user (who triggered the rule)
- Leaves a comment on an existing task in the project. We also want this comment to include data from the web request trigger
At this point (before the rule is created), we can send a POST request to the web request URL with such data. That is, in the data JSON body for this request, we can include an action_data object with the properties we want to send to our Asana instance.
action_data: {
  "key1": <value1>,
  "key2": <value2>,
  "key3": <value3>
  // ... etc.
}
After this request is made, the properties from action_data will be saved to the rule, and will be available for use as dynamic values in actions. Here's an example:
curl -X POST \
  https://app.asana.com/api/1.0/rule_triggers/trigger_identifier/run \
  -H 'authorization: Bearer ACCESS_TOKEN' \
  -H 'cache-control: no-cache' \
  -H 'content-type: application/json' \
  -d '{
   "data": {
      "resource": "TASK_GID",
      "action_data": {
         "user": {
            "id": "12345",
            "name": "Ross"
         },
         "tag": "Escalated"
      }
   }
}'
Note: Replacetrigger_identifier (generated by selecting the Web request received trigger), ACCESS_TOKEN (e.g., your personal access token), and TASK_GID (ID of an existing task) with your own values.
In the above example, we make a POST request to the web request URL. In the request, we include a JSON payload with a single data object. This object includes the following properties (with hard-coded values for the simplicity of this example):
resource: The GID of the task that we want to be automatically assigned to the user. This is the same task on which we also want a comment to be automatically created. Note that for this beta, the value forresourceis always the GID of an existing task in the project where the rule is made.action_data: Fields and values that are intended to be used in the action. In the exampleaction_dataobject above, we simply include auserobject and atagstring.
Provide a resourceDuring this beta period, it is required to provide a task ID (i.e., as the
resource) to trigger the rule, even if the action (e.g., creating a new task) doesn't technically require a task ID.
As part of the response from the POST request, you should see the following 200 OK response, which confirms that the action_data payload was successfully saved to Asana:
{
    "data": {
        "message": "Successfully saved the payload, but the rule was not triggered, because it hasn't be saved yet"
    }
}
2. Set up the action
Once the trigger is set up, we'll add automated actions that will carry out when the rule is run. Recall that for this tutorial, the actions will be both:
- Assigning the task to the user (who triggered the rule)
- Leaving a comment on the task
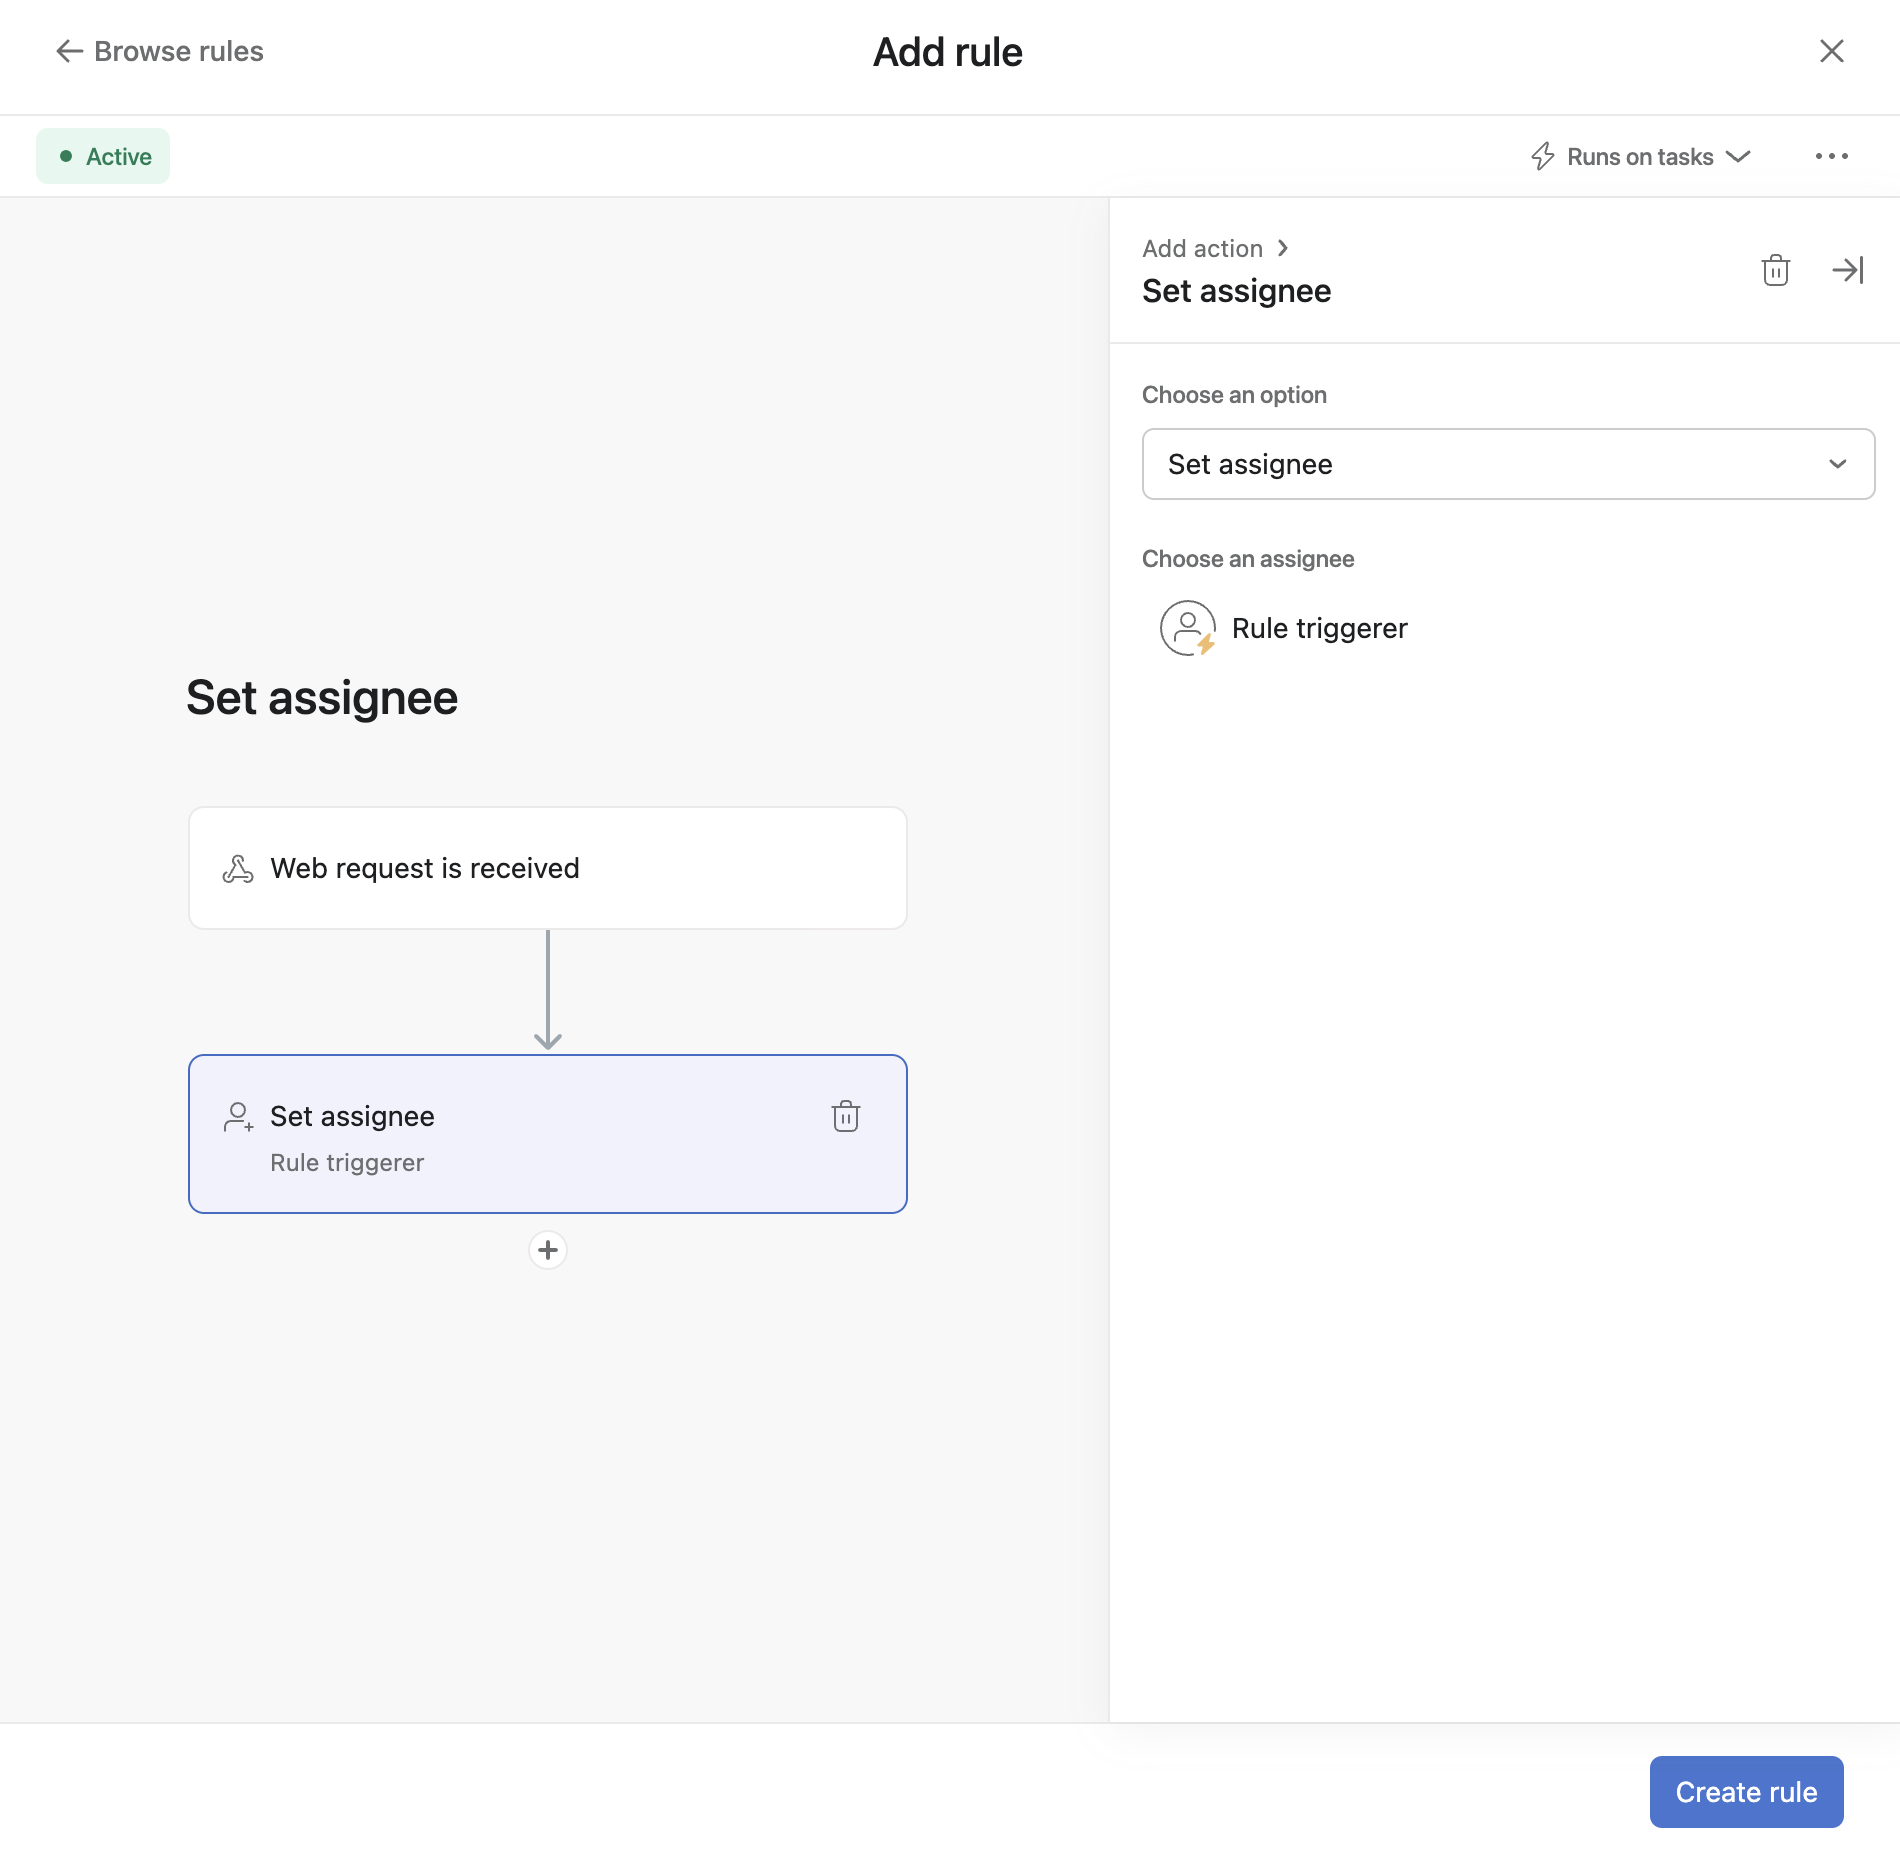
In the Actions tab, navigate to the Task field is... section. Once there, select the Set assignee to... action, choosing Rule triggerer as the assignee. This way, the user who makes the POST request to the URL becomes the assignee.
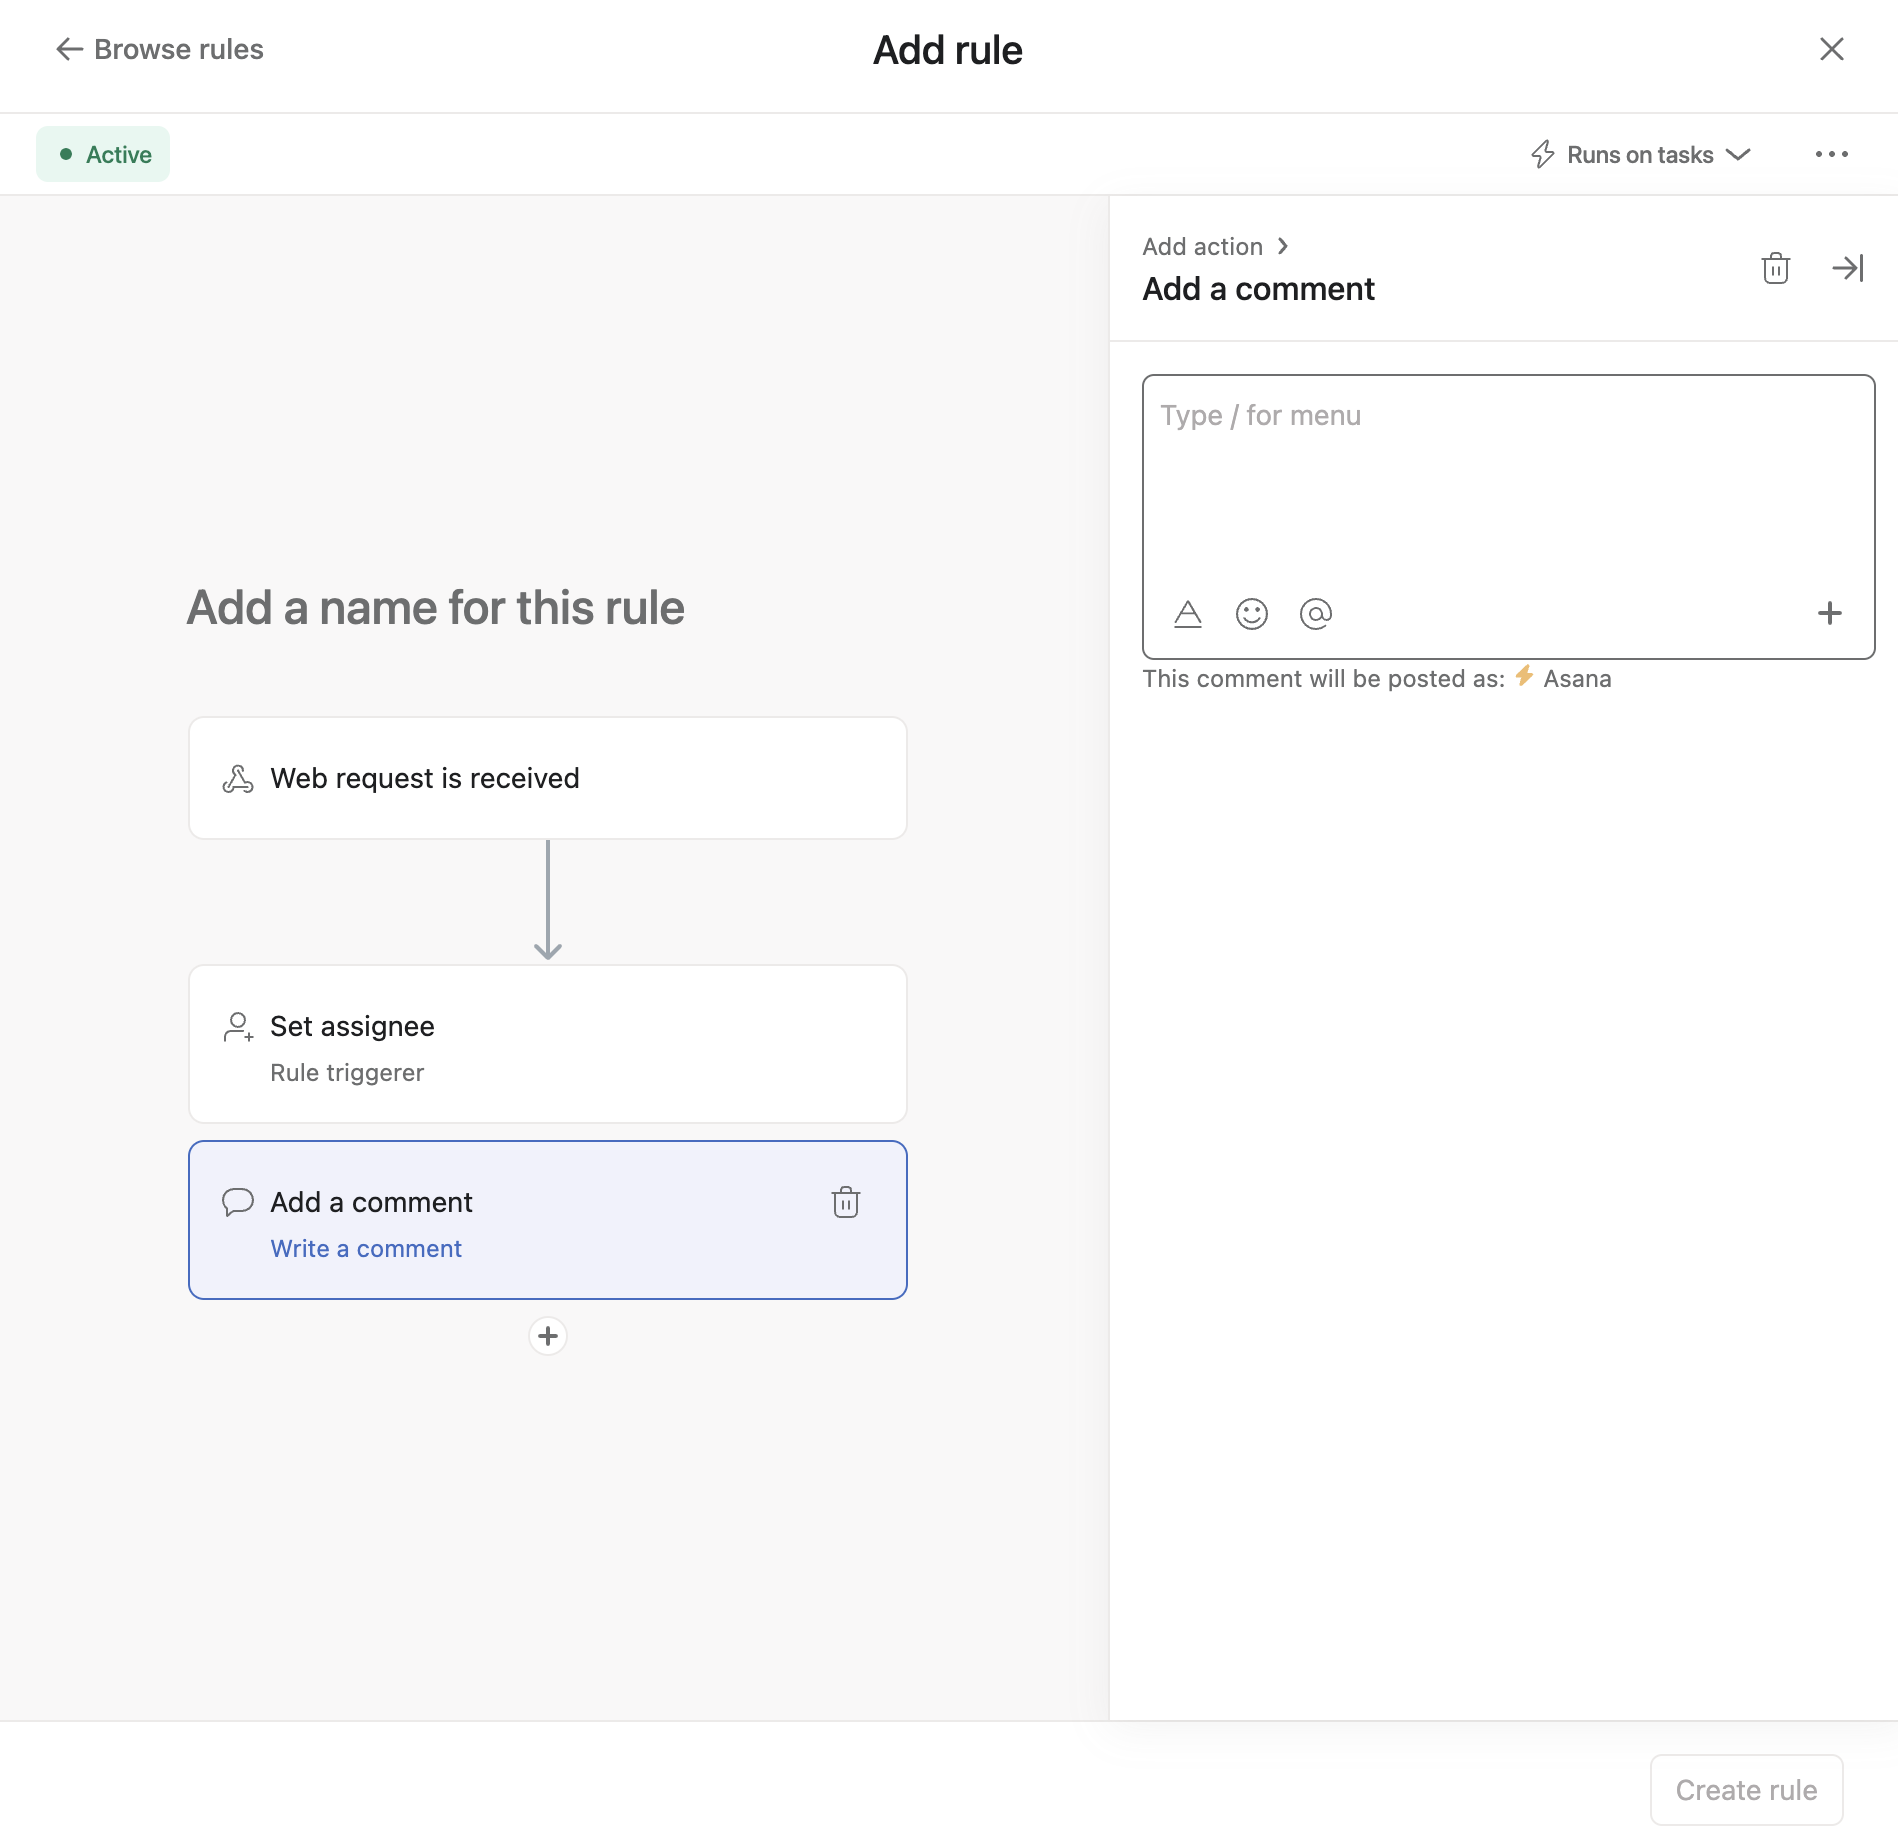
Along with assigning the task, we can also add an action for automatically commenting on that same task. Underneath the Assign task card on the left portion of the screen, select + to add another action. Then, in the Actions tab on the right portion of the screen, navigate to Add to task and select Add comment to add that action.
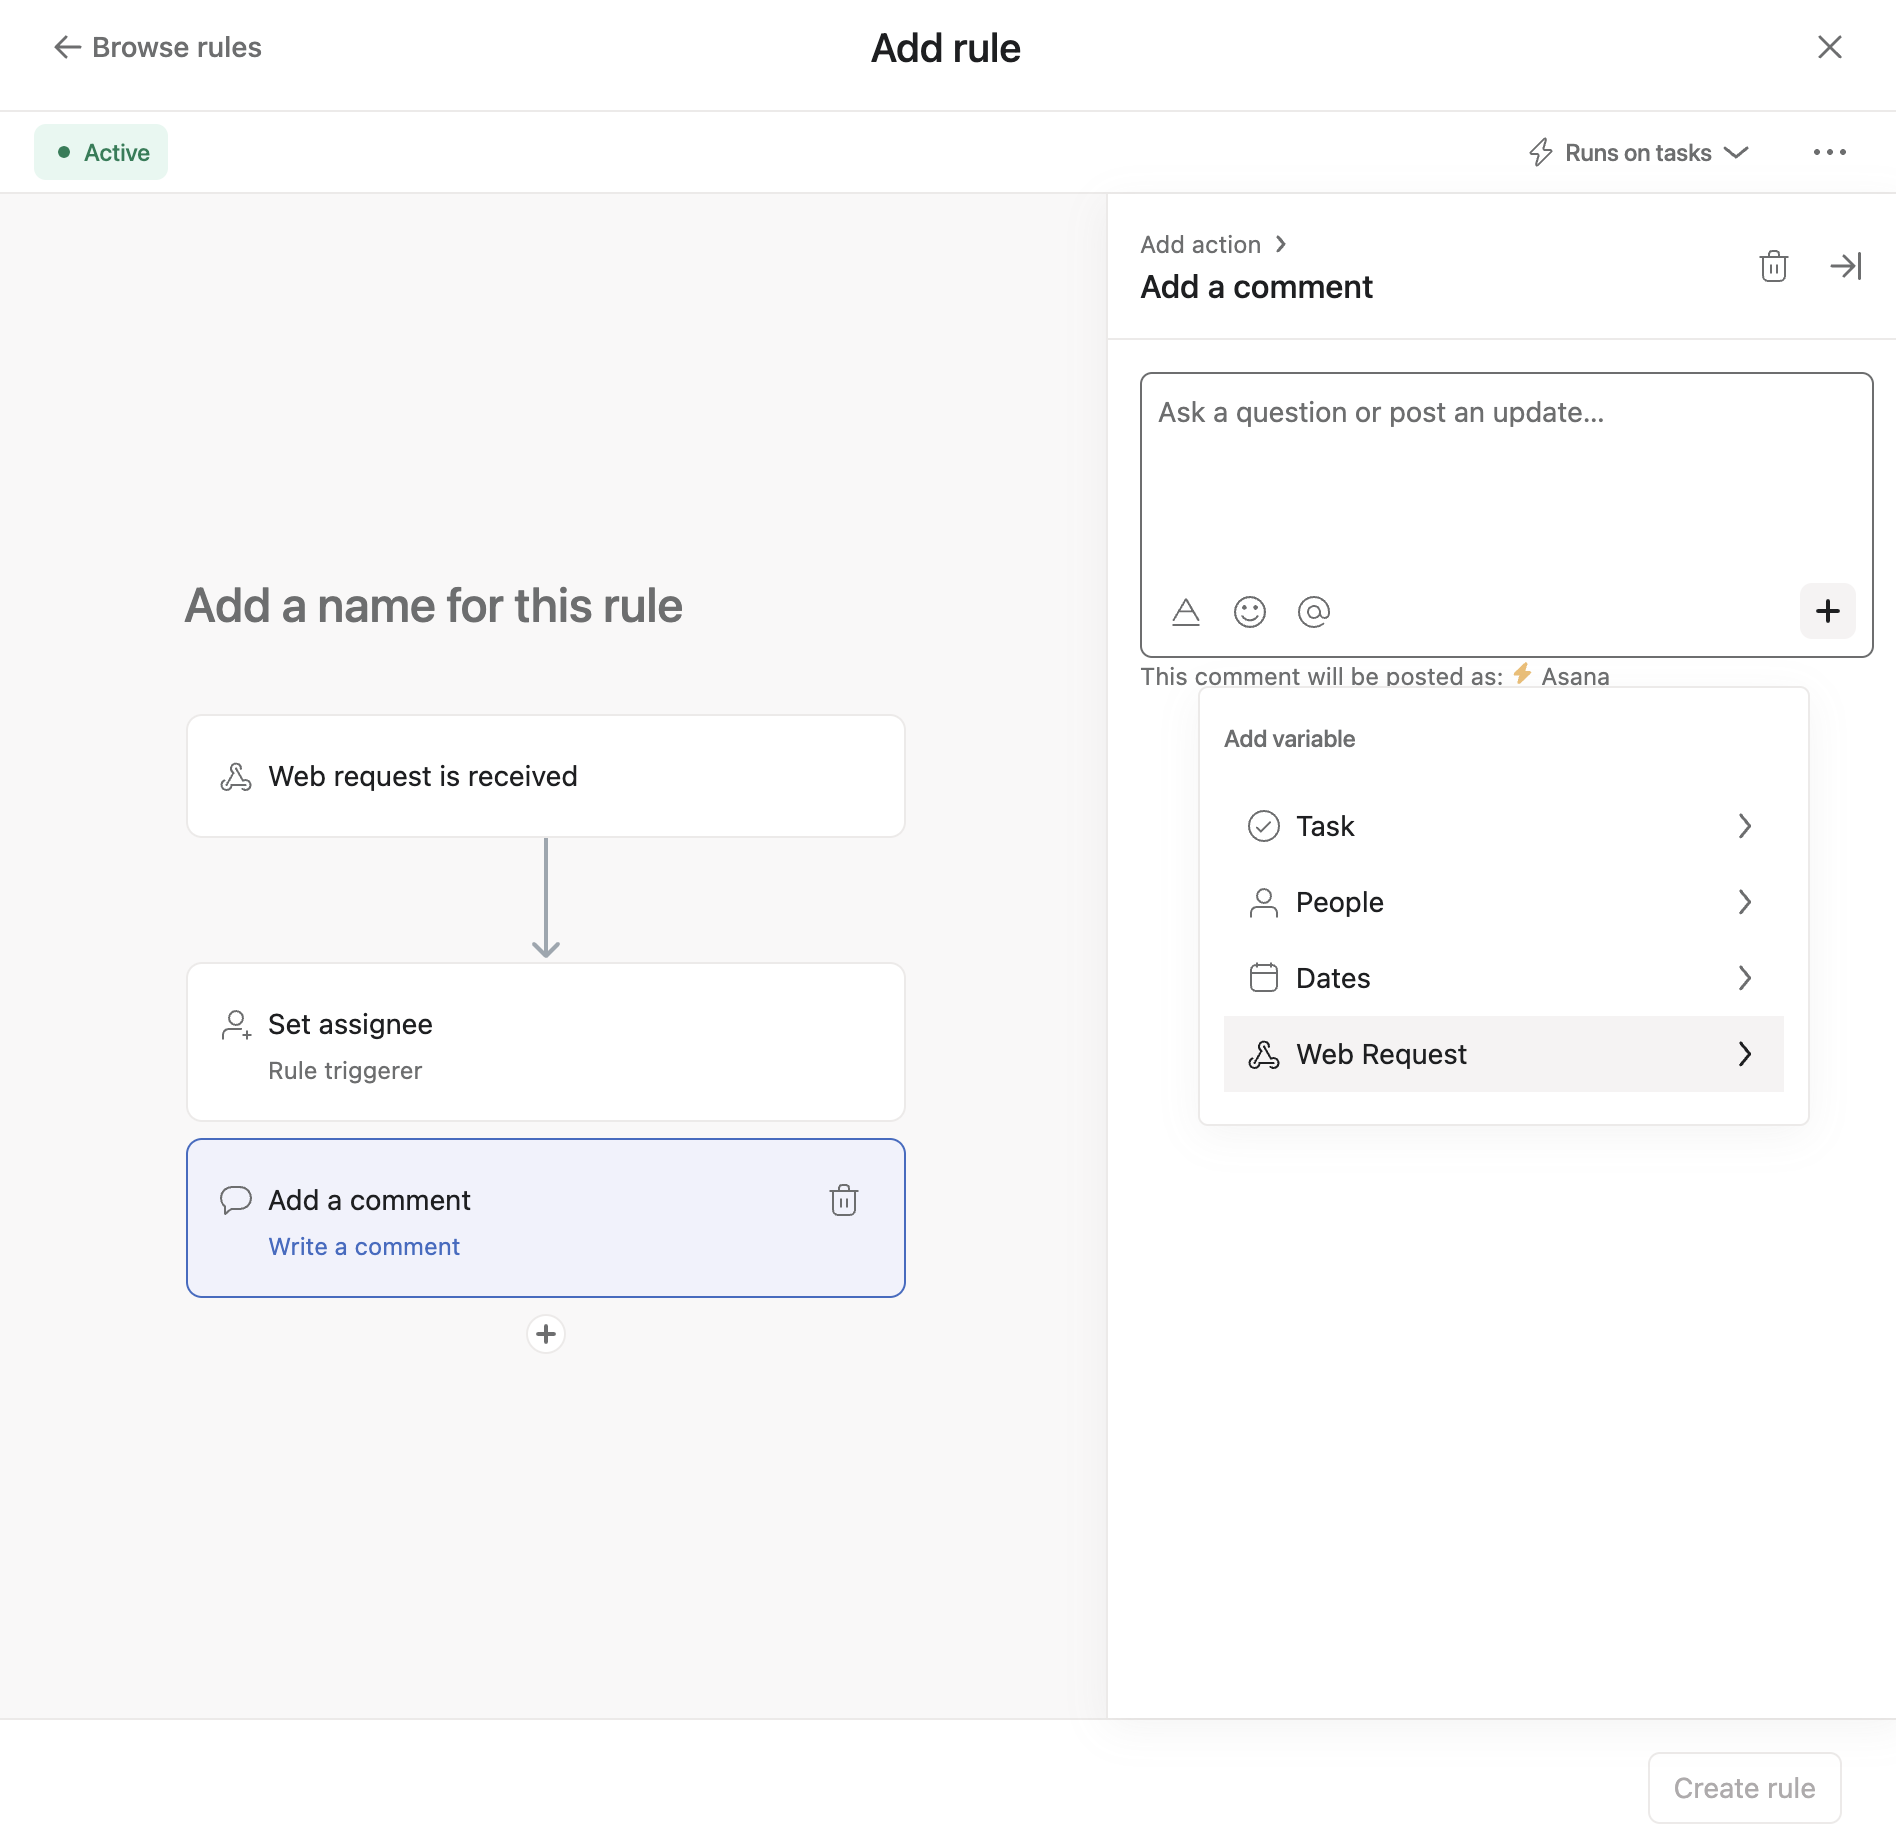
Recall that data from the request payload (i.e., action_data) can be used in actions for our rule. As such, we can integrate this data as variables (i.e., dynamic values) in the comment.
On the bottom right corner of the comment field, select the + icon to add Web Request variables.
Once selected, properties from action_data will be available for use. In our specific use case, this is the entire user object as well as the tag string that we defined and sent earlier (i.e., as the JSON payload).
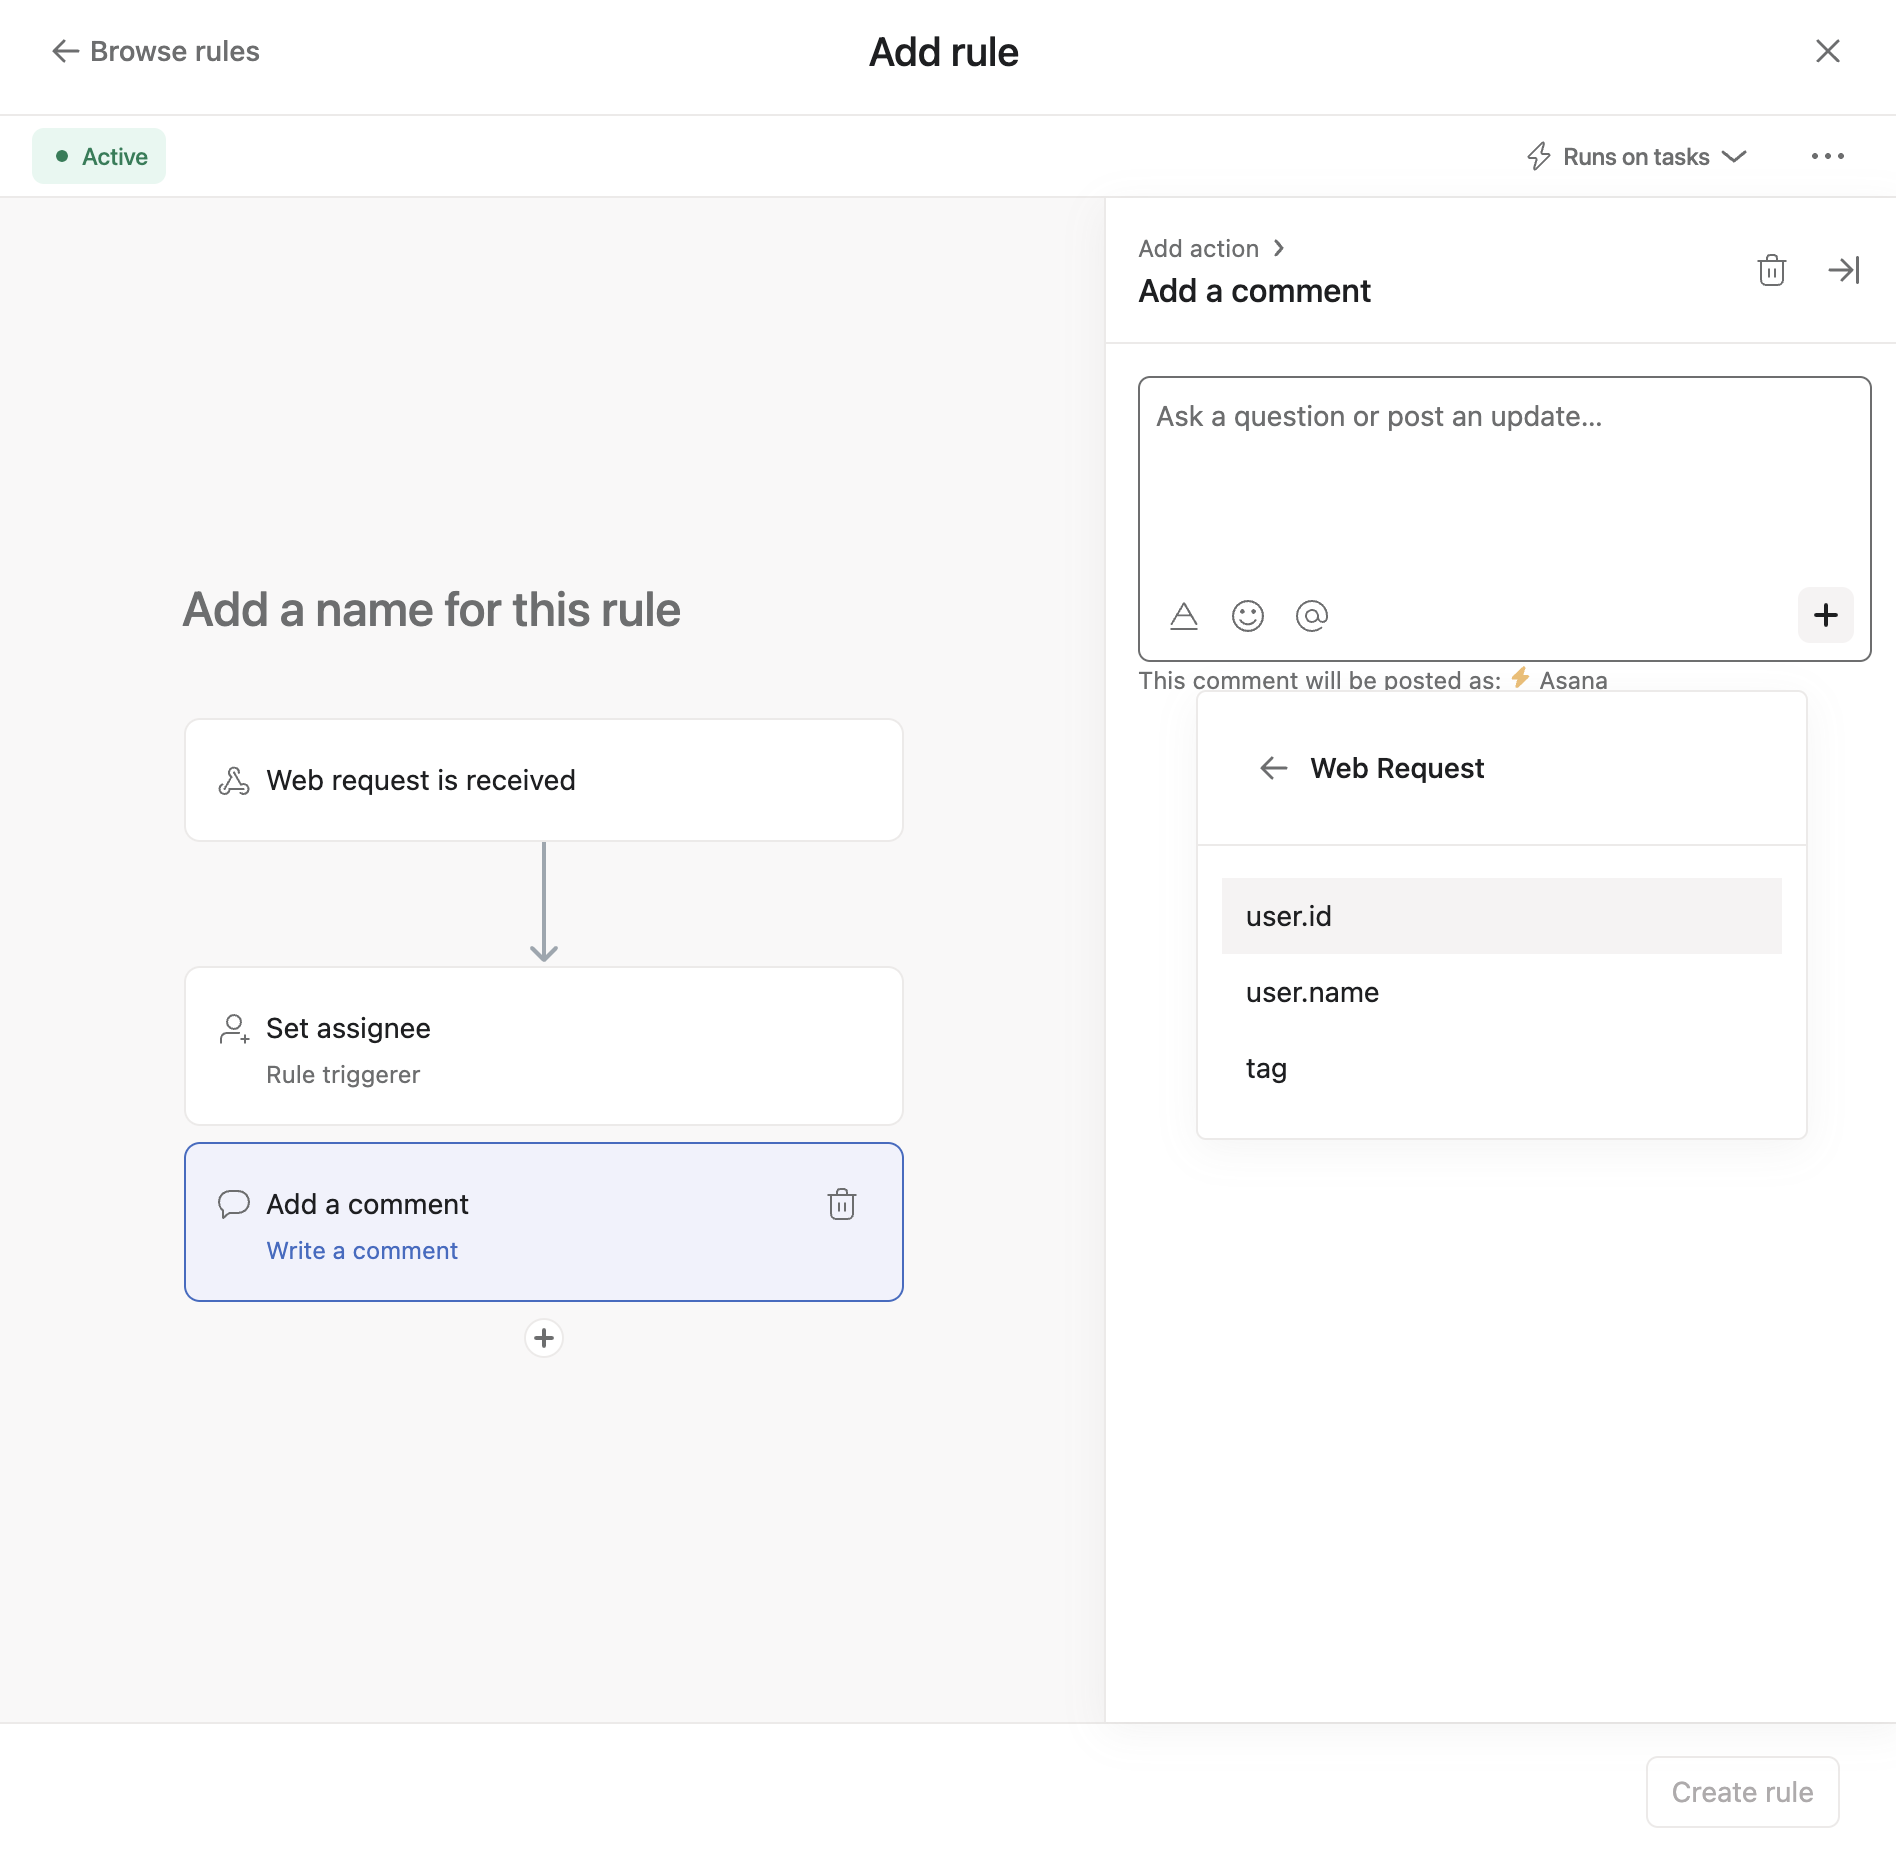
We can construct an automated comment to be created on the task with this data as dynamic values.
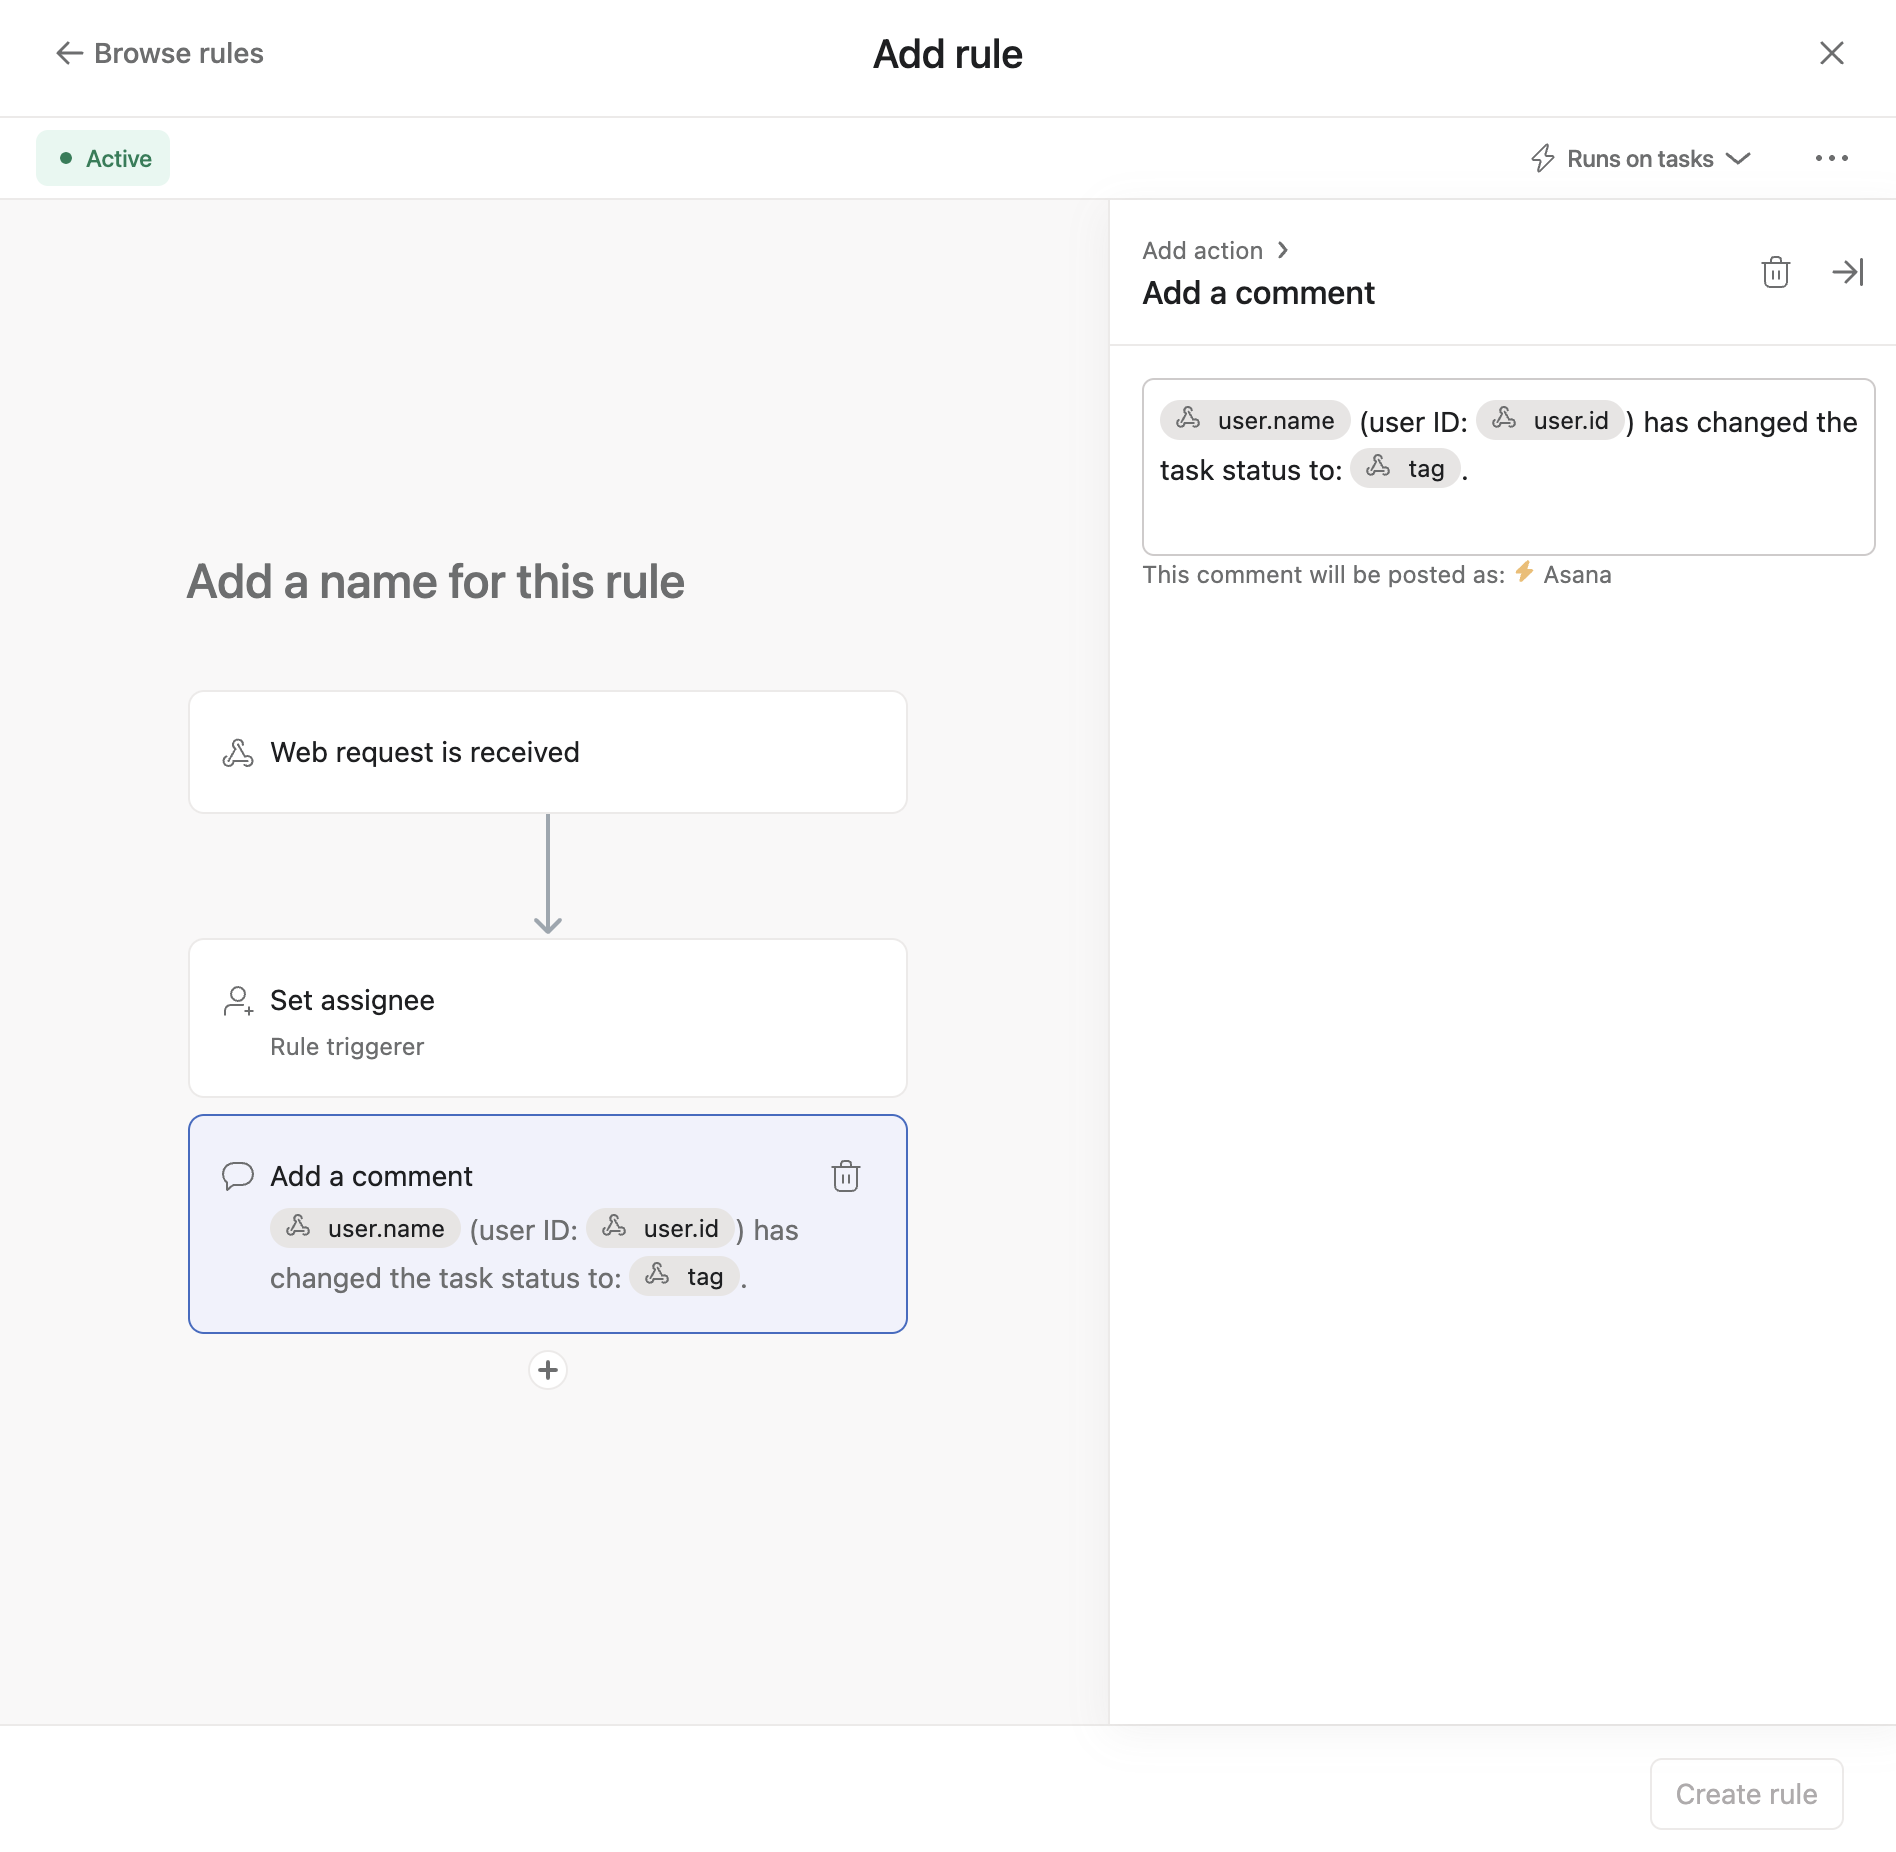
Once the body of the comment has been created, we'll name the rule and select Create rule to save it.
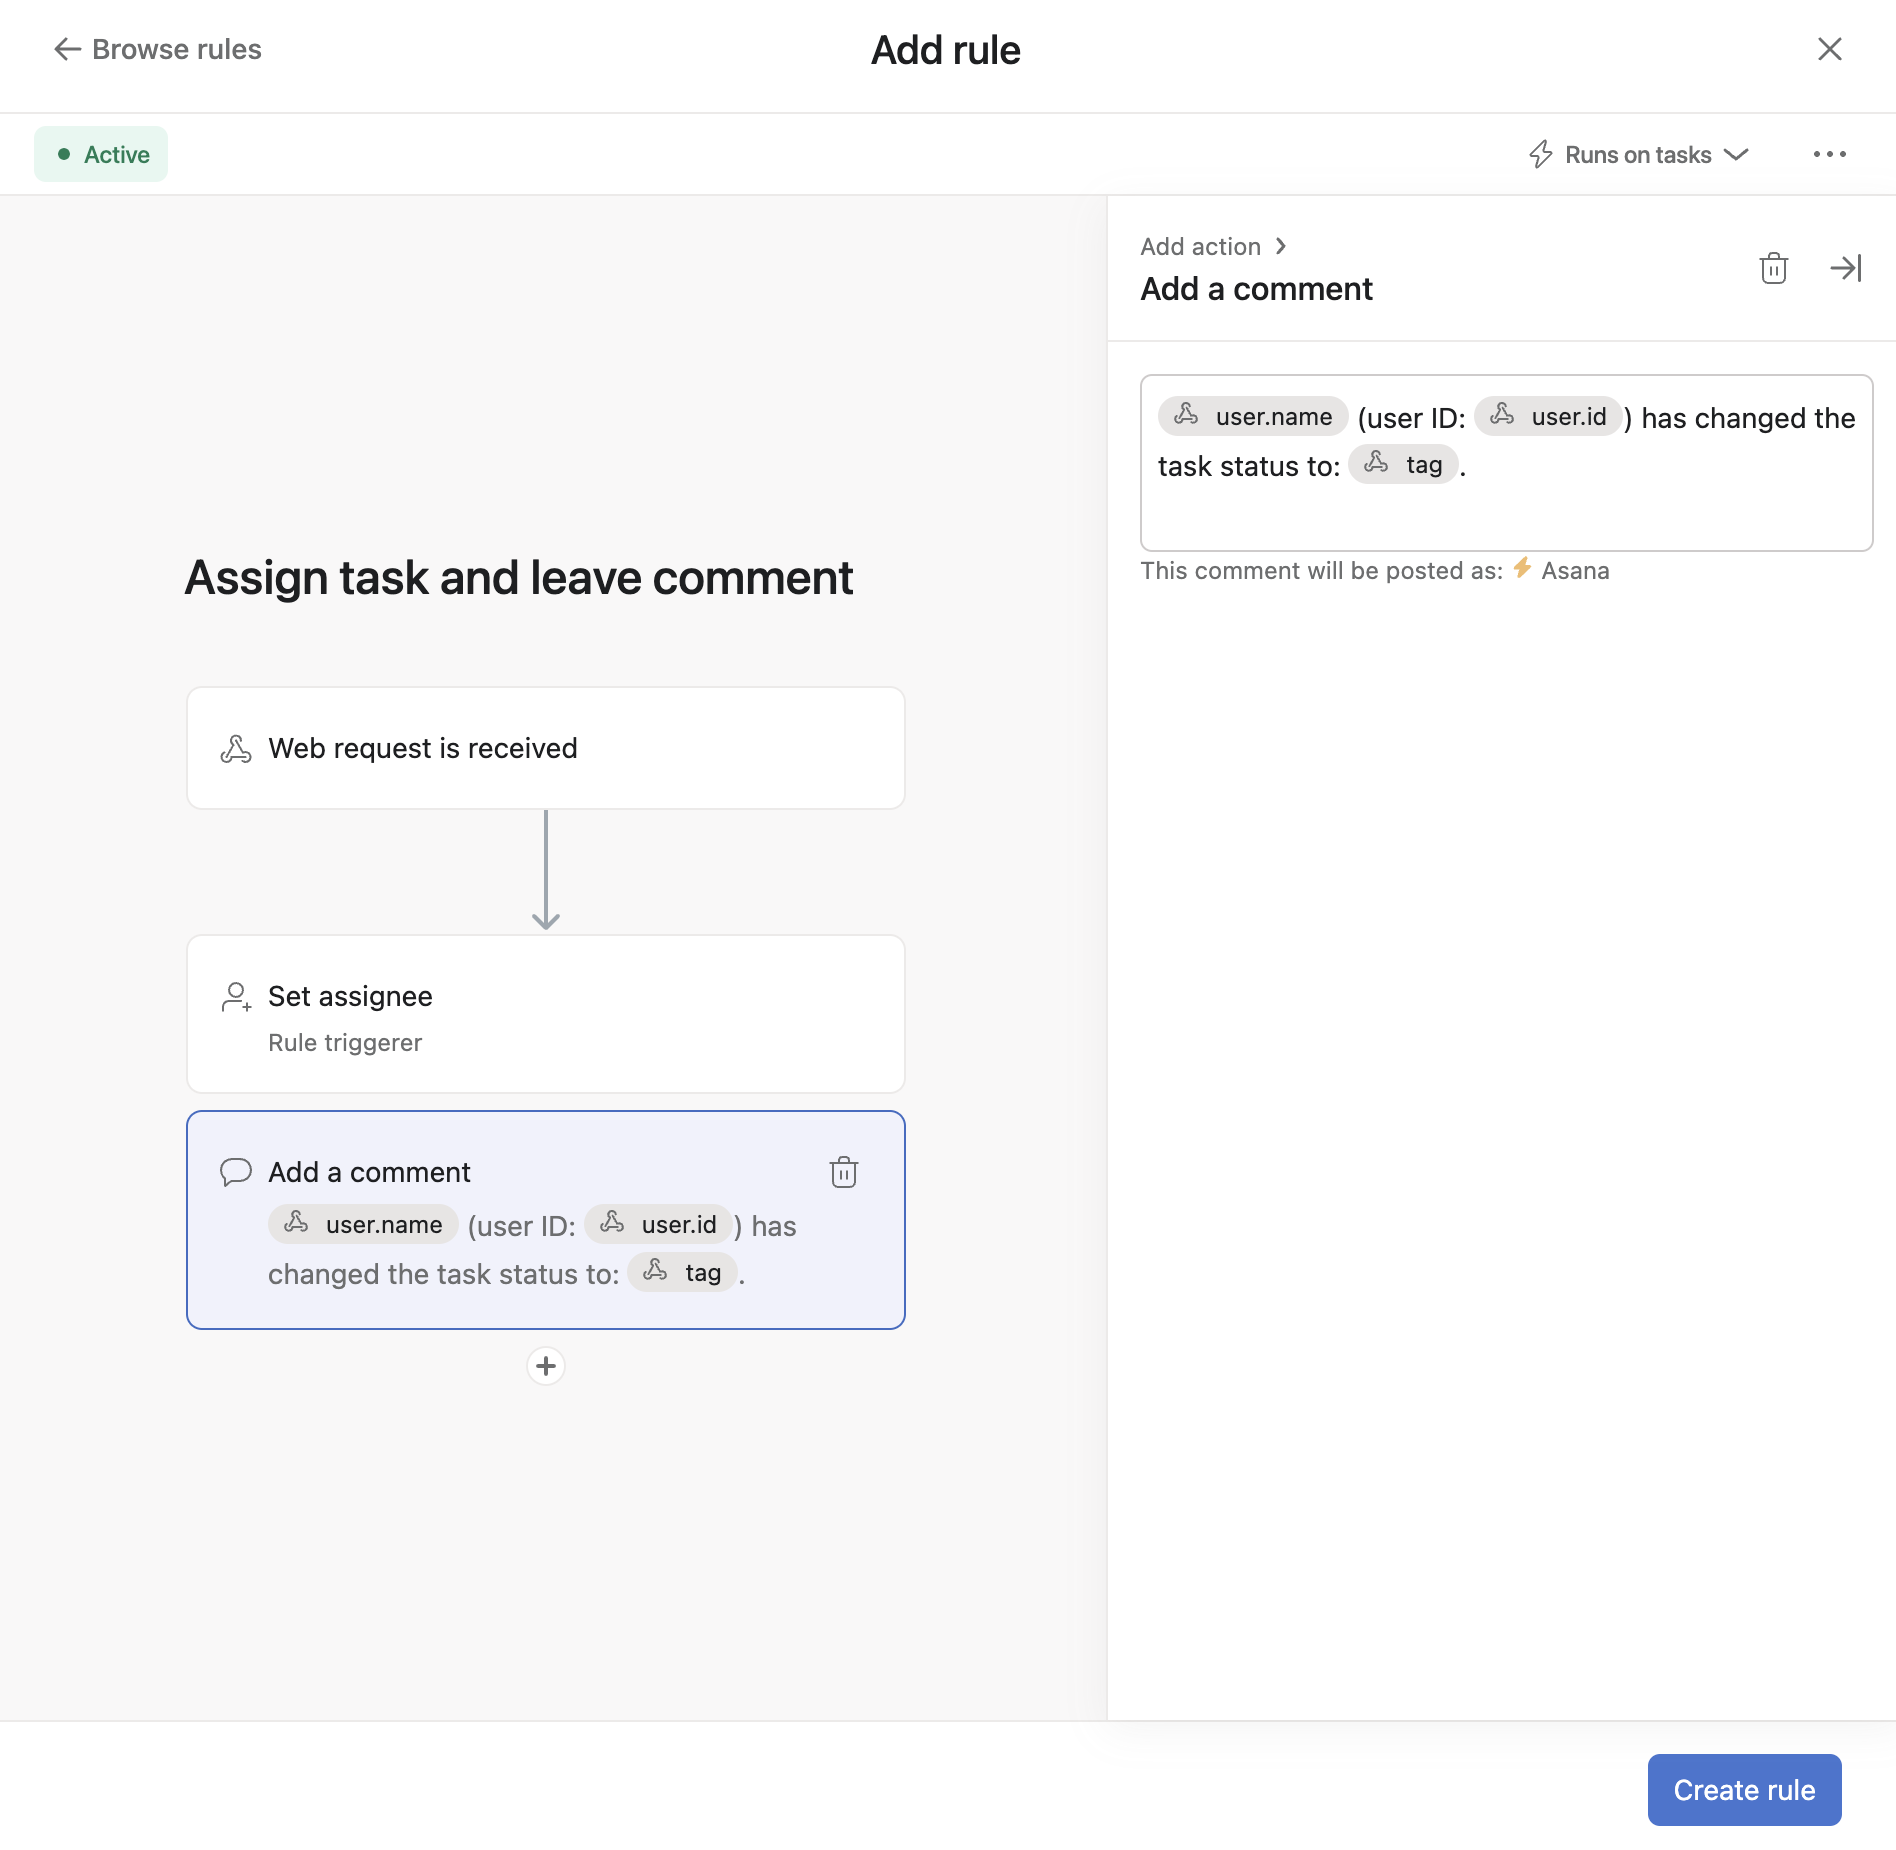
After saving, the rule should appear in your project and ready to use.
Deleting a ruleNote that if you delete a rule that uses incoming web requests (i.e., a rule using Web request received as a trigger), all of the rule's related
action_datawill also be deleted.
3. Test the automation
After setting up both the trigger and the action for this rule, we can test the automation that we've created. We'll make another POST request to the web request URL (i.e., API endpoint) to activate the trigger.
curl -X POST \
  https://app.asana.com/api/1.0/rule_triggers/trigger_identifier/run \
  -H 'authorization: Bearer ACCESS_TOKEN' \
  -H 'cache-control: no-cache' \
  -H 'content-type: application/json' \
  -d '{
   "data": {
      "resource": "TASK_GID",
      "action_data": {
         "user": {
            "id": "12345",
            "name": "Ross"
         },
         "tag": "Escalated"
      }
   }
}'
Note: Replacetrigger_identifier (generated by selecting the Web request received trigger), ACCESS_TOKEN (e.g., your personal access token), and TASK_GID (ID of an existing task) with your own values.
If successful, the server should send back a 200 OK HTTP status code with the following response:
{
    "data": {
        "message": "Successfully saved the payload and triggered the rule",
        "job_id": 1234567890
    }
}
Note: Thejob_id will be a uniquely-generated value in the response.
In the Asana app, you should see the results of the automation.
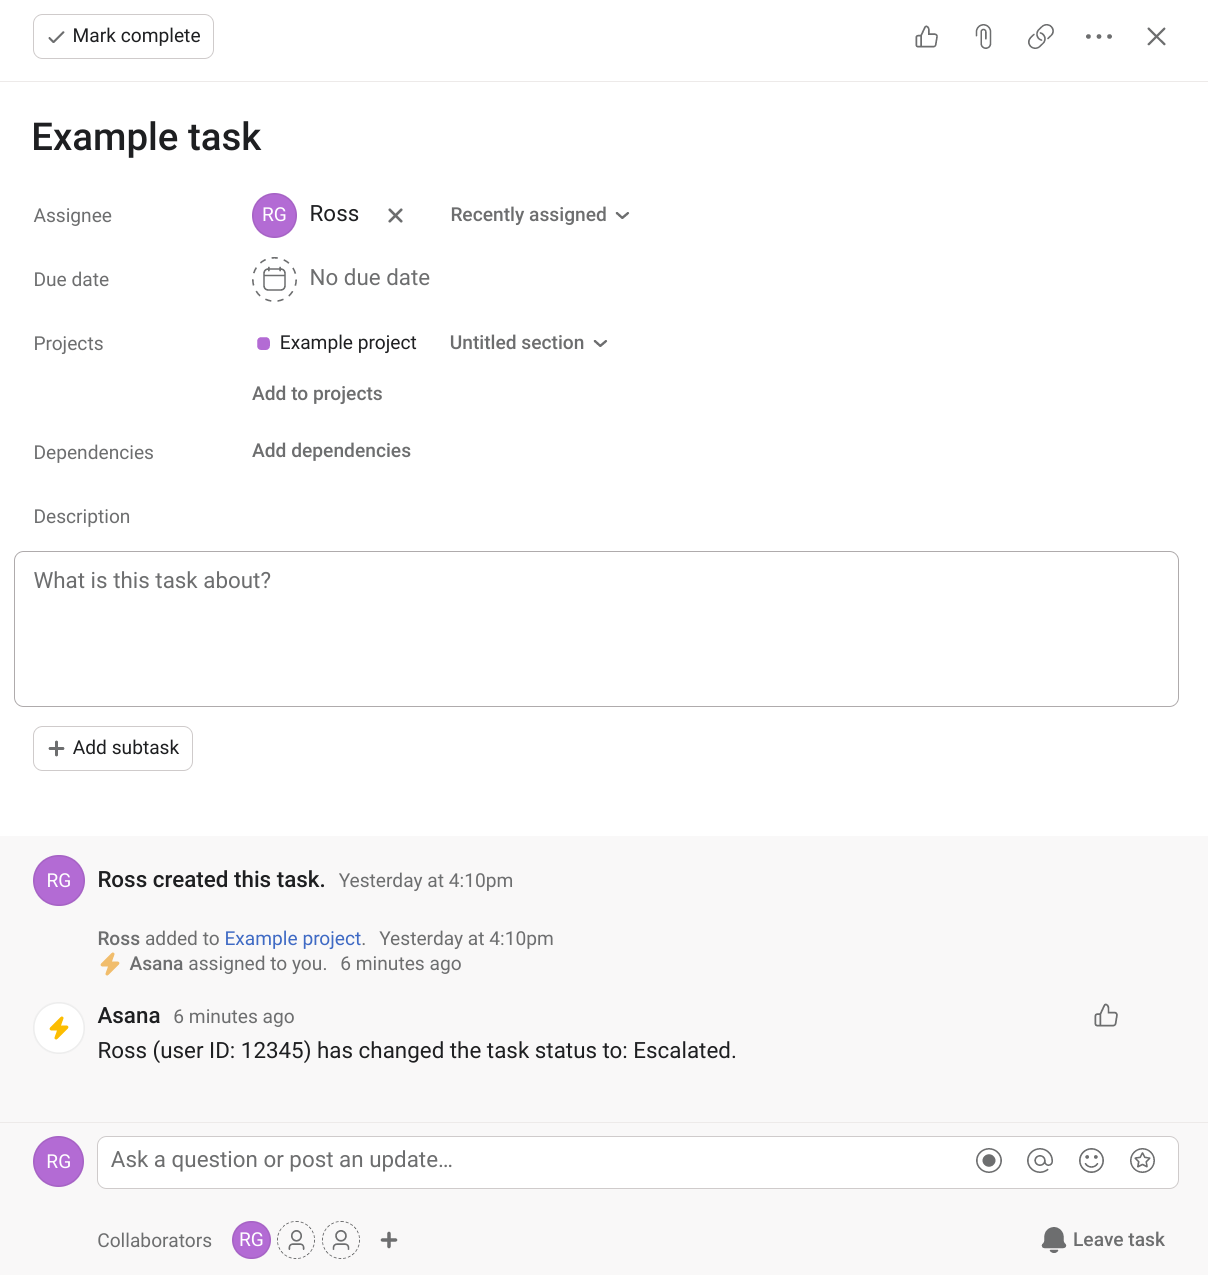
By activating the incoming web request trigger, we were able to set off two automated processes: assigning a user to the task, and leaving a comment on that same task.
Troubleshooting
Limits
The API endpoint is subject to standard rate limits and limits in the JSON payload.
Additionally, there is a limit of five (5) concurrent jobs. If you reach these limits, you may see a 429 Too Many Requests status returned in your API requests. In such cases, you should reduce the number of requests made in a short period of time.
Errors
Below are common errors you may encounter when making calls against the web request URL:
400 Bad Request
400 Bad RequestIn your request payload, you may have omitted a task ID in the resource, sent a task ID that doesn't belong in the rule's project, or sent a malformed/non-parseable JSON body. Adjust your request accordingly so that it can be processed properly.
401 Unauthorized
401 UnauthorizedYour token is not authorized to make a request to Asana's server. See the authentication to make sure you have appropriate and up-to-date credentials.
404 Not Found
404 Not FoundThe trigger identifier or task ID was not found. Double-check the automatically-generated web request URL for the correct trigger_identifier in the case of the former, and ensure that the task ID exists in the case of the latter.
Updated 11 months ago